Chart Guide (2.0.35)
- Bubbles
- Color = surface: green (turf), brown (dirt), blue (synthetic)
- Top number = finishing position; bottom number in parentheses = starting post position
- Height above line = beaten lengths — closer means a smaller margin
- Border = track conditions: green (FST/GD/FM), yellow (WF/SL/YLD), red (SY/MY/FRZ/SFT/HVY)
- Connecting Line
- Solid = good conditions; dashed = bad conditions
- Line Symbol
- ▲ Triangle = sprint (7f or less); ● Circle = route (more than 7f)
- Days Between Races
- Small number above each bubble (e.g. 19d) = days since the previous race — helps spot freshness, layoffs, and tight scheduling.
- Shaded Band (Bollinger)
- Highlights volatility — a wider band means more variation in recent performance
- Performance Trend
- Straight line showing the overall performance direction — angled up = improving, angled down = declining
- Dashed Reference Line
- AI Opponent = AI analysis class-level par for the race
Lane Bias Guide
- Bar Direction
- Bars above the line = more favorable lane • Bars below = less favorable, relative to the average at this track.
- Color
- Green = above-average advantage • Yellow = near-average • Red = below-average • Blue = this horse’s lane.
- Bias Score
- Derived from weighted average finishing positions across historical races at this track. Shown in the tooltip on hover. To use the bias score, calculate your handicap for the horse (e.g. finish position), then add (detrimental bias) or subtract (favorable bias) the bias score.
- Races
- Number of historical races used to compute each lane’s bias score.
Race Pace Bias Guide
- Bar Height & Direction
- Positive (green) = pace favors this horse • Negative (red) = pace works against this horse • Near-zero (amber) = neutral.
- Race Shape
- Projected race shape based on running styles of all horses (e.g. EE = two early horses, EP = one early presser).
- Pace Category
- FAST = contested early pace • LONE EARLY = one speed horse controlling pace • HONEST = moderate early pressure • SLOW = closers’ race.
- Flag (★)
- A star above the bar means this horse’s pace bias figure is ≥ 1.5 — a meaningful pace advantage or disadvantage.
Total Pace Guide
- Bar Segments
- Green = Early Pace (E1) • Amber = Mid Pace (E2) • Red = Late Pace (LP)
- Bar Height
- Total height = sum of E1 + E2 + LP average pace figures. Taller bars indicate a faster-paced horse overall.
- Grades & Rankings
- Hover to see each horse’s letter grade and ranking vs. other horses in this race (e.g. 2/9 = 2nd best of 9).
- Border
- Thicker border = this horse’s post position.
Performance vs. Peers Guide
- Bars (per post)
- Blue = avg career performance • Amber = avg last 3 races • Green = last race (improved vs. avg) • Red = last race (declined vs. avg)
- Trend Line
- Angled line above the bars: rising = improving form • falling = declining form.
- Horizontal Line
- Field average — the mean career performance of all horses in this race.
- Color Circles
- Standard post-position colors below each lane — same as the Total Pace chart.
- Border
- Thicker border = this horse’s post position.
Race Pace Simulation Guide
- Slider
- Drag left→right to advance from gate to finish. Drag all the way back to reset the race.
- Predicted Finish Order
- Factors in contested pace burn, each horse’s effort curve (peaked-early vs. peaked-late), and wide trip cost from outside posts. Updated live when Track Bias changes.
- Pace Scenario
- Lone Speed: single E horse likely rates and holds. Contested: two E horses burn each other — closers benefit. Hot Pace: speed meltdown, deep closers thrive. Soft: no early speed, moderate fractions throughout.
- Track Bias
- Slider below canvas. −2 = strong closer/wet bias; +2 = strong speed/rail bias. Recomputes the predicted finish order.
- Boxed Indicator
- Dashed orange ring = horse is surrounded (rival ahead, rival behind, wall outside). In a real race this horse must find a clear path to run.
- Running Styles
- E/EE = early speed (rushes to rail). P = presser (stalks the pace). S = stalker. SS = slow starter / closer.
| Stat | vs. Current Card | vs. All Horses |
|---|---|---|
| Averages
Career-average metrics across all AI race analysis. Performance and pace averages reflect estimated historical performance; trainer and jockey grades score in-the-money percentages. Grading scale: A = elite • B = above average • C = average • D = below average • F = poor • — = no data |
||
| Pick Pony AI Rating | C | B |
| Speed | F | D |
| Early Pace | B | B |
| Mid Pace | B | B |
| Late Pace | D | C |
| Finish Pos | F | F |
| Dirt Speed | F | C |
| Turf Speed | A | A |
| Distance Speed | D | B |
| Trainer Effectiveness | B | D |
| Jockey Effectiveness | C | C |
| 3rd Party Ratings | F | C |
| Recent
Performance analysis from the horse's recent races, weighted to reflect current form. Sprint and Route FPS (Foot Per Second) measure pace efficiency over the horse's recent sprints and routes respectively. Grading scale: A = elite • B = above average • C = average • D = below average • F = poor • — = no data |
||
| Speed | B | C |
| Early Pace | A | B |
| Mid Pace | B | B |
| Late Pace | C | C |
| Sprint FPS | F | D |
| Route FPS | D | D |
| Trainer Effectiveness | B | D |
| Jockey Effectiveness | C | C |
| 3rd Party Ratings | F | C |
| Predictions
AI-generated projections for the upcoming race, derived from prior AI analysis for speed and pace trends, surface and distance suitability, and current conditions. Grading scale: A = elite • B = above average • C = average • D = below average • F = poor • — = no data |
||
| Speed | F | D |
| Early Pace | B | C |
| Mid Pace | C | C |
| Late Pace | C | C |
A paid membership is required to view all stats. Subscribe now →
Chart Guide (2.0.35)
- Bubbles
- Color = surface: green (turf), brown (dirt), blue (synthetic)
- Top number = finishing position; bottom number in parentheses = starting post position
- Height above line = beaten lengths — closer means a smaller margin
- Border = track conditions: green (FST/GD/FM), yellow (WF/SL/YLD), red (SY/MY/FRZ/SFT/HVY)
- Connecting Line
- Solid = good conditions; dashed = bad conditions
- Line Symbol
- ▲ Triangle = sprint (7f or less); ● Circle = route (more than 7f)
- Days Between Races
- Small number above each bubble (e.g. 19d) = days since the previous race — helps spot freshness, layoffs, and tight scheduling.
- Shaded Band (Bollinger)
- Highlights volatility — a wider band means more variation in recent performance
- Performance Trend
- Straight line showing the overall performance direction — angled up = improving, angled down = declining
- Dashed Reference Line
- AI Opponent = AI analysis class-level par for the race
Notables: [Example] Key race notables appear here, such as post position bias, recent workouts, class changes, and trip notes flagged by our handicappers.
Lane Bias Guide
- Bar Direction
- Bars above the line = more favorable lane • Bars below = less favorable, relative to the average at this track.
- Color
- Green = above-average advantage • Yellow = near-average • Red = below-average • Blue = this horse’s lane.
- Bias Score
- Derived from weighted average finishing positions across historical races at this track. Shown in the tooltip on hover. To use the bias score, calculate your handicap for the horse (e.g. finish position), then add (detrimental bias) or subtract (favorable bias) the bias score.
- Races
- Number of historical races used to compute each lane’s bias score.
Race Pace Bias Guide
- Bar Height & Direction
- Positive (green) = pace favors this horse • Negative (red) = pace works against this horse • Near-zero (amber) = neutral.
- Race Shape
- Projected race shape based on running styles of all horses (e.g. EE = two early horses, EP = one early presser).
- Pace Category
- FAST = contested early pace • LONE EARLY = one speed horse controlling pace • HONEST = moderate early pressure • SLOW = closers’ race.
- Flag (★)
- A star above the bar means this horse’s pace bias figure is ≥ 1.5 — a meaningful pace advantage or disadvantage.
Total Pace Guide
- Bar Segments
- Green = Early Pace (E1) • Amber = Mid Pace (E2) • Red = Late Pace (LP)
- Bar Height
- Total height = sum of E1 + E2 + LP average pace figures. Taller bars indicate a faster-paced horse overall.
- Grades & Rankings
- Hover to see each horse’s letter grade and ranking vs. other horses in this race (e.g. 2/9 = 2nd best of 9).
- Border
- Thicker border = this horse’s post position.
Performance vs. Peers Guide
- Bars (per post)
- Blue = avg career performance • Amber = avg last 3 races • Green = last race (improved vs. avg) • Red = last race (declined vs. avg)
- Trend Line
- Angled line above the bars: rising = improving form • falling = declining form.
- Horizontal Line
- Field average — the mean career performance of all horses in this race.
- Color Circles
- Standard post-position colors below each lane — same as the Total Pace chart.
- Border
- Thicker border = this horse’s post position.
Race Pace Simulation Guide
- Slider
- Drag left→right to advance from gate to finish. Drag all the way back to reset the race.
- Predicted Finish Order
- Factors in contested pace burn, each horse’s effort curve (peaked-early vs. peaked-late), and wide trip cost from outside posts. Updated live when Track Bias changes.
- Pace Scenario
- Lone Speed: single E horse likely rates and holds. Contested: two E horses burn each other — closers benefit. Hot Pace: speed meltdown, deep closers thrive. Soft: no early speed, moderate fractions throughout.
- Track Bias
- Slider below canvas. −2 = strong closer/wet bias; +2 = strong speed/rail bias. Recomputes the predicted finish order.
- Boxed Indicator
- Dashed orange ring = horse is surrounded (rival ahead, rival behind, wall outside). In a real race this horse must find a clear path to run.
- Running Styles
- E/EE = early speed (rushes to rail). P = presser (stalks the pace). S = stalker. SS = slow starter / closer.
| Stat | vs. Current Card | vs. All Horses |
|---|---|---|
| Averages
Career-average metrics across all AI race analysis. Performance and pace averages reflect estimated historical performance; trainer and jockey grades score in-the-money percentages. Grading scale: A = elite • B = above average • C = average • D = below average • F = poor • — = no data |
||
| Pick Pony AI Rating | D | C |
| Speed | D | D |
| Early Pace | A | B |
| Mid Pace | A | A |
| Late Pace | F | F |
| Finish Pos | D | F |
| Dirt Speed | C | B |
| Turf Speed | F | D |
| Distance Speed | A | B |
| Trainer Effectiveness | F | F |
| Jockey Effectiveness | D | D |
| 3rd Party Ratings | C | C |
| Recent
Performance analysis from the horse's recent races, weighted to reflect current form. Sprint and Route FPS (Foot Per Second) measure pace efficiency over the horse's recent sprints and routes respectively. Grading scale: A = elite • B = above average • C = average • D = below average • F = poor • — = no data |
||
| Speed | F | D |
| Early Pace | C | C |
| Mid Pace | C | C |
| Late Pace | F | D |
| Sprint FPS | B | A |
| Route FPS | A | B |
| Trainer Effectiveness | F | F |
| Jockey Effectiveness | D | D |
| 3rd Party Ratings | C | C |
| Predictions
AI-generated projections for the upcoming race, derived from prior AI analysis for speed and pace trends, surface and distance suitability, and current conditions. Grading scale: A = elite • B = above average • C = average • D = below average • F = poor • — = no data |
||
| Speed | D | D |
| Early Pace | A | C |
| Mid Pace | A | C |
| Late Pace | C | C |
A paid membership is required to view all stats. Subscribe now →
Chart Guide (2.0.35)
- Bubbles
- Color = surface: green (turf), brown (dirt), blue (synthetic)
- Top number = finishing position; bottom number in parentheses = starting post position
- Height above line = beaten lengths — closer means a smaller margin
- Border = track conditions: green (FST/GD/FM), yellow (WF/SL/YLD), red (SY/MY/FRZ/SFT/HVY)
- Connecting Line
- Solid = good conditions; dashed = bad conditions
- Line Symbol
- ▲ Triangle = sprint (7f or less); ● Circle = route (more than 7f)
- Days Between Races
- Small number above each bubble (e.g. 19d) = days since the previous race — helps spot freshness, layoffs, and tight scheduling.
- Shaded Band (Bollinger)
- Highlights volatility — a wider band means more variation in recent performance
- Performance Trend
- Straight line showing the overall performance direction — angled up = improving, angled down = declining
- Dashed Reference Line
- AI Opponent = AI analysis class-level par for the race
Notables: [Example] Key race notables appear here, such as post position bias, recent workouts, class changes, and trip notes flagged by our handicappers.
Lane Bias Guide
- Bar Direction
- Bars above the line = more favorable lane • Bars below = less favorable, relative to the average at this track.
- Color
- Green = above-average advantage • Yellow = near-average • Red = below-average • Blue = this horse’s lane.
- Bias Score
- Derived from weighted average finishing positions across historical races at this track. Shown in the tooltip on hover. To use the bias score, calculate your handicap for the horse (e.g. finish position), then add (detrimental bias) or subtract (favorable bias) the bias score.
- Races
- Number of historical races used to compute each lane’s bias score.
Race Pace Bias Guide
- Bar Height & Direction
- Positive (green) = pace favors this horse • Negative (red) = pace works against this horse • Near-zero (amber) = neutral.
- Race Shape
- Projected race shape based on running styles of all horses (e.g. EE = two early horses, EP = one early presser).
- Pace Category
- FAST = contested early pace • LONE EARLY = one speed horse controlling pace • HONEST = moderate early pressure • SLOW = closers’ race.
- Flag (★)
- A star above the bar means this horse’s pace bias figure is ≥ 1.5 — a meaningful pace advantage or disadvantage.
Total Pace Guide
- Bar Segments
- Green = Early Pace (E1) • Amber = Mid Pace (E2) • Red = Late Pace (LP)
- Bar Height
- Total height = sum of E1 + E2 + LP average pace figures. Taller bars indicate a faster-paced horse overall.
- Grades & Rankings
- Hover to see each horse’s letter grade and ranking vs. other horses in this race (e.g. 2/9 = 2nd best of 9).
- Border
- Thicker border = this horse’s post position.
Performance vs. Peers Guide
- Bars (per post)
- Blue = avg career performance • Amber = avg last 3 races • Green = last race (improved vs. avg) • Red = last race (declined vs. avg)
- Trend Line
- Angled line above the bars: rising = improving form • falling = declining form.
- Horizontal Line
- Field average — the mean career performance of all horses in this race.
- Color Circles
- Standard post-position colors below each lane — same as the Total Pace chart.
- Border
- Thicker border = this horse’s post position.
Race Pace Simulation Guide
- Slider
- Drag left→right to advance from gate to finish. Drag all the way back to reset the race.
- Predicted Finish Order
- Factors in contested pace burn, each horse’s effort curve (peaked-early vs. peaked-late), and wide trip cost from outside posts. Updated live when Track Bias changes.
- Pace Scenario
- Lone Speed: single E horse likely rates and holds. Contested: two E horses burn each other — closers benefit. Hot Pace: speed meltdown, deep closers thrive. Soft: no early speed, moderate fractions throughout.
- Track Bias
- Slider below canvas. −2 = strong closer/wet bias; +2 = strong speed/rail bias. Recomputes the predicted finish order.
- Boxed Indicator
- Dashed orange ring = horse is surrounded (rival ahead, rival behind, wall outside). In a real race this horse must find a clear path to run.
- Running Styles
- E/EE = early speed (rushes to rail). P = presser (stalks the pace). S = stalker. SS = slow starter / closer.
| Stat | vs. Current Card | vs. All Horses |
|---|---|---|
| Averages
Career-average metrics across all AI race analysis. Performance and pace averages reflect estimated historical performance; trainer and jockey grades score in-the-money percentages. Grading scale: A = elite • B = above average • C = average • D = below average • F = poor • — = no data |
||
| Pick Pony AI Rating | B | B |
| Speed | A | B |
| Early Pace | C | B |
| Mid Pace | C | B |
| Late Pace | A | A |
| Finish Pos | A | C |
| Dirt Speed | B | A |
| Turf Speed | C | B |
| Distance Speed | C | B |
| Trainer Effectiveness | A | B |
| Jockey Effectiveness | A | A |
| 3rd Party Ratings | A | B |
| Recent
Performance analysis from the horse's recent races, weighted to reflect current form. Sprint and Route FPS (Foot Per Second) measure pace efficiency over the horse's recent sprints and routes respectively. Grading scale: A = elite • B = above average • C = average • D = below average • F = poor • — = no data |
||
| Speed | A | C |
| Early Pace | B | B |
| Mid Pace | A | B |
| Late Pace | A | C |
| Sprint FPS | A | A |
| Route FPS | A | A |
| Trainer Effectiveness | A | B |
| Jockey Effectiveness | A | A |
| 3rd Party Ratings | A | B |
| Predictions
AI-generated projections for the upcoming race, derived from prior AI analysis for speed and pace trends, surface and distance suitability, and current conditions. Grading scale: A = elite • B = above average • C = average • D = below average • F = poor • — = no data |
||
| Speed | A | B |
| Early Pace | C | D |
| Mid Pace | B | C |
| Late Pace | C | C |
A paid membership is required to view all stats. Subscribe now →
Chart Guide (2.0.35)
- Bubbles
- Color = surface: green (turf), brown (dirt), blue (synthetic)
- Top number = finishing position; bottom number in parentheses = starting post position
- Height above line = beaten lengths — closer means a smaller margin
- Border = track conditions: green (FST/GD/FM), yellow (WF/SL/YLD), red (SY/MY/FRZ/SFT/HVY)
- Connecting Line
- Solid = good conditions; dashed = bad conditions
- Line Symbol
- ▲ Triangle = sprint (7f or less); ● Circle = route (more than 7f)
- Days Between Races
- Small number above each bubble (e.g. 19d) = days since the previous race — helps spot freshness, layoffs, and tight scheduling.
- Shaded Band (Bollinger)
- Highlights volatility — a wider band means more variation in recent performance
- Performance Trend
- Straight line showing the overall performance direction — angled up = improving, angled down = declining
- Dashed Reference Line
- AI Opponent = AI analysis class-level par for the race
Notables: [Example] Key race notables appear here, such as post position bias, recent workouts, class changes, and trip notes flagged by our handicappers.
Lane Bias Guide
- Bar Direction
- Bars above the line = more favorable lane • Bars below = less favorable, relative to the average at this track.
- Color
- Green = above-average advantage • Yellow = near-average • Red = below-average • Blue = this horse’s lane.
- Bias Score
- Derived from weighted average finishing positions across historical races at this track. Shown in the tooltip on hover. To use the bias score, calculate your handicap for the horse (e.g. finish position), then add (detrimental bias) or subtract (favorable bias) the bias score.
- Races
- Number of historical races used to compute each lane’s bias score.
Race Pace Bias Guide
- Bar Height & Direction
- Positive (green) = pace favors this horse • Negative (red) = pace works against this horse • Near-zero (amber) = neutral.
- Race Shape
- Projected race shape based on running styles of all horses (e.g. EE = two early horses, EP = one early presser).
- Pace Category
- FAST = contested early pace • LONE EARLY = one speed horse controlling pace • HONEST = moderate early pressure • SLOW = closers’ race.
- Flag (★)
- A star above the bar means this horse’s pace bias figure is ≥ 1.5 — a meaningful pace advantage or disadvantage.
Total Pace Guide
- Bar Segments
- Green = Early Pace (E1) • Amber = Mid Pace (E2) • Red = Late Pace (LP)
- Bar Height
- Total height = sum of E1 + E2 + LP average pace figures. Taller bars indicate a faster-paced horse overall.
- Grades & Rankings
- Hover to see each horse’s letter grade and ranking vs. other horses in this race (e.g. 2/9 = 2nd best of 9).
- Border
- Thicker border = this horse’s post position.
Performance vs. Peers Guide
- Bars (per post)
- Blue = avg career performance • Amber = avg last 3 races • Green = last race (improved vs. avg) • Red = last race (declined vs. avg)
- Trend Line
- Angled line above the bars: rising = improving form • falling = declining form.
- Horizontal Line
- Field average — the mean career performance of all horses in this race.
- Color Circles
- Standard post-position colors below each lane — same as the Total Pace chart.
- Border
- Thicker border = this horse’s post position.
Race Pace Simulation Guide
- Slider
- Drag left→right to advance from gate to finish. Drag all the way back to reset the race.
- Predicted Finish Order
- Factors in contested pace burn, each horse’s effort curve (peaked-early vs. peaked-late), and wide trip cost from outside posts. Updated live when Track Bias changes.
- Pace Scenario
- Lone Speed: single E horse likely rates and holds. Contested: two E horses burn each other — closers benefit. Hot Pace: speed meltdown, deep closers thrive. Soft: no early speed, moderate fractions throughout.
- Track Bias
- Slider below canvas. −2 = strong closer/wet bias; +2 = strong speed/rail bias. Recomputes the predicted finish order.
- Boxed Indicator
- Dashed orange ring = horse is surrounded (rival ahead, rival behind, wall outside). In a real race this horse must find a clear path to run.
- Running Styles
- E/EE = early speed (rushes to rail). P = presser (stalks the pace). S = stalker. SS = slow starter / closer.
| Stat | vs. Current Card | vs. All Horses |
|---|---|---|
| Averages
Career-average metrics across all AI race analysis. Performance and pace averages reflect estimated historical performance; trainer and jockey grades score in-the-money percentages. Grading scale: A = elite • B = above average • C = average • D = below average • F = poor • — = no data |
||
| Pick Pony AI Rating | A | B |
| Speed | A | B |
| Early Pace | D | C |
| Mid Pace | D | B |
| Late Pace | A | A |
| Finish Pos | C | D |
| Dirt Speed | A | A |
| Turf Speed | A | A |
| Distance Speed | A | A |
| Trainer Effectiveness | A | C |
| Jockey Effectiveness | F | D |
| 3rd Party Ratings | A | C |
| Recent
Performance analysis from the horse's recent races, weighted to reflect current form. Sprint and Route FPS (Foot Per Second) measure pace efficiency over the horse's recent sprints and routes respectively. Grading scale: A = elite • B = above average • C = average • D = below average • F = poor • — = no data |
||
| Speed | A | C |
| Early Pace | F | D |
| Mid Pace | F | C |
| Late Pace | A | B |
| Sprint FPS | C | C |
| Route FPS | F | D |
| Trainer Effectiveness | A | C |
| Jockey Effectiveness | F | D |
| 3rd Party Ratings | A | C |
| Predictions
AI-generated projections for the upcoming race, derived from prior AI analysis for speed and pace trends, surface and distance suitability, and current conditions. Grading scale: A = elite • B = above average • C = average • D = below average • F = poor • — = no data |
||
| Speed | A | B |
| Early Pace | F | D |
| Mid Pace | F | C |
| Late Pace | C | C |
A paid membership is required to view all stats. Subscribe now →
Chart Guide (2.0.35)
- Bubbles
- Color = surface: green (turf), brown (dirt), blue (synthetic)
- Top number = finishing position; bottom number in parentheses = starting post position
- Height above line = beaten lengths — closer means a smaller margin
- Border = track conditions: green (FST/GD/FM), yellow (WF/SL/YLD), red (SY/MY/FRZ/SFT/HVY)
- Connecting Line
- Solid = good conditions; dashed = bad conditions
- Line Symbol
- ▲ Triangle = sprint (7f or less); ● Circle = route (more than 7f)
- Days Between Races
- Small number above each bubble (e.g. 19d) = days since the previous race — helps spot freshness, layoffs, and tight scheduling.
- Shaded Band (Bollinger)
- Highlights volatility — a wider band means more variation in recent performance
- Performance Trend
- Straight line showing the overall performance direction — angled up = improving, angled down = declining
- Dashed Reference Line
- AI Opponent = AI analysis class-level par for the race
Notables: [Example] Key race notables appear here, such as post position bias, recent workouts, class changes, and trip notes flagged by our handicappers.
Lane Bias Guide
- Bar Direction
- Bars above the line = more favorable lane • Bars below = less favorable, relative to the average at this track.
- Color
- Green = above-average advantage • Yellow = near-average • Red = below-average • Blue = this horse’s lane.
- Bias Score
- Derived from weighted average finishing positions across historical races at this track. Shown in the tooltip on hover. To use the bias score, calculate your handicap for the horse (e.g. finish position), then add (detrimental bias) or subtract (favorable bias) the bias score.
- Races
- Number of historical races used to compute each lane’s bias score.
Race Pace Bias Guide
- Bar Height & Direction
- Positive (green) = pace favors this horse • Negative (red) = pace works against this horse • Near-zero (amber) = neutral.
- Race Shape
- Projected race shape based on running styles of all horses (e.g. EE = two early horses, EP = one early presser).
- Pace Category
- FAST = contested early pace • LONE EARLY = one speed horse controlling pace • HONEST = moderate early pressure • SLOW = closers’ race.
- Flag (★)
- A star above the bar means this horse’s pace bias figure is ≥ 1.5 — a meaningful pace advantage or disadvantage.
Total Pace Guide
- Bar Segments
- Green = Early Pace (E1) • Amber = Mid Pace (E2) • Red = Late Pace (LP)
- Bar Height
- Total height = sum of E1 + E2 + LP average pace figures. Taller bars indicate a faster-paced horse overall.
- Grades & Rankings
- Hover to see each horse’s letter grade and ranking vs. other horses in this race (e.g. 2/9 = 2nd best of 9).
- Border
- Thicker border = this horse’s post position.
Performance vs. Peers Guide
- Bars (per post)
- Blue = avg career performance • Amber = avg last 3 races • Green = last race (improved vs. avg) • Red = last race (declined vs. avg)
- Trend Line
- Angled line above the bars: rising = improving form • falling = declining form.
- Horizontal Line
- Field average — the mean career performance of all horses in this race.
- Color Circles
- Standard post-position colors below each lane — same as the Total Pace chart.
- Border
- Thicker border = this horse’s post position.
Race Pace Simulation Guide
- Slider
- Drag left→right to advance from gate to finish. Drag all the way back to reset the race.
- Predicted Finish Order
- Factors in contested pace burn, each horse’s effort curve (peaked-early vs. peaked-late), and wide trip cost from outside posts. Updated live when Track Bias changes.
- Pace Scenario
- Lone Speed: single E horse likely rates and holds. Contested: two E horses burn each other — closers benefit. Hot Pace: speed meltdown, deep closers thrive. Soft: no early speed, moderate fractions throughout.
- Track Bias
- Slider below canvas. −2 = strong closer/wet bias; +2 = strong speed/rail bias. Recomputes the predicted finish order.
- Boxed Indicator
- Dashed orange ring = horse is surrounded (rival ahead, rival behind, wall outside). In a real race this horse must find a clear path to run.
- Running Styles
- E/EE = early speed (rushes to rail). P = presser (stalks the pace). S = stalker. SS = slow starter / closer.
| Stat | vs. Current Card | vs. All Horses |
|---|---|---|
| Averages
Career-average metrics across all AI race analysis. Performance and pace averages reflect estimated historical performance; trainer and jockey grades score in-the-money percentages. Grading scale: A = elite • B = above average • C = average • D = below average • F = poor • — = no data |
||
| Pick Pony AI Rating | A | B |
| Speed | B | C |
| Early Pace | F | C |
| Mid Pace | F | B |
| Late Pace | B | B |
| Finish Pos | A | C |
| Dirt Speed | B | A |
| Turf Speed | D | C |
| Distance Speed | C | B |
| Trainer Effectiveness | C | D |
| Jockey Effectiveness | B | C |
| 3rd Party Ratings | D | C |
| Recent
Performance analysis from the horse's recent races, weighted to reflect current form. Sprint and Route FPS (Foot Per Second) measure pace efficiency over the horse's recent sprints and routes respectively. Grading scale: A = elite • B = above average • C = average • D = below average • F = poor • — = no data |
||
| Speed | D | C |
| Early Pace | D | C |
| Mid Pace | C | C |
| Late Pace | B | C |
| Sprint FPS | D | D |
| Route FPS | C | D |
| Trainer Effectiveness | C | D |
| Jockey Effectiveness | B | C |
| 3rd Party Ratings | D | C |
| Predictions
AI-generated projections for the upcoming race, derived from prior AI analysis for speed and pace trends, surface and distance suitability, and current conditions. Grading scale: A = elite • B = above average • C = average • D = below average • F = poor • — = no data |
||
| Speed | B | C |
| Early Pace | D | D |
| Mid Pace | D | C |
| Late Pace | C | C |
A paid membership is required to view all stats. Subscribe now →
Chart Guide (2.0.35)
- Bubbles
- Color = surface: green (turf), brown (dirt), blue (synthetic)
- Top number = finishing position; bottom number in parentheses = starting post position
- Height above line = beaten lengths — closer means a smaller margin
- Border = track conditions: green (FST/GD/FM), yellow (WF/SL/YLD), red (SY/MY/FRZ/SFT/HVY)
- Connecting Line
- Solid = good conditions; dashed = bad conditions
- Line Symbol
- ▲ Triangle = sprint (7f or less); ● Circle = route (more than 7f)
- Days Between Races
- Small number above each bubble (e.g. 19d) = days since the previous race — helps spot freshness, layoffs, and tight scheduling.
- Shaded Band (Bollinger)
- Highlights volatility — a wider band means more variation in recent performance
- Performance Trend
- Straight line showing the overall performance direction — angled up = improving, angled down = declining
- Dashed Reference Line
- AI Opponent = AI analysis class-level par for the race
Notables: [Example] Key race notables appear here, such as post position bias, recent workouts, class changes, and trip notes flagged by our handicappers.
Lane Bias Guide
- Bar Direction
- Bars above the line = more favorable lane • Bars below = less favorable, relative to the average at this track.
- Color
- Green = above-average advantage • Yellow = near-average • Red = below-average • Blue = this horse’s lane.
- Bias Score
- Derived from weighted average finishing positions across historical races at this track. Shown in the tooltip on hover. To use the bias score, calculate your handicap for the horse (e.g. finish position), then add (detrimental bias) or subtract (favorable bias) the bias score.
- Races
- Number of historical races used to compute each lane’s bias score.
Race Pace Bias Guide
- Bar Height & Direction
- Positive (green) = pace favors this horse • Negative (red) = pace works against this horse • Near-zero (amber) = neutral.
- Race Shape
- Projected race shape based on running styles of all horses (e.g. EE = two early horses, EP = one early presser).
- Pace Category
- FAST = contested early pace • LONE EARLY = one speed horse controlling pace • HONEST = moderate early pressure • SLOW = closers’ race.
- Flag (★)
- A star above the bar means this horse’s pace bias figure is ≥ 1.5 — a meaningful pace advantage or disadvantage.
Total Pace Guide
- Bar Segments
- Green = Early Pace (E1) • Amber = Mid Pace (E2) • Red = Late Pace (LP)
- Bar Height
- Total height = sum of E1 + E2 + LP average pace figures. Taller bars indicate a faster-paced horse overall.
- Grades & Rankings
- Hover to see each horse’s letter grade and ranking vs. other horses in this race (e.g. 2/9 = 2nd best of 9).
- Border
- Thicker border = this horse’s post position.
Performance vs. Peers Guide
- Bars (per post)
- Blue = avg career performance • Amber = avg last 3 races • Green = last race (improved vs. avg) • Red = last race (declined vs. avg)
- Trend Line
- Angled line above the bars: rising = improving form • falling = declining form.
- Horizontal Line
- Field average — the mean career performance of all horses in this race.
- Color Circles
- Standard post-position colors below each lane — same as the Total Pace chart.
- Border
- Thicker border = this horse’s post position.
Race Pace Simulation Guide
- Slider
- Drag left→right to advance from gate to finish. Drag all the way back to reset the race.
- Predicted Finish Order
- Factors in contested pace burn, each horse’s effort curve (peaked-early vs. peaked-late), and wide trip cost from outside posts. Updated live when Track Bias changes.
- Pace Scenario
- Lone Speed: single E horse likely rates and holds. Contested: two E horses burn each other — closers benefit. Hot Pace: speed meltdown, deep closers thrive. Soft: no early speed, moderate fractions throughout.
- Track Bias
- Slider below canvas. −2 = strong closer/wet bias; +2 = strong speed/rail bias. Recomputes the predicted finish order.
- Boxed Indicator
- Dashed orange ring = horse is surrounded (rival ahead, rival behind, wall outside). In a real race this horse must find a clear path to run.
- Running Styles
- E/EE = early speed (rushes to rail). P = presser (stalks the pace). S = stalker. SS = slow starter / closer.
| Stat | vs. Current Card | vs. All Horses |
|---|---|---|
| Averages
Career-average metrics across all AI race analysis. Performance and pace averages reflect estimated historical performance; trainer and jockey grades score in-the-money percentages. Grading scale: A = elite • B = above average • C = average • D = below average • F = poor • — = no data |
||
| Pick Pony AI Rating | F | D |
| Speed | C | C |
| Early Pace | A | A |
| Mid Pace | A | A |
| Late Pace | C | C |
| Finish Pos | C | D |
| Dirt Speed | D | B |
| Turf Speed | B | B |
| Distance Speed | D | B |
| Trainer Effectiveness | D | F |
| Jockey Effectiveness | A | C |
| 3rd Party Ratings | B | C |
| Recent
Performance analysis from the horse's recent races, weighted to reflect current form. Sprint and Route FPS (Foot Per Second) measure pace efficiency over the horse's recent sprints and routes respectively. Grading scale: A = elite • B = above average • C = average • D = below average • F = poor • — = no data |
||
| Speed | C | C |
| Early Pace | A | A |
| Mid Pace | A | A |
| Late Pace | D | D |
| Sprint FPS | A | A |
| Route FPS | B | C |
| Trainer Effectiveness | D | F |
| Jockey Effectiveness | A | C |
| 3rd Party Ratings | B | C |
| Predictions
AI-generated projections for the upcoming race, derived from prior AI analysis for speed and pace trends, surface and distance suitability, and current conditions. Grading scale: A = elite • B = above average • C = average • D = below average • F = poor • — = no data |
||
| Speed | C | C |
| Early Pace | A | B |
| Mid Pace | A | B |
| Late Pace | C | C |
A paid membership is required to view all stats. Subscribe now →
Chart Guide (2.0.35)
- Bubbles
- Color = surface: green (turf), brown (dirt), blue (synthetic)
- Top number = finishing position; bottom number in parentheses = starting post position
- Height above line = beaten lengths — closer means a smaller margin
- Border = track conditions: green (FST/GD/FM), yellow (WF/SL/YLD), red (SY/MY/FRZ/SFT/HVY)
- Connecting Line
- Solid = good conditions; dashed = bad conditions
- Line Symbol
- ▲ Triangle = sprint (7f or less); ● Circle = route (more than 7f)
- Days Between Races
- Small number above each bubble (e.g. 19d) = days since the previous race — helps spot freshness, layoffs, and tight scheduling.
- Shaded Band (Bollinger)
- Highlights volatility — a wider band means more variation in recent performance
- Performance Trend
- Straight line showing the overall performance direction — angled up = improving, angled down = declining
- Dashed Reference Line
- AI Opponent = AI analysis class-level par for the race
Notables: [Example] Key race notables appear here, such as post position bias, recent workouts, class changes, and trip notes flagged by our handicappers.
Lane Bias Guide
- Bar Direction
- Bars above the line = more favorable lane • Bars below = less favorable, relative to the average at this track.
- Color
- Green = above-average advantage • Yellow = near-average • Red = below-average • Blue = this horse’s lane.
- Bias Score
- Derived from weighted average finishing positions across historical races at this track. Shown in the tooltip on hover. To use the bias score, calculate your handicap for the horse (e.g. finish position), then add (detrimental bias) or subtract (favorable bias) the bias score.
- Races
- Number of historical races used to compute each lane’s bias score.
Race Pace Bias Guide
- Bar Height & Direction
- Positive (green) = pace favors this horse • Negative (red) = pace works against this horse • Near-zero (amber) = neutral.
- Race Shape
- Projected race shape based on running styles of all horses (e.g. EE = two early horses, EP = one early presser).
- Pace Category
- FAST = contested early pace • LONE EARLY = one speed horse controlling pace • HONEST = moderate early pressure • SLOW = closers’ race.
- Flag (★)
- A star above the bar means this horse’s pace bias figure is ≥ 1.5 — a meaningful pace advantage or disadvantage.
Total Pace Guide
- Bar Segments
- Green = Early Pace (E1) • Amber = Mid Pace (E2) • Red = Late Pace (LP)
- Bar Height
- Total height = sum of E1 + E2 + LP average pace figures. Taller bars indicate a faster-paced horse overall.
- Grades & Rankings
- Hover to see each horse’s letter grade and ranking vs. other horses in this race (e.g. 2/9 = 2nd best of 9).
- Border
- Thicker border = this horse’s post position.
Performance vs. Peers Guide
- Bars (per post)
- Blue = avg career performance • Amber = avg last 3 races • Green = last race (improved vs. avg) • Red = last race (declined vs. avg)
- Trend Line
- Angled line above the bars: rising = improving form • falling = declining form.
- Horizontal Line
- Field average — the mean career performance of all horses in this race.
- Color Circles
- Standard post-position colors below each lane — same as the Total Pace chart.
- Border
- Thicker border = this horse’s post position.
Race Pace Simulation Guide
- Slider
- Drag left→right to advance from gate to finish. Drag all the way back to reset the race.
- Predicted Finish Order
- Factors in contested pace burn, each horse’s effort curve (peaked-early vs. peaked-late), and wide trip cost from outside posts. Updated live when Track Bias changes.
- Pace Scenario
- Lone Speed: single E horse likely rates and holds. Contested: two E horses burn each other — closers benefit. Hot Pace: speed meltdown, deep closers thrive. Soft: no early speed, moderate fractions throughout.
- Track Bias
- Slider below canvas. −2 = strong closer/wet bias; +2 = strong speed/rail bias. Recomputes the predicted finish order.
- Boxed Indicator
- Dashed orange ring = horse is surrounded (rival ahead, rival behind, wall outside). In a real race this horse must find a clear path to run.
- Running Styles
- E/EE = early speed (rushes to rail). P = presser (stalks the pace). S = stalker. SS = slow starter / closer.
| Stat | vs. Current Card | vs. All Horses |
|---|---|---|
| Averages
Career-average metrics across all AI race analysis. Performance and pace averages reflect estimated historical performance; trainer and jockey grades score in-the-money percentages. Grading scale: A = elite • B = above average • C = average • D = below average • F = poor • — = no data |
||
| Pick Pony AI Rating | A | A |
| Speed | C | B |
| Early Pace | A | D |
| Mid Pace | A | C |
| Late Pace | C | C |
| Finish Pos | D | F |
| Dirt Speed | B | B |
| Turf Speed | A | C |
| Distance Speed | A | A |
| Trainer Effectiveness | D | B |
| Jockey Effectiveness | A | A |
| 3rd Party Ratings | A | A |
| Recent
Performance analysis from the horse's recent races, weighted to reflect current form. Sprint and Route FPS (Foot Per Second) measure pace efficiency over the horse's recent sprints and routes respectively. Grading scale: A = elite • B = above average • C = average • D = below average • F = poor • — = no data |
||
| Speed | C | B |
| Early Pace | D | B |
| Mid Pace | C | A |
| Late Pace | D | D |
| Sprint FPS | C | B |
| Route FPS | F | C |
| Trainer Effectiveness | D | B |
| Jockey Effectiveness | A | A |
| 3rd Party Ratings | A | A |
| Predictions
AI-generated projections for the upcoming race, derived from prior AI analysis for speed and pace trends, surface and distance suitability, and current conditions. Grading scale: A = elite • B = above average • C = average • D = below average • F = poor • — = no data |
||
| Speed | C | B |
| Early Pace | D | C |
| Mid Pace | F | B |
| Late Pace | C | C |
A paid membership is required to view all stats. Subscribe now →
Chart Guide (2.0.35)
- Bubbles
- Color = surface: green (turf), brown (dirt), blue (synthetic)
- Top number = finishing position; bottom number in parentheses = starting post position
- Height above line = beaten lengths — closer means a smaller margin
- Border = track conditions: green (FST/GD/FM), yellow (WF/SL/YLD), red (SY/MY/FRZ/SFT/HVY)
- Connecting Line
- Solid = good conditions; dashed = bad conditions
- Line Symbol
- ▲ Triangle = sprint (7f or less); ● Circle = route (more than 7f)
- Days Between Races
- Small number above each bubble (e.g. 19d) = days since the previous race — helps spot freshness, layoffs, and tight scheduling.
- Shaded Band (Bollinger)
- Highlights volatility — a wider band means more variation in recent performance
- Performance Trend
- Straight line showing the overall performance direction — angled up = improving, angled down = declining
- Dashed Reference Line
- AI Opponent = AI analysis class-level par for the race
Notables: [Example] Key race notables appear here, such as post position bias, recent workouts, class changes, and trip notes flagged by our handicappers.
Lane Bias Guide
- Bar Direction
- Bars above the line = more favorable lane • Bars below = less favorable, relative to the average at this track.
- Color
- Green = above-average advantage • Yellow = near-average • Red = below-average • Blue = this horse’s lane.
- Bias Score
- Derived from weighted average finishing positions across historical races at this track. Shown in the tooltip on hover. To use the bias score, calculate your handicap for the horse (e.g. finish position), then add (detrimental bias) or subtract (favorable bias) the bias score.
- Races
- Number of historical races used to compute each lane’s bias score.
Race Pace Bias Guide
- Bar Height & Direction
- Positive (green) = pace favors this horse • Negative (red) = pace works against this horse • Near-zero (amber) = neutral.
- Race Shape
- Projected race shape based on running styles of all horses (e.g. EE = two early horses, EP = one early presser).
- Pace Category
- FAST = contested early pace • LONE EARLY = one speed horse controlling pace • HONEST = moderate early pressure • SLOW = closers’ race.
- Flag (★)
- A star above the bar means this horse’s pace bias figure is ≥ 1.5 — a meaningful pace advantage or disadvantage.
Total Pace Guide
- Bar Segments
- Green = Early Pace (E1) • Amber = Mid Pace (E2) • Red = Late Pace (LP)
- Bar Height
- Total height = sum of E1 + E2 + LP average pace figures. Taller bars indicate a faster-paced horse overall.
- Grades & Rankings
- Hover to see each horse’s letter grade and ranking vs. other horses in this race (e.g. 2/9 = 2nd best of 9).
- Border
- Thicker border = this horse’s post position.
Performance vs. Peers Guide
- Bars (per post)
- Blue = avg career performance • Amber = avg last 3 races • Green = last race (improved vs. avg) • Red = last race (declined vs. avg)
- Trend Line
- Angled line above the bars: rising = improving form • falling = declining form.
- Horizontal Line
- Field average — the mean career performance of all horses in this race.
- Color Circles
- Standard post-position colors below each lane — same as the Total Pace chart.
- Border
- Thicker border = this horse’s post position.
Race Pace Simulation Guide
- Slider
- Drag left→right to advance from gate to finish. Drag all the way back to reset the race.
- Predicted Finish Order
- Factors in contested pace burn, each horse’s effort curve (peaked-early vs. peaked-late), and wide trip cost from outside posts. Updated live when Track Bias changes.
- Pace Scenario
- Lone Speed: single E horse likely rates and holds. Contested: two E horses burn each other — closers benefit. Hot Pace: speed meltdown, deep closers thrive. Soft: no early speed, moderate fractions throughout.
- Track Bias
- Slider below canvas. −2 = strong closer/wet bias; +2 = strong speed/rail bias. Recomputes the predicted finish order.
- Boxed Indicator
- Dashed orange ring = horse is surrounded (rival ahead, rival behind, wall outside). In a real race this horse must find a clear path to run.
- Running Styles
- E/EE = early speed (rushes to rail). P = presser (stalks the pace). S = stalker. SS = slow starter / closer.
| Stat | vs. Current Card | vs. All Horses |
|---|---|---|
| Averages
Career-average metrics across all AI race analysis. Performance and pace averages reflect estimated historical performance; trainer and jockey grades score in-the-money percentages. Grading scale: A = elite • B = above average • C = average • D = below average • F = poor • — = no data |
||
| Pick Pony AI Rating | A | A |
| Speed | A | A |
| Early Pace | F | D |
| Mid Pace | F | D |
| Late Pace | A | A |
| Finish Pos | A | B |
| Dirt Speed | B | B |
| Turf Speed | C | D |
| Distance Speed | A | B |
| Trainer Effectiveness | A | A |
| Jockey Effectiveness | A | A |
| 3rd Party Ratings | C | A |
| Recent
Performance analysis from the horse's recent races, weighted to reflect current form. Sprint and Route FPS (Foot Per Second) measure pace efficiency over the horse's recent sprints and routes respectively. Grading scale: A = elite • B = above average • C = average • D = below average • F = poor • — = no data |
||
| Speed | A | A |
| Early Pace | C | B |
| Mid Pace | F | B |
| Late Pace | A | A |
| Sprint FPS | F | C |
| Route FPS | D | C |
| Trainer Effectiveness | A | A |
| Jockey Effectiveness | A | A |
| 3rd Party Ratings | C | A |
| Predictions
AI-generated projections for the upcoming race, derived from prior AI analysis for speed and pace trends, surface and distance suitability, and current conditions. Grading scale: A = elite • B = above average • C = average • D = below average • F = poor • — = no data |
||
| Speed | A | A |
| Early Pace | B | B |
| Mid Pace | D | B |
| Late Pace | C | C |
A paid membership is required to view all stats. Subscribe now →
Chart Guide (2.0.35)
- Bubbles
- Color = surface: green (turf), brown (dirt), blue (synthetic)
- Top number = finishing position; bottom number in parentheses = starting post position
- Height above line = beaten lengths — closer means a smaller margin
- Border = track conditions: green (FST/GD/FM), yellow (WF/SL/YLD), red (SY/MY/FRZ/SFT/HVY)
- Connecting Line
- Solid = good conditions; dashed = bad conditions
- Line Symbol
- ▲ Triangle = sprint (7f or less); ● Circle = route (more than 7f)
- Days Between Races
- Small number above each bubble (e.g. 19d) = days since the previous race — helps spot freshness, layoffs, and tight scheduling.
- Shaded Band (Bollinger)
- Highlights volatility — a wider band means more variation in recent performance
- Performance Trend
- Straight line showing the overall performance direction — angled up = improving, angled down = declining
- Dashed Reference Line
- AI Opponent = AI analysis class-level par for the race
Notables: [Example] Key race notables appear here, such as post position bias, recent workouts, class changes, and trip notes flagged by our handicappers.
Lane Bias Guide
- Bar Direction
- Bars above the line = more favorable lane • Bars below = less favorable, relative to the average at this track.
- Color
- Green = above-average advantage • Yellow = near-average • Red = below-average • Blue = this horse’s lane.
- Bias Score
- Derived from weighted average finishing positions across historical races at this track. Shown in the tooltip on hover. To use the bias score, calculate your handicap for the horse (e.g. finish position), then add (detrimental bias) or subtract (favorable bias) the bias score.
- Races
- Number of historical races used to compute each lane’s bias score.
Race Pace Bias Guide
- Bar Height & Direction
- Positive (green) = pace favors this horse • Negative (red) = pace works against this horse • Near-zero (amber) = neutral.
- Race Shape
- Projected race shape based on running styles of all horses (e.g. EE = two early horses, EP = one early presser).
- Pace Category
- FAST = contested early pace • LONE EARLY = one speed horse controlling pace • HONEST = moderate early pressure • SLOW = closers’ race.
- Flag (★)
- A star above the bar means this horse’s pace bias figure is ≥ 1.5 — a meaningful pace advantage or disadvantage.
Total Pace Guide
- Bar Segments
- Green = Early Pace (E1) • Amber = Mid Pace (E2) • Red = Late Pace (LP)
- Bar Height
- Total height = sum of E1 + E2 + LP average pace figures. Taller bars indicate a faster-paced horse overall.
- Grades & Rankings
- Hover to see each horse’s letter grade and ranking vs. other horses in this race (e.g. 2/9 = 2nd best of 9).
- Border
- Thicker border = this horse’s post position.
Performance vs. Peers Guide
- Bars (per post)
- Blue = avg career performance • Amber = avg last 3 races • Green = last race (improved vs. avg) • Red = last race (declined vs. avg)
- Trend Line
- Angled line above the bars: rising = improving form • falling = declining form.
- Horizontal Line
- Field average — the mean career performance of all horses in this race.
- Color Circles
- Standard post-position colors below each lane — same as the Total Pace chart.
- Border
- Thicker border = this horse’s post position.
Race Pace Simulation Guide
- Slider
- Drag left→right to advance from gate to finish. Drag all the way back to reset the race.
- Predicted Finish Order
- Factors in contested pace burn, each horse’s effort curve (peaked-early vs. peaked-late), and wide trip cost from outside posts. Updated live when Track Bias changes.
- Pace Scenario
- Lone Speed: single E horse likely rates and holds. Contested: two E horses burn each other — closers benefit. Hot Pace: speed meltdown, deep closers thrive. Soft: no early speed, moderate fractions throughout.
- Track Bias
- Slider below canvas. −2 = strong closer/wet bias; +2 = strong speed/rail bias. Recomputes the predicted finish order.
- Boxed Indicator
- Dashed orange ring = horse is surrounded (rival ahead, rival behind, wall outside). In a real race this horse must find a clear path to run.
- Running Styles
- E/EE = early speed (rushes to rail). P = presser (stalks the pace). S = stalker. SS = slow starter / closer.
| Stat | vs. Current Card | vs. All Horses |
|---|---|---|
| Averages
Career-average metrics across all AI race analysis. Performance and pace averages reflect estimated historical performance; trainer and jockey grades score in-the-money percentages. Grading scale: A = elite • B = above average • C = average • D = below average • F = poor • — = no data |
||
| Pick Pony AI Rating | D | B |
| Speed | B | B |
| Early Pace | D | D |
| Mid Pace | D | D |
| Late Pace | A | B |
| Finish Pos | F | F |
| Dirt Speed | F | F |
| Turf Speed | A | B |
| Distance Speed | D | F |
| Trainer Effectiveness | B | A |
| Jockey Effectiveness | F | D |
| 3rd Party Ratings | D | A |
| Recent
Performance analysis from the horse's recent races, weighted to reflect current form. Sprint and Route FPS (Foot Per Second) measure pace efficiency over the horse's recent sprints and routes respectively. Grading scale: A = elite • B = above average • C = average • D = below average • F = poor • — = no data |
||
| Speed | B | B |
| Early Pace | F | C |
| Mid Pace | D | B |
| Late Pace | A | B |
| Sprint FPS | D | B |
| Route FPS | C | B |
| Trainer Effectiveness | B | A |
| Jockey Effectiveness | F | D |
| 3rd Party Ratings | D | A |
| Predictions
AI-generated projections for the upcoming race, derived from prior AI analysis for speed and pace trends, surface and distance suitability, and current conditions. Grading scale: A = elite • B = above average • C = average • D = below average • F = poor • — = no data |
||
| Speed | B | B |
| Early Pace | C | B |
| Mid Pace | B | A |
| Late Pace | C | C |
A paid membership is required to view all stats. Subscribe now →
Chart Guide (2.0.35)
- Bubbles
- Color = surface: green (turf), brown (dirt), blue (synthetic)
- Top number = finishing position; bottom number in parentheses = starting post position
- Height above line = beaten lengths — closer means a smaller margin
- Border = track conditions: green (FST/GD/FM), yellow (WF/SL/YLD), red (SY/MY/FRZ/SFT/HVY)
- Connecting Line
- Solid = good conditions; dashed = bad conditions
- Line Symbol
- ▲ Triangle = sprint (7f or less); ● Circle = route (more than 7f)
- Days Between Races
- Small number above each bubble (e.g. 19d) = days since the previous race — helps spot freshness, layoffs, and tight scheduling.
- Shaded Band (Bollinger)
- Highlights volatility — a wider band means more variation in recent performance
- Performance Trend
- Straight line showing the overall performance direction — angled up = improving, angled down = declining
- Dashed Reference Line
- AI Opponent = AI analysis class-level par for the race
Notables: [Example] Key race notables appear here, such as post position bias, recent workouts, class changes, and trip notes flagged by our handicappers.
Lane Bias Guide
- Bar Direction
- Bars above the line = more favorable lane • Bars below = less favorable, relative to the average at this track.
- Color
- Green = above-average advantage • Yellow = near-average • Red = below-average • Blue = this horse’s lane.
- Bias Score
- Derived from weighted average finishing positions across historical races at this track. Shown in the tooltip on hover. To use the bias score, calculate your handicap for the horse (e.g. finish position), then add (detrimental bias) or subtract (favorable bias) the bias score.
- Races
- Number of historical races used to compute each lane’s bias score.
Race Pace Bias Guide
- Bar Height & Direction
- Positive (green) = pace favors this horse • Negative (red) = pace works against this horse • Near-zero (amber) = neutral.
- Race Shape
- Projected race shape based on running styles of all horses (e.g. EE = two early horses, EP = one early presser).
- Pace Category
- FAST = contested early pace • LONE EARLY = one speed horse controlling pace • HONEST = moderate early pressure • SLOW = closers’ race.
- Flag (★)
- A star above the bar means this horse’s pace bias figure is ≥ 1.5 — a meaningful pace advantage or disadvantage.
Total Pace Guide
- Bar Segments
- Green = Early Pace (E1) • Amber = Mid Pace (E2) • Red = Late Pace (LP)
- Bar Height
- Total height = sum of E1 + E2 + LP average pace figures. Taller bars indicate a faster-paced horse overall.
- Grades & Rankings
- Hover to see each horse’s letter grade and ranking vs. other horses in this race (e.g. 2/9 = 2nd best of 9).
- Border
- Thicker border = this horse’s post position.
Performance vs. Peers Guide
- Bars (per post)
- Blue = avg career performance • Amber = avg last 3 races • Green = last race (improved vs. avg) • Red = last race (declined vs. avg)
- Trend Line
- Angled line above the bars: rising = improving form • falling = declining form.
- Horizontal Line
- Field average — the mean career performance of all horses in this race.
- Color Circles
- Standard post-position colors below each lane — same as the Total Pace chart.
- Border
- Thicker border = this horse’s post position.
Race Pace Simulation Guide
- Slider
- Drag left→right to advance from gate to finish. Drag all the way back to reset the race.
- Predicted Finish Order
- Factors in contested pace burn, each horse’s effort curve (peaked-early vs. peaked-late), and wide trip cost from outside posts. Updated live when Track Bias changes.
- Pace Scenario
- Lone Speed: single E horse likely rates and holds. Contested: two E horses burn each other — closers benefit. Hot Pace: speed meltdown, deep closers thrive. Soft: no early speed, moderate fractions throughout.
- Track Bias
- Slider below canvas. −2 = strong closer/wet bias; +2 = strong speed/rail bias. Recomputes the predicted finish order.
- Boxed Indicator
- Dashed orange ring = horse is surrounded (rival ahead, rival behind, wall outside). In a real race this horse must find a clear path to run.
- Running Styles
- E/EE = early speed (rushes to rail). P = presser (stalks the pace). S = stalker. SS = slow starter / closer.
| Stat | vs. Current Card | vs. All Horses |
|---|---|---|
| Averages
Career-average metrics across all AI race analysis. Performance and pace averages reflect estimated historical performance; trainer and jockey grades score in-the-money percentages. Grading scale: A = elite • B = above average • C = average • D = below average • F = poor • — = no data |
||
| Pick Pony AI Rating | F | B |
| Speed | F | C |
| Early Pace | B | D |
| Mid Pace | B | D |
| Late Pace | D | D |
| Finish Pos | B | B |
| Dirt Speed | C | B |
| Turf Speed | C | D |
| Distance Speed | B | B |
| Trainer Effectiveness | A | A |
| Jockey Effectiveness | B | A |
| 3rd Party Ratings | B | A |
| Recent
Performance analysis from the horse's recent races, weighted to reflect current form. Sprint and Route FPS (Foot Per Second) measure pace efficiency over the horse's recent sprints and routes respectively. Grading scale: A = elite • B = above average • C = average • D = below average • F = poor • — = no data |
||
| Speed | A | A |
| Early Pace | B | A |
| Mid Pace | B | A |
| Late Pace | B | C |
| Sprint FPS | A | A |
| Route FPS | A | A |
| Trainer Effectiveness | A | A |
| Jockey Effectiveness | B | A |
| 3rd Party Ratings | B | A |
| Predictions
AI-generated projections for the upcoming race, derived from prior AI analysis for speed and pace trends, surface and distance suitability, and current conditions. Grading scale: A = elite • B = above average • C = average • D = below average • F = poor • — = no data |
||
| Speed | F | C |
| Early Pace | F | D |
| Mid Pace | C | B |
| Late Pace | C | C |
A paid membership is required to view all stats. Subscribe now →
Chart Guide (2.0.35)
- Bubbles
- Color = surface: green (turf), brown (dirt), blue (synthetic)
- Top number = finishing position; bottom number in parentheses = starting post position
- Height above line = beaten lengths — closer means a smaller margin
- Border = track conditions: green (FST/GD/FM), yellow (WF/SL/YLD), red (SY/MY/FRZ/SFT/HVY)
- Connecting Line
- Solid = good conditions; dashed = bad conditions
- Line Symbol
- ▲ Triangle = sprint (7f or less); ● Circle = route (more than 7f)
- Days Between Races
- Small number above each bubble (e.g. 19d) = days since the previous race — helps spot freshness, layoffs, and tight scheduling.
- Shaded Band (Bollinger)
- Highlights volatility — a wider band means more variation in recent performance
- Performance Trend
- Straight line showing the overall performance direction — angled up = improving, angled down = declining
- Dashed Reference Line
- AI Opponent = AI analysis class-level par for the race
Notables: [Example] Key race notables appear here, such as post position bias, recent workouts, class changes, and trip notes flagged by our handicappers.
Lane Bias Guide
- Bar Direction
- Bars above the line = more favorable lane • Bars below = less favorable, relative to the average at this track.
- Color
- Green = above-average advantage • Yellow = near-average • Red = below-average • Blue = this horse’s lane.
- Bias Score
- Derived from weighted average finishing positions across historical races at this track. Shown in the tooltip on hover. To use the bias score, calculate your handicap for the horse (e.g. finish position), then add (detrimental bias) or subtract (favorable bias) the bias score.
- Races
- Number of historical races used to compute each lane’s bias score.
Race Pace Bias Guide
- Bar Height & Direction
- Positive (green) = pace favors this horse • Negative (red) = pace works against this horse • Near-zero (amber) = neutral.
- Race Shape
- Projected race shape based on running styles of all horses (e.g. EE = two early horses, EP = one early presser).
- Pace Category
- FAST = contested early pace • LONE EARLY = one speed horse controlling pace • HONEST = moderate early pressure • SLOW = closers’ race.
- Flag (★)
- A star above the bar means this horse’s pace bias figure is ≥ 1.5 — a meaningful pace advantage or disadvantage.
Total Pace Guide
- Bar Segments
- Green = Early Pace (E1) • Amber = Mid Pace (E2) • Red = Late Pace (LP)
- Bar Height
- Total height = sum of E1 + E2 + LP average pace figures. Taller bars indicate a faster-paced horse overall.
- Grades & Rankings
- Hover to see each horse’s letter grade and ranking vs. other horses in this race (e.g. 2/9 = 2nd best of 9).
- Border
- Thicker border = this horse’s post position.
Performance vs. Peers Guide
- Bars (per post)
- Blue = avg career performance • Amber = avg last 3 races • Green = last race (improved vs. avg) • Red = last race (declined vs. avg)
- Trend Line
- Angled line above the bars: rising = improving form • falling = declining form.
- Horizontal Line
- Field average — the mean career performance of all horses in this race.
- Color Circles
- Standard post-position colors below each lane — same as the Total Pace chart.
- Border
- Thicker border = this horse’s post position.
Race Pace Simulation Guide
- Slider
- Drag left→right to advance from gate to finish. Drag all the way back to reset the race.
- Predicted Finish Order
- Factors in contested pace burn, each horse’s effort curve (peaked-early vs. peaked-late), and wide trip cost from outside posts. Updated live when Track Bias changes.
- Pace Scenario
- Lone Speed: single E horse likely rates and holds. Contested: two E horses burn each other — closers benefit. Hot Pace: speed meltdown, deep closers thrive. Soft: no early speed, moderate fractions throughout.
- Track Bias
- Slider below canvas. −2 = strong closer/wet bias; +2 = strong speed/rail bias. Recomputes the predicted finish order.
- Boxed Indicator
- Dashed orange ring = horse is surrounded (rival ahead, rival behind, wall outside). In a real race this horse must find a clear path to run.
- Running Styles
- E/EE = early speed (rushes to rail). P = presser (stalks the pace). S = stalker. SS = slow starter / closer.
| Stat | vs. Current Card | vs. All Horses |
|---|---|---|
| Averages
Career-average metrics across all AI race analysis. Performance and pace averages reflect estimated historical performance; trainer and jockey grades score in-the-money percentages. Grading scale: A = elite • B = above average • C = average • D = below average • F = poor • — = no data |
||
| Pick Pony AI Rating | B | B |
| Speed | D | B |
| Early Pace | A | D |
| Mid Pace | A | C |
| Late Pace | F | D |
| Finish Pos | C | C |
| Dirt Speed | A | A |
| Turf Speed | C | D |
| Distance Speed | D | F |
| Trainer Effectiveness | C | B |
| Jockey Effectiveness | C | B |
| 3rd Party Ratings | A | A |
| Recent
Performance analysis from the horse's recent races, weighted to reflect current form. Sprint and Route FPS (Foot Per Second) measure pace efficiency over the horse's recent sprints and routes respectively. Grading scale: A = elite • B = above average • C = average • D = below average • F = poor • — = no data |
||
| Speed | D | B |
| Early Pace | A | A |
| Mid Pace | A | A |
| Late Pace | F | D |
| Sprint FPS | B | B |
| Route FPS | B | A |
| Trainer Effectiveness | C | B |
| Jockey Effectiveness | C | B |
| 3rd Party Ratings | A | A |
| Predictions
AI-generated projections for the upcoming race, derived from prior AI analysis for speed and pace trends, surface and distance suitability, and current conditions. Grading scale: A = elite • B = above average • C = average • D = below average • F = poor • — = no data |
||
| Speed | D | C |
| Early Pace | A | A |
| Mid Pace | A | A |
| Late Pace | C | C |
A paid membership is required to view all stats. Subscribe now →
Chart Guide (2.0.35)
- Bubbles
- Color = surface: green (turf), brown (dirt), blue (synthetic)
- Top number = finishing position; bottom number in parentheses = starting post position
- Height above line = beaten lengths — closer means a smaller margin
- Border = track conditions: green (FST/GD/FM), yellow (WF/SL/YLD), red (SY/MY/FRZ/SFT/HVY)
- Connecting Line
- Solid = good conditions; dashed = bad conditions
- Line Symbol
- ▲ Triangle = sprint (7f or less); ● Circle = route (more than 7f)
- Days Between Races
- Small number above each bubble (e.g. 19d) = days since the previous race — helps spot freshness, layoffs, and tight scheduling.
- Shaded Band (Bollinger)
- Highlights volatility — a wider band means more variation in recent performance
- Performance Trend
- Straight line showing the overall performance direction — angled up = improving, angled down = declining
- Dashed Reference Line
- AI Opponent = AI analysis class-level par for the race
Notables: [Example] Key race notables appear here, such as post position bias, recent workouts, class changes, and trip notes flagged by our handicappers.
Lane Bias Guide
- Bar Direction
- Bars above the line = more favorable lane • Bars below = less favorable, relative to the average at this track.
- Color
- Green = above-average advantage • Yellow = near-average • Red = below-average • Blue = this horse’s lane.
- Bias Score
- Derived from weighted average finishing positions across historical races at this track. Shown in the tooltip on hover. To use the bias score, calculate your handicap for the horse (e.g. finish position), then add (detrimental bias) or subtract (favorable bias) the bias score.
- Races
- Number of historical races used to compute each lane’s bias score.
Race Pace Bias Guide
- Bar Height & Direction
- Positive (green) = pace favors this horse • Negative (red) = pace works against this horse • Near-zero (amber) = neutral.
- Race Shape
- Projected race shape based on running styles of all horses (e.g. EE = two early horses, EP = one early presser).
- Pace Category
- FAST = contested early pace • LONE EARLY = one speed horse controlling pace • HONEST = moderate early pressure • SLOW = closers’ race.
- Flag (★)
- A star above the bar means this horse’s pace bias figure is ≥ 1.5 — a meaningful pace advantage or disadvantage.
Total Pace Guide
- Bar Segments
- Green = Early Pace (E1) • Amber = Mid Pace (E2) • Red = Late Pace (LP)
- Bar Height
- Total height = sum of E1 + E2 + LP average pace figures. Taller bars indicate a faster-paced horse overall.
- Grades & Rankings
- Hover to see each horse’s letter grade and ranking vs. other horses in this race (e.g. 2/9 = 2nd best of 9).
- Border
- Thicker border = this horse’s post position.
Performance vs. Peers Guide
- Bars (per post)
- Blue = avg career performance • Amber = avg last 3 races • Green = last race (improved vs. avg) • Red = last race (declined vs. avg)
- Trend Line
- Angled line above the bars: rising = improving form • falling = declining form.
- Horizontal Line
- Field average — the mean career performance of all horses in this race.
- Color Circles
- Standard post-position colors below each lane — same as the Total Pace chart.
- Border
- Thicker border = this horse’s post position.
Race Pace Simulation Guide
- Slider
- Drag left→right to advance from gate to finish. Drag all the way back to reset the race.
- Predicted Finish Order
- Factors in contested pace burn, each horse’s effort curve (peaked-early vs. peaked-late), and wide trip cost from outside posts. Updated live when Track Bias changes.
- Pace Scenario
- Lone Speed: single E horse likely rates and holds. Contested: two E horses burn each other — closers benefit. Hot Pace: speed meltdown, deep closers thrive. Soft: no early speed, moderate fractions throughout.
- Track Bias
- Slider below canvas. −2 = strong closer/wet bias; +2 = strong speed/rail bias. Recomputes the predicted finish order.
- Boxed Indicator
- Dashed orange ring = horse is surrounded (rival ahead, rival behind, wall outside). In a real race this horse must find a clear path to run.
- Running Styles
- E/EE = early speed (rushes to rail). P = presser (stalks the pace). S = stalker. SS = slow starter / closer.
| Stat | vs. Current Card | vs. All Horses |
|---|---|---|
| Averages
Career-average metrics across all AI race analysis. Performance and pace averages reflect estimated historical performance; trainer and jockey grades score in-the-money percentages. Grading scale: A = elite • B = above average • C = average • D = below average • F = poor • — = no data |
||
| Pick Pony AI Rating | C | B |
| Speed | B | B |
| Early Pace | C | D |
| Mid Pace | C | D |
| Late Pace | B | C |
| Finish Pos | A | B |
| Dirt Speed | D | B |
| Turf Speed | C | D |
| Distance Speed | D | F |
| Trainer Effectiveness | F | C |
| Jockey Effectiveness | D | C |
| 3rd Party Ratings | F | A |
| Recent
Performance analysis from the horse's recent races, weighted to reflect current form. Sprint and Route FPS (Foot Per Second) measure pace efficiency over the horse's recent sprints and routes respectively. Grading scale: A = elite • B = above average • C = average • D = below average • F = poor • — = no data |
||
| Speed | D | B |
| Early Pace | A | A |
| Mid Pace | A | A |
| Late Pace | C | C |
| Sprint FPS | A | A |
| Route FPS | A | A |
| Trainer Effectiveness | F | C |
| Jockey Effectiveness | D | C |
| 3rd Party Ratings | F | A |
| Predictions
AI-generated projections for the upcoming race, derived from prior AI analysis for speed and pace trends, surface and distance suitability, and current conditions. Grading scale: A = elite • B = above average • C = average • D = below average • F = poor • — = no data |
||
| Speed | B | B |
| Early Pace | A | A |
| Mid Pace | A | A |
| Late Pace | C | C |
A paid membership is required to view all stats. Subscribe now →
Chart Guide (2.0.35)
- Bubbles
- Color = surface: green (turf), brown (dirt), blue (synthetic)
- Top number = finishing position; bottom number in parentheses = starting post position
- Height above line = beaten lengths — closer means a smaller margin
- Border = track conditions: green (FST/GD/FM), yellow (WF/SL/YLD), red (SY/MY/FRZ/SFT/HVY)
- Connecting Line
- Solid = good conditions; dashed = bad conditions
- Line Symbol
- ▲ Triangle = sprint (7f or less); ● Circle = route (more than 7f)
- Days Between Races
- Small number above each bubble (e.g. 19d) = days since the previous race — helps spot freshness, layoffs, and tight scheduling.
- Shaded Band (Bollinger)
- Highlights volatility — a wider band means more variation in recent performance
- Performance Trend
- Straight line showing the overall performance direction — angled up = improving, angled down = declining
- Dashed Reference Line
- AI Opponent = AI analysis class-level par for the race
Notables: [Example] Key race notables appear here, such as post position bias, recent workouts, class changes, and trip notes flagged by our handicappers.
Lane Bias Guide
- Bar Direction
- Bars above the line = more favorable lane • Bars below = less favorable, relative to the average at this track.
- Color
- Green = above-average advantage • Yellow = near-average • Red = below-average • Blue = this horse’s lane.
- Bias Score
- Derived from weighted average finishing positions across historical races at this track. Shown in the tooltip on hover. To use the bias score, calculate your handicap for the horse (e.g. finish position), then add (detrimental bias) or subtract (favorable bias) the bias score.
- Races
- Number of historical races used to compute each lane’s bias score.
Race Pace Bias Guide
- Bar Height & Direction
- Positive (green) = pace favors this horse • Negative (red) = pace works against this horse • Near-zero (amber) = neutral.
- Race Shape
- Projected race shape based on running styles of all horses (e.g. EE = two early horses, EP = one early presser).
- Pace Category
- FAST = contested early pace • LONE EARLY = one speed horse controlling pace • HONEST = moderate early pressure • SLOW = closers’ race.
- Flag (★)
- A star above the bar means this horse’s pace bias figure is ≥ 1.5 — a meaningful pace advantage or disadvantage.
Total Pace Guide
- Bar Segments
- Green = Early Pace (E1) • Amber = Mid Pace (E2) • Red = Late Pace (LP)
- Bar Height
- Total height = sum of E1 + E2 + LP average pace figures. Taller bars indicate a faster-paced horse overall.
- Grades & Rankings
- Hover to see each horse’s letter grade and ranking vs. other horses in this race (e.g. 2/9 = 2nd best of 9).
- Border
- Thicker border = this horse’s post position.
Performance vs. Peers Guide
- Bars (per post)
- Blue = avg career performance • Amber = avg last 3 races • Green = last race (improved vs. avg) • Red = last race (declined vs. avg)
- Trend Line
- Angled line above the bars: rising = improving form • falling = declining form.
- Horizontal Line
- Field average — the mean career performance of all horses in this race.
- Color Circles
- Standard post-position colors below each lane — same as the Total Pace chart.
- Border
- Thicker border = this horse’s post position.
Race Pace Simulation Guide
- Slider
- Drag left→right to advance from gate to finish. Drag all the way back to reset the race.
- Predicted Finish Order
- Factors in contested pace burn, each horse’s effort curve (peaked-early vs. peaked-late), and wide trip cost from outside posts. Updated live when Track Bias changes.
- Pace Scenario
- Lone Speed: single E horse likely rates and holds. Contested: two E horses burn each other — closers benefit. Hot Pace: speed meltdown, deep closers thrive. Soft: no early speed, moderate fractions throughout.
- Track Bias
- Slider below canvas. −2 = strong closer/wet bias; +2 = strong speed/rail bias. Recomputes the predicted finish order.
- Boxed Indicator
- Dashed orange ring = horse is surrounded (rival ahead, rival behind, wall outside). In a real race this horse must find a clear path to run.
- Running Styles
- E/EE = early speed (rushes to rail). P = presser (stalks the pace). S = stalker. SS = slow starter / closer.
| Stat | vs. Current Card | vs. All Horses |
|---|---|---|
| Averages
Career-average metrics across all AI race analysis. Performance and pace averages reflect estimated historical performance; trainer and jockey grades score in-the-money percentages. Grading scale: A = elite • B = above average • C = average • D = below average • F = poor • — = no data |
||
| Pick Pony AI Rating | F | D |
| Speed | F | C |
| Early Pace | F | B |
| Mid Pace | D | A |
| Late Pace | F | D |
| Finish Pos | F | F |
| Dirt Speed | F | B |
| Turf Speed | D | D |
| Distance Speed | D | F |
| Trainer Effectiveness | D | F |
| Jockey Effectiveness | F | F |
| 3rd Party Ratings | F | D |
| Recent
Performance analysis from the horse's recent races, weighted to reflect current form. Sprint and Route FPS (Foot Per Second) measure pace efficiency over the horse's recent sprints and routes respectively. Grading scale: A = elite • B = above average • C = average • D = below average • F = poor • — = no data |
||
| Speed | F | D |
| Early Pace | D | C |
| Mid Pace | F | B |
| Late Pace | F | F |
| Sprint FPS | D | C |
| Route FPS | F | D |
| Trainer Effectiveness | D | F |
| Jockey Effectiveness | F | F |
| 3rd Party Ratings | F | D |
| Predictions
AI-generated projections for the upcoming race, derived from prior AI analysis for speed and pace trends, surface and distance suitability, and current conditions. Grading scale: A = elite • B = above average • C = average • D = below average • F = poor • — = no data |
||
| Speed | F | D |
| Early Pace | F | C |
| Mid Pace | F | B |
| Late Pace | C | C |
A paid membership is required to view all stats. Subscribe now →
Chart Guide (2.0.35)
- Bubbles
- Color = surface: green (turf), brown (dirt), blue (synthetic)
- Top number = finishing position; bottom number in parentheses = starting post position
- Height above line = beaten lengths — closer means a smaller margin
- Border = track conditions: green (FST/GD/FM), yellow (WF/SL/YLD), red (SY/MY/FRZ/SFT/HVY)
- Connecting Line
- Solid = good conditions; dashed = bad conditions
- Line Symbol
- ▲ Triangle = sprint (7f or less); ● Circle = route (more than 7f)
- Days Between Races
- Small number above each bubble (e.g. 19d) = days since the previous race — helps spot freshness, layoffs, and tight scheduling.
- Shaded Band (Bollinger)
- Highlights volatility — a wider band means more variation in recent performance
- Performance Trend
- Straight line showing the overall performance direction — angled up = improving, angled down = declining
- Dashed Reference Line
- AI Opponent = AI analysis class-level par for the race
Notables: [Example] Key race notables appear here, such as post position bias, recent workouts, class changes, and trip notes flagged by our handicappers.
Lane Bias Guide
- Bar Direction
- Bars above the line = more favorable lane • Bars below = less favorable, relative to the average at this track.
- Color
- Green = above-average advantage • Yellow = near-average • Red = below-average • Blue = this horse’s lane.
- Bias Score
- Derived from weighted average finishing positions across historical races at this track. Shown in the tooltip on hover. To use the bias score, calculate your handicap for the horse (e.g. finish position), then add (detrimental bias) or subtract (favorable bias) the bias score.
- Races
- Number of historical races used to compute each lane’s bias score.
Race Pace Bias Guide
- Bar Height & Direction
- Positive (green) = pace favors this horse • Negative (red) = pace works against this horse • Near-zero (amber) = neutral.
- Race Shape
- Projected race shape based on running styles of all horses (e.g. EE = two early horses, EP = one early presser).
- Pace Category
- FAST = contested early pace • LONE EARLY = one speed horse controlling pace • HONEST = moderate early pressure • SLOW = closers’ race.
- Flag (★)
- A star above the bar means this horse’s pace bias figure is ≥ 1.5 — a meaningful pace advantage or disadvantage.
Total Pace Guide
- Bar Segments
- Green = Early Pace (E1) • Amber = Mid Pace (E2) • Red = Late Pace (LP)
- Bar Height
- Total height = sum of E1 + E2 + LP average pace figures. Taller bars indicate a faster-paced horse overall.
- Grades & Rankings
- Hover to see each horse’s letter grade and ranking vs. other horses in this race (e.g. 2/9 = 2nd best of 9).
- Border
- Thicker border = this horse’s post position.
Performance vs. Peers Guide
- Bars (per post)
- Blue = avg career performance • Amber = avg last 3 races • Green = last race (improved vs. avg) • Red = last race (declined vs. avg)
- Trend Line
- Angled line above the bars: rising = improving form • falling = declining form.
- Horizontal Line
- Field average — the mean career performance of all horses in this race.
- Color Circles
- Standard post-position colors below each lane — same as the Total Pace chart.
- Border
- Thicker border = this horse’s post position.
Race Pace Simulation Guide
- Slider
- Drag left→right to advance from gate to finish. Drag all the way back to reset the race.
- Predicted Finish Order
- Factors in contested pace burn, each horse’s effort curve (peaked-early vs. peaked-late), and wide trip cost from outside posts. Updated live when Track Bias changes.
- Pace Scenario
- Lone Speed: single E horse likely rates and holds. Contested: two E horses burn each other — closers benefit. Hot Pace: speed meltdown, deep closers thrive. Soft: no early speed, moderate fractions throughout.
- Track Bias
- Slider below canvas. −2 = strong closer/wet bias; +2 = strong speed/rail bias. Recomputes the predicted finish order.
- Boxed Indicator
- Dashed orange ring = horse is surrounded (rival ahead, rival behind, wall outside). In a real race this horse must find a clear path to run.
- Running Styles
- E/EE = early speed (rushes to rail). P = presser (stalks the pace). S = stalker. SS = slow starter / closer.
| Stat | vs. Current Card | vs. All Horses |
|---|---|---|
| Averages
Career-average metrics across all AI race analysis. Performance and pace averages reflect estimated historical performance; trainer and jockey grades score in-the-money percentages. Grading scale: A = elite • B = above average • C = average • D = below average • F = poor • — = no data |
||
| Pick Pony AI Rating | C | B |
| Speed | C | B |
| Early Pace | A | A |
| Mid Pace | A | A |
| Late Pace | C | B |
| Finish Pos | D | F |
| Dirt Speed | C | A |
| Turf Speed | A | B |
| Distance Speed | B | A |
| Trainer Effectiveness | D | F |
| Jockey Effectiveness | C | C |
| 3rd Party Ratings | C | C |
| Recent
Performance analysis from the horse's recent races, weighted to reflect current form. Sprint and Route FPS (Foot Per Second) measure pace efficiency over the horse's recent sprints and routes respectively. Grading scale: A = elite • B = above average • C = average • D = below average • F = poor • — = no data |
||
| Speed | B | B |
| Early Pace | A | A |
| Mid Pace | A | A |
| Late Pace | C | B |
| Sprint FPS | B | C |
| Route FPS | D | D |
| Trainer Effectiveness | D | F |
| Jockey Effectiveness | C | C |
| 3rd Party Ratings | C | C |
| Predictions
AI-generated projections for the upcoming race, derived from prior AI analysis for speed and pace trends, surface and distance suitability, and current conditions. Grading scale: A = elite • B = above average • C = average • D = below average • F = poor • — = no data |
||
| Speed | C | B |
| Early Pace | A | A |
| Mid Pace | A | A |
| Late Pace | C | C |
A paid membership is required to view all stats. Subscribe now →
Chart Guide (2.0.35)
- Bubbles
- Color = surface: green (turf), brown (dirt), blue (synthetic)
- Top number = finishing position; bottom number in parentheses = starting post position
- Height above line = beaten lengths — closer means a smaller margin
- Border = track conditions: green (FST/GD/FM), yellow (WF/SL/YLD), red (SY/MY/FRZ/SFT/HVY)
- Connecting Line
- Solid = good conditions; dashed = bad conditions
- Line Symbol
- ▲ Triangle = sprint (7f or less); ● Circle = route (more than 7f)
- Days Between Races
- Small number above each bubble (e.g. 19d) = days since the previous race — helps spot freshness, layoffs, and tight scheduling.
- Shaded Band (Bollinger)
- Highlights volatility — a wider band means more variation in recent performance
- Performance Trend
- Straight line showing the overall performance direction — angled up = improving, angled down = declining
- Dashed Reference Line
- AI Opponent = AI analysis class-level par for the race
Notables: [Example] Key race notables appear here, such as post position bias, recent workouts, class changes, and trip notes flagged by our handicappers.
Lane Bias Guide
- Bar Direction
- Bars above the line = more favorable lane • Bars below = less favorable, relative to the average at this track.
- Color
- Green = above-average advantage • Yellow = near-average • Red = below-average • Blue = this horse’s lane.
- Bias Score
- Derived from weighted average finishing positions across historical races at this track. Shown in the tooltip on hover. To use the bias score, calculate your handicap for the horse (e.g. finish position), then add (detrimental bias) or subtract (favorable bias) the bias score.
- Races
- Number of historical races used to compute each lane’s bias score.
Race Pace Bias Guide
- Bar Height & Direction
- Positive (green) = pace favors this horse • Negative (red) = pace works against this horse • Near-zero (amber) = neutral.
- Race Shape
- Projected race shape based on running styles of all horses (e.g. EE = two early horses, EP = one early presser).
- Pace Category
- FAST = contested early pace • LONE EARLY = one speed horse controlling pace • HONEST = moderate early pressure • SLOW = closers’ race.
- Flag (★)
- A star above the bar means this horse’s pace bias figure is ≥ 1.5 — a meaningful pace advantage or disadvantage.
Total Pace Guide
- Bar Segments
- Green = Early Pace (E1) • Amber = Mid Pace (E2) • Red = Late Pace (LP)
- Bar Height
- Total height = sum of E1 + E2 + LP average pace figures. Taller bars indicate a faster-paced horse overall.
- Grades & Rankings
- Hover to see each horse’s letter grade and ranking vs. other horses in this race (e.g. 2/9 = 2nd best of 9).
- Border
- Thicker border = this horse’s post position.
Performance vs. Peers Guide
- Bars (per post)
- Blue = avg career performance • Amber = avg last 3 races • Green = last race (improved vs. avg) • Red = last race (declined vs. avg)
- Trend Line
- Angled line above the bars: rising = improving form • falling = declining form.
- Horizontal Line
- Field average — the mean career performance of all horses in this race.
- Color Circles
- Standard post-position colors below each lane — same as the Total Pace chart.
- Border
- Thicker border = this horse’s post position.
Race Pace Simulation Guide
- Slider
- Drag left→right to advance from gate to finish. Drag all the way back to reset the race.
- Predicted Finish Order
- Factors in contested pace burn, each horse’s effort curve (peaked-early vs. peaked-late), and wide trip cost from outside posts. Updated live when Track Bias changes.
- Pace Scenario
- Lone Speed: single E horse likely rates and holds. Contested: two E horses burn each other — closers benefit. Hot Pace: speed meltdown, deep closers thrive. Soft: no early speed, moderate fractions throughout.
- Track Bias
- Slider below canvas. −2 = strong closer/wet bias; +2 = strong speed/rail bias. Recomputes the predicted finish order.
- Boxed Indicator
- Dashed orange ring = horse is surrounded (rival ahead, rival behind, wall outside). In a real race this horse must find a clear path to run.
- Running Styles
- E/EE = early speed (rushes to rail). P = presser (stalks the pace). S = stalker. SS = slow starter / closer.
| Stat | vs. Current Card | vs. All Horses |
|---|---|---|
| Averages
Career-average metrics across all AI race analysis. Performance and pace averages reflect estimated historical performance; trainer and jockey grades score in-the-money percentages. Grading scale: A = elite • B = above average • C = average • D = below average • F = poor • — = no data |
||
| Pick Pony AI Rating | D | B |
| Speed | A | A |
| Early Pace | D | B |
| Mid Pace | B | A |
| Late Pace | A | A |
| Finish Pos | A | B |
| Dirt Speed | A | A |
| Turf Speed | A | A |
| Distance Speed | D | F |
| Trainer Effectiveness | C | D |
| Jockey Effectiveness | C | D |
| 3rd Party Ratings | A | A |
| Recent
Performance analysis from the horse's recent races, weighted to reflect current form. Sprint and Route FPS (Foot Per Second) measure pace efficiency over the horse's recent sprints and routes respectively. Grading scale: A = elite • B = above average • C = average • D = below average • F = poor • — = no data |
||
| Speed | A | A |
| Early Pace | F | C |
| Mid Pace | D | B |
| Late Pace | A | A |
| Sprint FPS | C | C |
| Route FPS | C | D |
| Trainer Effectiveness | C | D |
| Jockey Effectiveness | C | D |
| 3rd Party Ratings | A | A |
| Predictions
AI-generated projections for the upcoming race, derived from prior AI analysis for speed and pace trends, surface and distance suitability, and current conditions. Grading scale: A = elite • B = above average • C = average • D = below average • F = poor • — = no data |
||
| Speed | A | A |
| Early Pace | D | C |
| Mid Pace | C | B |
| Late Pace | C | C |
A paid membership is required to view all stats. Subscribe now →
Chart Guide (2.0.35)
- Bubbles
- Color = surface: green (turf), brown (dirt), blue (synthetic)
- Top number = finishing position; bottom number in parentheses = starting post position
- Height above line = beaten lengths — closer means a smaller margin
- Border = track conditions: green (FST/GD/FM), yellow (WF/SL/YLD), red (SY/MY/FRZ/SFT/HVY)
- Connecting Line
- Solid = good conditions; dashed = bad conditions
- Line Symbol
- ▲ Triangle = sprint (7f or less); ● Circle = route (more than 7f)
- Days Between Races
- Small number above each bubble (e.g. 19d) = days since the previous race — helps spot freshness, layoffs, and tight scheduling.
- Shaded Band (Bollinger)
- Highlights volatility — a wider band means more variation in recent performance
- Performance Trend
- Straight line showing the overall performance direction — angled up = improving, angled down = declining
- Dashed Reference Line
- AI Opponent = AI analysis class-level par for the race
Notables: [Example] Key race notables appear here, such as post position bias, recent workouts, class changes, and trip notes flagged by our handicappers.
Lane Bias Guide
- Bar Direction
- Bars above the line = more favorable lane • Bars below = less favorable, relative to the average at this track.
- Color
- Green = above-average advantage • Yellow = near-average • Red = below-average • Blue = this horse’s lane.
- Bias Score
- Derived from weighted average finishing positions across historical races at this track. Shown in the tooltip on hover. To use the bias score, calculate your handicap for the horse (e.g. finish position), then add (detrimental bias) or subtract (favorable bias) the bias score.
- Races
- Number of historical races used to compute each lane’s bias score.
Race Pace Bias Guide
- Bar Height & Direction
- Positive (green) = pace favors this horse • Negative (red) = pace works against this horse • Near-zero (amber) = neutral.
- Race Shape
- Projected race shape based on running styles of all horses (e.g. EE = two early horses, EP = one early presser).
- Pace Category
- FAST = contested early pace • LONE EARLY = one speed horse controlling pace • HONEST = moderate early pressure • SLOW = closers’ race.
- Flag (★)
- A star above the bar means this horse’s pace bias figure is ≥ 1.5 — a meaningful pace advantage or disadvantage.
Total Pace Guide
- Bar Segments
- Green = Early Pace (E1) • Amber = Mid Pace (E2) • Red = Late Pace (LP)
- Bar Height
- Total height = sum of E1 + E2 + LP average pace figures. Taller bars indicate a faster-paced horse overall.
- Grades & Rankings
- Hover to see each horse’s letter grade and ranking vs. other horses in this race (e.g. 2/9 = 2nd best of 9).
- Border
- Thicker border = this horse’s post position.
Performance vs. Peers Guide
- Bars (per post)
- Blue = avg career performance • Amber = avg last 3 races • Green = last race (improved vs. avg) • Red = last race (declined vs. avg)
- Trend Line
- Angled line above the bars: rising = improving form • falling = declining form.
- Horizontal Line
- Field average — the mean career performance of all horses in this race.
- Color Circles
- Standard post-position colors below each lane — same as the Total Pace chart.
- Border
- Thicker border = this horse’s post position.
Race Pace Simulation Guide
- Slider
- Drag left→right to advance from gate to finish. Drag all the way back to reset the race.
- Predicted Finish Order
- Factors in contested pace burn, each horse’s effort curve (peaked-early vs. peaked-late), and wide trip cost from outside posts. Updated live when Track Bias changes.
- Pace Scenario
- Lone Speed: single E horse likely rates and holds. Contested: two E horses burn each other — closers benefit. Hot Pace: speed meltdown, deep closers thrive. Soft: no early speed, moderate fractions throughout.
- Track Bias
- Slider below canvas. −2 = strong closer/wet bias; +2 = strong speed/rail bias. Recomputes the predicted finish order.
- Boxed Indicator
- Dashed orange ring = horse is surrounded (rival ahead, rival behind, wall outside). In a real race this horse must find a clear path to run.
- Running Styles
- E/EE = early speed (rushes to rail). P = presser (stalks the pace). S = stalker. SS = slow starter / closer.
| Stat | vs. Current Card | vs. All Horses |
|---|---|---|
| Averages
Career-average metrics across all AI race analysis. Performance and pace averages reflect estimated historical performance; trainer and jockey grades score in-the-money percentages. Grading scale: A = elite • B = above average • C = average • D = below average • F = poor • — = no data |
||
| Pick Pony AI Rating | B | B |
| Speed | B | B |
| Early Pace | B | A |
| Mid Pace | C | A |
| Late Pace | C | B |
| Finish Pos | A | C |
| Dirt Speed | C | A |
| Turf Speed | C | B |
| Distance Speed | C | B |
| Trainer Effectiveness | B | C |
| Jockey Effectiveness | B | C |
| 3rd Party Ratings | C | B |
| Recent
Performance analysis from the horse's recent races, weighted to reflect current form. Sprint and Route FPS (Foot Per Second) measure pace efficiency over the horse's recent sprints and routes respectively. Grading scale: A = elite • B = above average • C = average • D = below average • F = poor • — = no data |
||
| Speed | D | C |
| Early Pace | C | C |
| Mid Pace | C | B |
| Late Pace | A | B |
| Sprint FPS | C | C |
| Route FPS | C | D |
| Trainer Effectiveness | B | C |
| Jockey Effectiveness | B | C |
| 3rd Party Ratings | C | B |
| Predictions
AI-generated projections for the upcoming race, derived from prior AI analysis for speed and pace trends, surface and distance suitability, and current conditions. Grading scale: A = elite • B = above average • C = average • D = below average • F = poor • — = no data |
||
| Speed | B | B |
| Early Pace | B | B |
| Mid Pace | B | B |
| Late Pace | C | C |
A paid membership is required to view all stats. Subscribe now →
Chart Guide (2.0.35)
- Bubbles
- Color = surface: green (turf), brown (dirt), blue (synthetic)
- Top number = finishing position; bottom number in parentheses = starting post position
- Height above line = beaten lengths — closer means a smaller margin
- Border = track conditions: green (FST/GD/FM), yellow (WF/SL/YLD), red (SY/MY/FRZ/SFT/HVY)
- Connecting Line
- Solid = good conditions; dashed = bad conditions
- Line Symbol
- ▲ Triangle = sprint (7f or less); ● Circle = route (more than 7f)
- Days Between Races
- Small number above each bubble (e.g. 19d) = days since the previous race — helps spot freshness, layoffs, and tight scheduling.
- Shaded Band (Bollinger)
- Highlights volatility — a wider band means more variation in recent performance
- Performance Trend
- Straight line showing the overall performance direction — angled up = improving, angled down = declining
- Dashed Reference Line
- AI Opponent = AI analysis class-level par for the race
Notables: [Example] Key race notables appear here, such as post position bias, recent workouts, class changes, and trip notes flagged by our handicappers.
Lane Bias Guide
- Bar Direction
- Bars above the line = more favorable lane • Bars below = less favorable, relative to the average at this track.
- Color
- Green = above-average advantage • Yellow = near-average • Red = below-average • Blue = this horse’s lane.
- Bias Score
- Derived from weighted average finishing positions across historical races at this track. Shown in the tooltip on hover. To use the bias score, calculate your handicap for the horse (e.g. finish position), then add (detrimental bias) or subtract (favorable bias) the bias score.
- Races
- Number of historical races used to compute each lane’s bias score.
Race Pace Bias Guide
- Bar Height & Direction
- Positive (green) = pace favors this horse • Negative (red) = pace works against this horse • Near-zero (amber) = neutral.
- Race Shape
- Projected race shape based on running styles of all horses (e.g. EE = two early horses, EP = one early presser).
- Pace Category
- FAST = contested early pace • LONE EARLY = one speed horse controlling pace • HONEST = moderate early pressure • SLOW = closers’ race.
- Flag (★)
- A star above the bar means this horse’s pace bias figure is ≥ 1.5 — a meaningful pace advantage or disadvantage.
Total Pace Guide
- Bar Segments
- Green = Early Pace (E1) • Amber = Mid Pace (E2) • Red = Late Pace (LP)
- Bar Height
- Total height = sum of E1 + E2 + LP average pace figures. Taller bars indicate a faster-paced horse overall.
- Grades & Rankings
- Hover to see each horse’s letter grade and ranking vs. other horses in this race (e.g. 2/9 = 2nd best of 9).
- Border
- Thicker border = this horse’s post position.
Performance vs. Peers Guide
- Bars (per post)
- Blue = avg career performance • Amber = avg last 3 races • Green = last race (improved vs. avg) • Red = last race (declined vs. avg)
- Trend Line
- Angled line above the bars: rising = improving form • falling = declining form.
- Horizontal Line
- Field average — the mean career performance of all horses in this race.
- Color Circles
- Standard post-position colors below each lane — same as the Total Pace chart.
- Border
- Thicker border = this horse’s post position.
Race Pace Simulation Guide
- Slider
- Drag left→right to advance from gate to finish. Drag all the way back to reset the race.
- Predicted Finish Order
- Factors in contested pace burn, each horse’s effort curve (peaked-early vs. peaked-late), and wide trip cost from outside posts. Updated live when Track Bias changes.
- Pace Scenario
- Lone Speed: single E horse likely rates and holds. Contested: two E horses burn each other — closers benefit. Hot Pace: speed meltdown, deep closers thrive. Soft: no early speed, moderate fractions throughout.
- Track Bias
- Slider below canvas. −2 = strong closer/wet bias; +2 = strong speed/rail bias. Recomputes the predicted finish order.
- Boxed Indicator
- Dashed orange ring = horse is surrounded (rival ahead, rival behind, wall outside). In a real race this horse must find a clear path to run.
- Running Styles
- E/EE = early speed (rushes to rail). P = presser (stalks the pace). S = stalker. SS = slow starter / closer.
| Stat | vs. Current Card | vs. All Horses |
|---|---|---|
| Averages
Career-average metrics across all AI race analysis. Performance and pace averages reflect estimated historical performance; trainer and jockey grades score in-the-money percentages. Grading scale: A = elite • B = above average • C = average • D = below average • F = poor • — = no data |
||
| Pick Pony AI Rating | C | B |
| Speed | D | B |
| Early Pace | C | A |
| Mid Pace | C | A |
| Late Pace | B | B |
| Finish Pos | C | C |
| Dirt Speed | B | A |
| Turf Speed | B | B |
| Distance Speed | A | A |
| Trainer Effectiveness | F | F |
| Jockey Effectiveness | D | F |
| 3rd Party Ratings | D | C |
| Recent
Performance analysis from the horse's recent races, weighted to reflect current form. Sprint and Route FPS (Foot Per Second) measure pace efficiency over the horse's recent sprints and routes respectively. Grading scale: A = elite • B = above average • C = average • D = below average • F = poor • — = no data |
||
| Speed | C | B |
| Early Pace | C | C |
| Mid Pace | C | B |
| Late Pace | C | B |
| Sprint FPS | F | D |
| Route FPS | B | C |
| Trainer Effectiveness | F | F |
| Jockey Effectiveness | D | F |
| 3rd Party Ratings | D | C |
| Predictions
AI-generated projections for the upcoming race, derived from prior AI analysis for speed and pace trends, surface and distance suitability, and current conditions. Grading scale: A = elite • B = above average • C = average • D = below average • F = poor • — = no data |
||
| Speed | D | B |
| Early Pace | C | B |
| Mid Pace | C | B |
| Late Pace | C | C |
A paid membership is required to view all stats. Subscribe now →
Chart Guide (2.0.35)
- Bubbles
- Color = surface: green (turf), brown (dirt), blue (synthetic)
- Top number = finishing position; bottom number in parentheses = starting post position
- Height above line = beaten lengths — closer means a smaller margin
- Border = track conditions: green (FST/GD/FM), yellow (WF/SL/YLD), red (SY/MY/FRZ/SFT/HVY)
- Connecting Line
- Solid = good conditions; dashed = bad conditions
- Line Symbol
- ▲ Triangle = sprint (7f or less); ● Circle = route (more than 7f)
- Days Between Races
- Small number above each bubble (e.g. 19d) = days since the previous race — helps spot freshness, layoffs, and tight scheduling.
- Shaded Band (Bollinger)
- Highlights volatility — a wider band means more variation in recent performance
- Performance Trend
- Straight line showing the overall performance direction — angled up = improving, angled down = declining
- Dashed Reference Line
- AI Opponent = AI analysis class-level par for the race
Notables: [Example] Key race notables appear here, such as post position bias, recent workouts, class changes, and trip notes flagged by our handicappers.
Lane Bias Guide
- Bar Direction
- Bars above the line = more favorable lane • Bars below = less favorable, relative to the average at this track.
- Color
- Green = above-average advantage • Yellow = near-average • Red = below-average • Blue = this horse’s lane.
- Bias Score
- Derived from weighted average finishing positions across historical races at this track. Shown in the tooltip on hover. To use the bias score, calculate your handicap for the horse (e.g. finish position), then add (detrimental bias) or subtract (favorable bias) the bias score.
- Races
- Number of historical races used to compute each lane’s bias score.
Race Pace Bias Guide
- Bar Height & Direction
- Positive (green) = pace favors this horse • Negative (red) = pace works against this horse • Near-zero (amber) = neutral.
- Race Shape
- Projected race shape based on running styles of all horses (e.g. EE = two early horses, EP = one early presser).
- Pace Category
- FAST = contested early pace • LONE EARLY = one speed horse controlling pace • HONEST = moderate early pressure • SLOW = closers’ race.
- Flag (★)
- A star above the bar means this horse’s pace bias figure is ≥ 1.5 — a meaningful pace advantage or disadvantage.
Total Pace Guide
- Bar Segments
- Green = Early Pace (E1) • Amber = Mid Pace (E2) • Red = Late Pace (LP)
- Bar Height
- Total height = sum of E1 + E2 + LP average pace figures. Taller bars indicate a faster-paced horse overall.
- Grades & Rankings
- Hover to see each horse’s letter grade and ranking vs. other horses in this race (e.g. 2/9 = 2nd best of 9).
- Border
- Thicker border = this horse’s post position.
Performance vs. Peers Guide
- Bars (per post)
- Blue = avg career performance • Amber = avg last 3 races • Green = last race (improved vs. avg) • Red = last race (declined vs. avg)
- Trend Line
- Angled line above the bars: rising = improving form • falling = declining form.
- Horizontal Line
- Field average — the mean career performance of all horses in this race.
- Color Circles
- Standard post-position colors below each lane — same as the Total Pace chart.
- Border
- Thicker border = this horse’s post position.
Race Pace Simulation Guide
- Slider
- Drag left→right to advance from gate to finish. Drag all the way back to reset the race.
- Predicted Finish Order
- Factors in contested pace burn, each horse’s effort curve (peaked-early vs. peaked-late), and wide trip cost from outside posts. Updated live when Track Bias changes.
- Pace Scenario
- Lone Speed: single E horse likely rates and holds. Contested: two E horses burn each other — closers benefit. Hot Pace: speed meltdown, deep closers thrive. Soft: no early speed, moderate fractions throughout.
- Track Bias
- Slider below canvas. −2 = strong closer/wet bias; +2 = strong speed/rail bias. Recomputes the predicted finish order.
- Boxed Indicator
- Dashed orange ring = horse is surrounded (rival ahead, rival behind, wall outside). In a real race this horse must find a clear path to run.
- Running Styles
- E/EE = early speed (rushes to rail). P = presser (stalks the pace). S = stalker. SS = slow starter / closer.
| Stat | vs. Current Card | vs. All Horses |
|---|---|---|
| Averages
Career-average metrics across all AI race analysis. Performance and pace averages reflect estimated historical performance; trainer and jockey grades score in-the-money percentages. Grading scale: A = elite • B = above average • C = average • D = below average • F = poor • — = no data |
||
| Pick Pony AI Rating | A | B |
| Speed | A | B |
| Early Pace | C | B |
| Mid Pace | D | A |
| Late Pace | A | A |
| Finish Pos | C | C |
| Dirt Speed | D | B |
| Turf Speed | D | D |
| Distance Speed | C | B |
| Trainer Effectiveness | A | B |
| Jockey Effectiveness | A | A |
| 3rd Party Ratings | B | B |
| Recent
Performance analysis from the horse's recent races, weighted to reflect current form. Sprint and Route FPS (Foot Per Second) measure pace efficiency over the horse's recent sprints and routes respectively. Grading scale: A = elite • B = above average • C = average • D = below average • F = poor • — = no data |
||
| Speed | A | B |
| Early Pace | B | B |
| Mid Pace | B | A |
| Late Pace | B | B |
| Sprint FPS | A | C |
| Route FPS | A | C |
| Trainer Effectiveness | A | B |
| Jockey Effectiveness | A | A |
| 3rd Party Ratings | B | B |
| Predictions
AI-generated projections for the upcoming race, derived from prior AI analysis for speed and pace trends, surface and distance suitability, and current conditions. Grading scale: A = elite • B = above average • C = average • D = below average • F = poor • — = no data |
||
| Speed | A | B |
| Early Pace | D | C |
| Mid Pace | D | B |
| Late Pace | C | C |
A paid membership is required to view all stats. Subscribe now →
Chart Guide (2.0.35)
- Bubbles
- Color = surface: green (turf), brown (dirt), blue (synthetic)
- Top number = finishing position; bottom number in parentheses = starting post position
- Height above line = beaten lengths — closer means a smaller margin
- Border = track conditions: green (FST/GD/FM), yellow (WF/SL/YLD), red (SY/MY/FRZ/SFT/HVY)
- Connecting Line
- Solid = good conditions; dashed = bad conditions
- Line Symbol
- ▲ Triangle = sprint (7f or less); ● Circle = route (more than 7f)
- Days Between Races
- Small number above each bubble (e.g. 19d) = days since the previous race — helps spot freshness, layoffs, and tight scheduling.
- Shaded Band (Bollinger)
- Highlights volatility — a wider band means more variation in recent performance
- Performance Trend
- Straight line showing the overall performance direction — angled up = improving, angled down = declining
- Dashed Reference Line
- AI Opponent = AI analysis class-level par for the race
Notables: [Example] Key race notables appear here, such as post position bias, recent workouts, class changes, and trip notes flagged by our handicappers.
Lane Bias Guide
- Bar Direction
- Bars above the line = more favorable lane • Bars below = less favorable, relative to the average at this track.
- Color
- Green = above-average advantage • Yellow = near-average • Red = below-average • Blue = this horse’s lane.
- Bias Score
- Derived from weighted average finishing positions across historical races at this track. Shown in the tooltip on hover. To use the bias score, calculate your handicap for the horse (e.g. finish position), then add (detrimental bias) or subtract (favorable bias) the bias score.
- Races
- Number of historical races used to compute each lane’s bias score.
Race Pace Bias Guide
- Bar Height & Direction
- Positive (green) = pace favors this horse • Negative (red) = pace works against this horse • Near-zero (amber) = neutral.
- Race Shape
- Projected race shape based on running styles of all horses (e.g. EE = two early horses, EP = one early presser).
- Pace Category
- FAST = contested early pace • LONE EARLY = one speed horse controlling pace • HONEST = moderate early pressure • SLOW = closers’ race.
- Flag (★)
- A star above the bar means this horse’s pace bias figure is ≥ 1.5 — a meaningful pace advantage or disadvantage.
Total Pace Guide
- Bar Segments
- Green = Early Pace (E1) • Amber = Mid Pace (E2) • Red = Late Pace (LP)
- Bar Height
- Total height = sum of E1 + E2 + LP average pace figures. Taller bars indicate a faster-paced horse overall.
- Grades & Rankings
- Hover to see each horse’s letter grade and ranking vs. other horses in this race (e.g. 2/9 = 2nd best of 9).
- Border
- Thicker border = this horse’s post position.
Performance vs. Peers Guide
- Bars (per post)
- Blue = avg career performance • Amber = avg last 3 races • Green = last race (improved vs. avg) • Red = last race (declined vs. avg)
- Trend Line
- Angled line above the bars: rising = improving form • falling = declining form.
- Horizontal Line
- Field average — the mean career performance of all horses in this race.
- Color Circles
- Standard post-position colors below each lane — same as the Total Pace chart.
- Border
- Thicker border = this horse’s post position.
Race Pace Simulation Guide
- Slider
- Drag left→right to advance from gate to finish. Drag all the way back to reset the race.
- Predicted Finish Order
- Factors in contested pace burn, each horse’s effort curve (peaked-early vs. peaked-late), and wide trip cost from outside posts. Updated live when Track Bias changes.
- Pace Scenario
- Lone Speed: single E horse likely rates and holds. Contested: two E horses burn each other — closers benefit. Hot Pace: speed meltdown, deep closers thrive. Soft: no early speed, moderate fractions throughout.
- Track Bias
- Slider below canvas. −2 = strong closer/wet bias; +2 = strong speed/rail bias. Recomputes the predicted finish order.
- Boxed Indicator
- Dashed orange ring = horse is surrounded (rival ahead, rival behind, wall outside). In a real race this horse must find a clear path to run.
- Running Styles
- E/EE = early speed (rushes to rail). P = presser (stalks the pace). S = stalker. SS = slow starter / closer.
| Stat | vs. Current Card | vs. All Horses |
|---|---|---|
| Averages
Career-average metrics across all AI race analysis. Performance and pace averages reflect estimated historical performance; trainer and jockey grades score in-the-money percentages. Grading scale: A = elite • B = above average • C = average • D = below average • F = poor • — = no data |
||
| Pick Pony AI Rating | A | A |
| Speed | C | B |
| Early Pace | A | A |
| Mid Pace | A | A |
| Late Pace | D | D |
| Finish Pos | C | C |
| Dirt Speed | B | A |
| Turf Speed | D | D |
| Distance Speed | A | A |
| Trainer Effectiveness | A | C |
| Jockey Effectiveness | A | C |
| 3rd Party Ratings | A | B |
| Recent
Performance analysis from the horse's recent races, weighted to reflect current form. Sprint and Route FPS (Foot Per Second) measure pace efficiency over the horse's recent sprints and routes respectively. Grading scale: A = elite • B = above average • C = average • D = below average • F = poor • — = no data |
||
| Speed | C | B |
| Early Pace | A | A |
| Mid Pace | A | A |
| Late Pace | D | D |
| Sprint FPS | A | B |
| Route FPS | A | C |
| Trainer Effectiveness | A | C |
| Jockey Effectiveness | A | C |
| 3rd Party Ratings | A | B |
| Predictions
AI-generated projections for the upcoming race, derived from prior AI analysis for speed and pace trends, surface and distance suitability, and current conditions. Grading scale: A = elite • B = above average • C = average • D = below average • F = poor • — = no data |
||
| Speed | C | B |
| Early Pace | A | A |
| Mid Pace | A | A |
| Late Pace | C | C |
A paid membership is required to view all stats. Subscribe now →
Chart Guide (2.0.35)
- Bubbles
- Color = surface: green (turf), brown (dirt), blue (synthetic)
- Top number = finishing position; bottom number in parentheses = starting post position
- Height above line = beaten lengths — closer means a smaller margin
- Border = track conditions: green (FST/GD/FM), yellow (WF/SL/YLD), red (SY/MY/FRZ/SFT/HVY)
- Connecting Line
- Solid = good conditions; dashed = bad conditions
- Line Symbol
- ▲ Triangle = sprint (7f or less); ● Circle = route (more than 7f)
- Days Between Races
- Small number above each bubble (e.g. 19d) = days since the previous race — helps spot freshness, layoffs, and tight scheduling.
- Shaded Band (Bollinger)
- Highlights volatility — a wider band means more variation in recent performance
- Performance Trend
- Straight line showing the overall performance direction — angled up = improving, angled down = declining
- Dashed Reference Line
- AI Opponent = AI analysis class-level par for the race
Notables: [Example] Key race notables appear here, such as post position bias, recent workouts, class changes, and trip notes flagged by our handicappers.
Lane Bias Guide
- Bar Direction
- Bars above the line = more favorable lane • Bars below = less favorable, relative to the average at this track.
- Color
- Green = above-average advantage • Yellow = near-average • Red = below-average • Blue = this horse’s lane.
- Bias Score
- Derived from weighted average finishing positions across historical races at this track. Shown in the tooltip on hover. To use the bias score, calculate your handicap for the horse (e.g. finish position), then add (detrimental bias) or subtract (favorable bias) the bias score.
- Races
- Number of historical races used to compute each lane’s bias score.
Race Pace Bias Guide
- Bar Height & Direction
- Positive (green) = pace favors this horse • Negative (red) = pace works against this horse • Near-zero (amber) = neutral.
- Race Shape
- Projected race shape based on running styles of all horses (e.g. EE = two early horses, EP = one early presser).
- Pace Category
- FAST = contested early pace • LONE EARLY = one speed horse controlling pace • HONEST = moderate early pressure • SLOW = closers’ race.
- Flag (★)
- A star above the bar means this horse’s pace bias figure is ≥ 1.5 — a meaningful pace advantage or disadvantage.
Total Pace Guide
- Bar Segments
- Green = Early Pace (E1) • Amber = Mid Pace (E2) • Red = Late Pace (LP)
- Bar Height
- Total height = sum of E1 + E2 + LP average pace figures. Taller bars indicate a faster-paced horse overall.
- Grades & Rankings
- Hover to see each horse’s letter grade and ranking vs. other horses in this race (e.g. 2/9 = 2nd best of 9).
- Border
- Thicker border = this horse’s post position.
Performance vs. Peers Guide
- Bars (per post)
- Blue = avg career performance • Amber = avg last 3 races • Green = last race (improved vs. avg) • Red = last race (declined vs. avg)
- Trend Line
- Angled line above the bars: rising = improving form • falling = declining form.
- Horizontal Line
- Field average — the mean career performance of all horses in this race.
- Color Circles
- Standard post-position colors below each lane — same as the Total Pace chart.
- Border
- Thicker border = this horse’s post position.
Race Pace Simulation Guide
- Slider
- Drag left→right to advance from gate to finish. Drag all the way back to reset the race.
- Predicted Finish Order
- Factors in contested pace burn, each horse’s effort curve (peaked-early vs. peaked-late), and wide trip cost from outside posts. Updated live when Track Bias changes.
- Pace Scenario
- Lone Speed: single E horse likely rates and holds. Contested: two E horses burn each other — closers benefit. Hot Pace: speed meltdown, deep closers thrive. Soft: no early speed, moderate fractions throughout.
- Track Bias
- Slider below canvas. −2 = strong closer/wet bias; +2 = strong speed/rail bias. Recomputes the predicted finish order.
- Boxed Indicator
- Dashed orange ring = horse is surrounded (rival ahead, rival behind, wall outside). In a real race this horse must find a clear path to run.
- Running Styles
- E/EE = early speed (rushes to rail). P = presser (stalks the pace). S = stalker. SS = slow starter / closer.
| Stat | vs. Current Card | vs. All Horses |
|---|---|---|
| Averages
Career-average metrics across all AI race analysis. Performance and pace averages reflect estimated historical performance; trainer and jockey grades score in-the-money percentages. Grading scale: A = elite • B = above average • C = average • D = below average • F = poor • — = no data |
||
| Pick Pony AI Rating | B | A |
| Speed | B | A |
| Early Pace | A | A |
| Mid Pace | A | A |
| Late Pace | C | B |
| Finish Pos | C | C |
| Dirt Speed | A | A |
| Turf Speed | B | A |
| Distance Speed | A | A |
| Trainer Effectiveness | D | C |
| Jockey Effectiveness | C | C |
| 3rd Party Ratings | C | A |
| Recent
Performance analysis from the horse's recent races, weighted to reflect current form. Sprint and Route FPS (Foot Per Second) measure pace efficiency over the horse's recent sprints and routes respectively. Grading scale: A = elite • B = above average • C = average • D = below average • F = poor • — = no data |
||
| Speed | F | B |
| Early Pace | A | A |
| Mid Pace | A | A |
| Late Pace | F | D |
| Sprint FPS | A | A |
| Route FPS | B | B |
| Trainer Effectiveness | D | C |
| Jockey Effectiveness | C | C |
| 3rd Party Ratings | C | A |
| Predictions
AI-generated projections for the upcoming race, derived from prior AI analysis for speed and pace trends, surface and distance suitability, and current conditions. Grading scale: A = elite • B = above average • C = average • D = below average • F = poor • — = no data |
||
| Speed | B | A |
| Early Pace | B | A |
| Mid Pace | B | A |
| Late Pace | C | C |
A paid membership is required to view all stats. Subscribe now →
Chart Guide (2.0.35)
- Bubbles
- Color = surface: green (turf), brown (dirt), blue (synthetic)
- Top number = finishing position; bottom number in parentheses = starting post position
- Height above line = beaten lengths — closer means a smaller margin
- Border = track conditions: green (FST/GD/FM), yellow (WF/SL/YLD), red (SY/MY/FRZ/SFT/HVY)
- Connecting Line
- Solid = good conditions; dashed = bad conditions
- Line Symbol
- ▲ Triangle = sprint (7f or less); ● Circle = route (more than 7f)
- Days Between Races
- Small number above each bubble (e.g. 19d) = days since the previous race — helps spot freshness, layoffs, and tight scheduling.
- Shaded Band (Bollinger)
- Highlights volatility — a wider band means more variation in recent performance
- Performance Trend
- Straight line showing the overall performance direction — angled up = improving, angled down = declining
- Dashed Reference Line
- AI Opponent = AI analysis class-level par for the race
Notables: [Example] Key race notables appear here, such as post position bias, recent workouts, class changes, and trip notes flagged by our handicappers.
Lane Bias Guide
- Bar Direction
- Bars above the line = more favorable lane • Bars below = less favorable, relative to the average at this track.
- Color
- Green = above-average advantage • Yellow = near-average • Red = below-average • Blue = this horse’s lane.
- Bias Score
- Derived from weighted average finishing positions across historical races at this track. Shown in the tooltip on hover. To use the bias score, calculate your handicap for the horse (e.g. finish position), then add (detrimental bias) or subtract (favorable bias) the bias score.
- Races
- Number of historical races used to compute each lane’s bias score.
Race Pace Bias Guide
- Bar Height & Direction
- Positive (green) = pace favors this horse • Negative (red) = pace works against this horse • Near-zero (amber) = neutral.
- Race Shape
- Projected race shape based on running styles of all horses (e.g. EE = two early horses, EP = one early presser).
- Pace Category
- FAST = contested early pace • LONE EARLY = one speed horse controlling pace • HONEST = moderate early pressure • SLOW = closers’ race.
- Flag (★)
- A star above the bar means this horse’s pace bias figure is ≥ 1.5 — a meaningful pace advantage or disadvantage.
Total Pace Guide
- Bar Segments
- Green = Early Pace (E1) • Amber = Mid Pace (E2) • Red = Late Pace (LP)
- Bar Height
- Total height = sum of E1 + E2 + LP average pace figures. Taller bars indicate a faster-paced horse overall.
- Grades & Rankings
- Hover to see each horse’s letter grade and ranking vs. other horses in this race (e.g. 2/9 = 2nd best of 9).
- Border
- Thicker border = this horse’s post position.
Performance vs. Peers Guide
- Bars (per post)
- Blue = avg career performance • Amber = avg last 3 races • Green = last race (improved vs. avg) • Red = last race (declined vs. avg)
- Trend Line
- Angled line above the bars: rising = improving form • falling = declining form.
- Horizontal Line
- Field average — the mean career performance of all horses in this race.
- Color Circles
- Standard post-position colors below each lane — same as the Total Pace chart.
- Border
- Thicker border = this horse’s post position.
Race Pace Simulation Guide
- Slider
- Drag left→right to advance from gate to finish. Drag all the way back to reset the race.
- Predicted Finish Order
- Factors in contested pace burn, each horse’s effort curve (peaked-early vs. peaked-late), and wide trip cost from outside posts. Updated live when Track Bias changes.
- Pace Scenario
- Lone Speed: single E horse likely rates and holds. Contested: two E horses burn each other — closers benefit. Hot Pace: speed meltdown, deep closers thrive. Soft: no early speed, moderate fractions throughout.
- Track Bias
- Slider below canvas. −2 = strong closer/wet bias; +2 = strong speed/rail bias. Recomputes the predicted finish order.
- Boxed Indicator
- Dashed orange ring = horse is surrounded (rival ahead, rival behind, wall outside). In a real race this horse must find a clear path to run.
- Running Styles
- E/EE = early speed (rushes to rail). P = presser (stalks the pace). S = stalker. SS = slow starter / closer.
| Stat | vs. Current Card | vs. All Horses |
|---|---|---|
| Averages
Career-average metrics across all AI race analysis. Performance and pace averages reflect estimated historical performance; trainer and jockey grades score in-the-money percentages. Grading scale: A = elite • B = above average • C = average • D = below average • F = poor • — = no data |
||
| Pick Pony AI Rating | D | B |
| Speed | D | A |
| Early Pace | D | A |
| Mid Pace | D | A |
| Late Pace | A | A |
| Finish Pos | C | B |
| Dirt Speed | D | A |
| Turf Speed | D | B |
| Distance Speed | D | A |
| Trainer Effectiveness | A | A |
| Jockey Effectiveness | A | A |
| 3rd Party Ratings | A | A |
| Recent
Performance analysis from the horse's recent races, weighted to reflect current form. Sprint and Route FPS (Foot Per Second) measure pace efficiency over the horse's recent sprints and routes respectively. Grading scale: A = elite • B = above average • C = average • D = below average • F = poor • — = no data |
||
| Speed | C | A |
| Early Pace | D | B |
| Mid Pace | D | A |
| Late Pace | B | A |
| Sprint FPS | C | C |
| Route FPS | C | C |
| Trainer Effectiveness | A | A |
| Jockey Effectiveness | A | A |
| 3rd Party Ratings | A | A |
| Predictions
AI-generated projections for the upcoming race, derived from prior AI analysis for speed and pace trends, surface and distance suitability, and current conditions. Grading scale: A = elite • B = above average • C = average • D = below average • F = poor • — = no data |
||
| Speed | D | A |
| Early Pace | C | B |
| Mid Pace | D | A |
| Late Pace | C | C |
A paid membership is required to view all stats. Subscribe now →
Chart Guide (2.0.35)
- Bubbles
- Color = surface: green (turf), brown (dirt), blue (synthetic)
- Top number = finishing position; bottom number in parentheses = starting post position
- Height above line = beaten lengths — closer means a smaller margin
- Border = track conditions: green (FST/GD/FM), yellow (WF/SL/YLD), red (SY/MY/FRZ/SFT/HVY)
- Connecting Line
- Solid = good conditions; dashed = bad conditions
- Line Symbol
- ▲ Triangle = sprint (7f or less); ● Circle = route (more than 7f)
- Days Between Races
- Small number above each bubble (e.g. 19d) = days since the previous race — helps spot freshness, layoffs, and tight scheduling.
- Shaded Band (Bollinger)
- Highlights volatility — a wider band means more variation in recent performance
- Performance Trend
- Straight line showing the overall performance direction — angled up = improving, angled down = declining
- Dashed Reference Line
- AI Opponent = AI analysis class-level par for the race
Notables: [Example] Key race notables appear here, such as post position bias, recent workouts, class changes, and trip notes flagged by our handicappers.
Lane Bias Guide
- Bar Direction
- Bars above the line = more favorable lane • Bars below = less favorable, relative to the average at this track.
- Color
- Green = above-average advantage • Yellow = near-average • Red = below-average • Blue = this horse’s lane.
- Bias Score
- Derived from weighted average finishing positions across historical races at this track. Shown in the tooltip on hover. To use the bias score, calculate your handicap for the horse (e.g. finish position), then add (detrimental bias) or subtract (favorable bias) the bias score.
- Races
- Number of historical races used to compute each lane’s bias score.
Race Pace Bias Guide
- Bar Height & Direction
- Positive (green) = pace favors this horse • Negative (red) = pace works against this horse • Near-zero (amber) = neutral.
- Race Shape
- Projected race shape based on running styles of all horses (e.g. EE = two early horses, EP = one early presser).
- Pace Category
- FAST = contested early pace • LONE EARLY = one speed horse controlling pace • HONEST = moderate early pressure • SLOW = closers’ race.
- Flag (★)
- A star above the bar means this horse’s pace bias figure is ≥ 1.5 — a meaningful pace advantage or disadvantage.
Total Pace Guide
- Bar Segments
- Green = Early Pace (E1) • Amber = Mid Pace (E2) • Red = Late Pace (LP)
- Bar Height
- Total height = sum of E1 + E2 + LP average pace figures. Taller bars indicate a faster-paced horse overall.
- Grades & Rankings
- Hover to see each horse’s letter grade and ranking vs. other horses in this race (e.g. 2/9 = 2nd best of 9).
- Border
- Thicker border = this horse’s post position.
Performance vs. Peers Guide
- Bars (per post)
- Blue = avg career performance • Amber = avg last 3 races • Green = last race (improved vs. avg) • Red = last race (declined vs. avg)
- Trend Line
- Angled line above the bars: rising = improving form • falling = declining form.
- Horizontal Line
- Field average — the mean career performance of all horses in this race.
- Color Circles
- Standard post-position colors below each lane — same as the Total Pace chart.
- Border
- Thicker border = this horse’s post position.
Race Pace Simulation Guide
- Slider
- Drag left→right to advance from gate to finish. Drag all the way back to reset the race.
- Predicted Finish Order
- Factors in contested pace burn, each horse’s effort curve (peaked-early vs. peaked-late), and wide trip cost from outside posts. Updated live when Track Bias changes.
- Pace Scenario
- Lone Speed: single E horse likely rates and holds. Contested: two E horses burn each other — closers benefit. Hot Pace: speed meltdown, deep closers thrive. Soft: no early speed, moderate fractions throughout.
- Track Bias
- Slider below canvas. −2 = strong closer/wet bias; +2 = strong speed/rail bias. Recomputes the predicted finish order.
- Boxed Indicator
- Dashed orange ring = horse is surrounded (rival ahead, rival behind, wall outside). In a real race this horse must find a clear path to run.
- Running Styles
- E/EE = early speed (rushes to rail). P = presser (stalks the pace). S = stalker. SS = slow starter / closer.
| Stat | vs. Current Card | vs. All Horses |
|---|---|---|
| Averages
Career-average metrics across all AI race analysis. Performance and pace averages reflect estimated historical performance; trainer and jockey grades score in-the-money percentages. Grading scale: A = elite • B = above average • C = average • D = below average • F = poor • — = no data |
||
| Pick Pony AI Rating | C | A |
| Speed | F | A |
| Early Pace | C | A |
| Mid Pace | C | A |
| Late Pace | D | B |
| Finish Pos | D | C |
| Dirt Speed | F | A |
| Turf Speed | A | A |
| Distance Speed | F | A |
| Trainer Effectiveness | F | D |
| Jockey Effectiveness | F | C |
| 3rd Party Ratings | D | A |
| Recent
Performance analysis from the horse's recent races, weighted to reflect current form. Sprint and Route FPS (Foot Per Second) measure pace efficiency over the horse's recent sprints and routes respectively. Grading scale: A = elite • B = above average • C = average • D = below average • F = poor • — = no data |
||
| Speed | D | A |
| Early Pace | C | A |
| Mid Pace | C | A |
| Late Pace | C | B |
| Sprint FPS | C | C |
| Route FPS | A | B |
| Trainer Effectiveness | F | D |
| Jockey Effectiveness | F | C |
| 3rd Party Ratings | D | A |
| Predictions
AI-generated projections for the upcoming race, derived from prior AI analysis for speed and pace trends, surface and distance suitability, and current conditions. Grading scale: A = elite • B = above average • C = average • D = below average • F = poor • — = no data |
||
| Speed | F | A |
| Early Pace | F | D |
| Mid Pace | C | A |
| Late Pace | C | C |
A paid membership is required to view all stats. Subscribe now →
Chart Guide (2.0.35)
- Bubbles
- Color = surface: green (turf), brown (dirt), blue (synthetic)
- Top number = finishing position; bottom number in parentheses = starting post position
- Height above line = beaten lengths — closer means a smaller margin
- Border = track conditions: green (FST/GD/FM), yellow (WF/SL/YLD), red (SY/MY/FRZ/SFT/HVY)
- Connecting Line
- Solid = good conditions; dashed = bad conditions
- Line Symbol
- ▲ Triangle = sprint (7f or less); ● Circle = route (more than 7f)
- Days Between Races
- Small number above each bubble (e.g. 19d) = days since the previous race — helps spot freshness, layoffs, and tight scheduling.
- Shaded Band (Bollinger)
- Highlights volatility — a wider band means more variation in recent performance
- Performance Trend
- Straight line showing the overall performance direction — angled up = improving, angled down = declining
- Dashed Reference Line
- AI Opponent = AI analysis class-level par for the race
Notables: [Example] Key race notables appear here, such as post position bias, recent workouts, class changes, and trip notes flagged by our handicappers.
Lane Bias Guide
- Bar Direction
- Bars above the line = more favorable lane • Bars below = less favorable, relative to the average at this track.
- Color
- Green = above-average advantage • Yellow = near-average • Red = below-average • Blue = this horse’s lane.
- Bias Score
- Derived from weighted average finishing positions across historical races at this track. Shown in the tooltip on hover. To use the bias score, calculate your handicap for the horse (e.g. finish position), then add (detrimental bias) or subtract (favorable bias) the bias score.
- Races
- Number of historical races used to compute each lane’s bias score.
Race Pace Bias Guide
- Bar Height & Direction
- Positive (green) = pace favors this horse • Negative (red) = pace works against this horse • Near-zero (amber) = neutral.
- Race Shape
- Projected race shape based on running styles of all horses (e.g. EE = two early horses, EP = one early presser).
- Pace Category
- FAST = contested early pace • LONE EARLY = one speed horse controlling pace • HONEST = moderate early pressure • SLOW = closers’ race.
- Flag (★)
- A star above the bar means this horse’s pace bias figure is ≥ 1.5 — a meaningful pace advantage or disadvantage.
Total Pace Guide
- Bar Segments
- Green = Early Pace (E1) • Amber = Mid Pace (E2) • Red = Late Pace (LP)
- Bar Height
- Total height = sum of E1 + E2 + LP average pace figures. Taller bars indicate a faster-paced horse overall.
- Grades & Rankings
- Hover to see each horse’s letter grade and ranking vs. other horses in this race (e.g. 2/9 = 2nd best of 9).
- Border
- Thicker border = this horse’s post position.
Performance vs. Peers Guide
- Bars (per post)
- Blue = avg career performance • Amber = avg last 3 races • Green = last race (improved vs. avg) • Red = last race (declined vs. avg)
- Trend Line
- Angled line above the bars: rising = improving form • falling = declining form.
- Horizontal Line
- Field average — the mean career performance of all horses in this race.
- Color Circles
- Standard post-position colors below each lane — same as the Total Pace chart.
- Border
- Thicker border = this horse’s post position.
Race Pace Simulation Guide
- Slider
- Drag left→right to advance from gate to finish. Drag all the way back to reset the race.
- Predicted Finish Order
- Factors in contested pace burn, each horse’s effort curve (peaked-early vs. peaked-late), and wide trip cost from outside posts. Updated live when Track Bias changes.
- Pace Scenario
- Lone Speed: single E horse likely rates and holds. Contested: two E horses burn each other — closers benefit. Hot Pace: speed meltdown, deep closers thrive. Soft: no early speed, moderate fractions throughout.
- Track Bias
- Slider below canvas. −2 = strong closer/wet bias; +2 = strong speed/rail bias. Recomputes the predicted finish order.
- Boxed Indicator
- Dashed orange ring = horse is surrounded (rival ahead, rival behind, wall outside). In a real race this horse must find a clear path to run.
- Running Styles
- E/EE = early speed (rushes to rail). P = presser (stalks the pace). S = stalker. SS = slow starter / closer.
| Stat | vs. Current Card | vs. All Horses |
|---|---|---|
| Averages
Career-average metrics across all AI race analysis. Performance and pace averages reflect estimated historical performance; trainer and jockey grades score in-the-money percentages. Grading scale: A = elite • B = above average • C = average • D = below average • F = poor • — = no data |
||
| Pick Pony AI Rating | C | A |
| Speed | C | A |
| Early Pace | C | A |
| Mid Pace | C | A |
| Late Pace | B | A |
| Finish Pos | A | A |
| Dirt Speed | C | A |
| Turf Speed | C | B |
| Distance Speed | D | A |
| Trainer Effectiveness | B | B |
| Jockey Effectiveness | D | C |
| 3rd Party Ratings | C | A |
| Recent
Performance analysis from the horse's recent races, weighted to reflect current form. Sprint and Route FPS (Foot Per Second) measure pace efficiency over the horse's recent sprints and routes respectively. Grading scale: A = elite • B = above average • C = average • D = below average • F = poor • — = no data |
||
| Speed | C | A |
| Early Pace | C | A |
| Mid Pace | C | A |
| Late Pace | C | B |
| Sprint FPS | D | D |
| Route FPS | D | C |
| Trainer Effectiveness | B | B |
| Jockey Effectiveness | D | C |
| 3rd Party Ratings | C | A |
| Predictions
AI-generated projections for the upcoming race, derived from prior AI analysis for speed and pace trends, surface and distance suitability, and current conditions. Grading scale: A = elite • B = above average • C = average • D = below average • F = poor • — = no data |
||
| Speed | C | A |
| Early Pace | C | C |
| Mid Pace | C | A |
| Late Pace | C | C |
A paid membership is required to view all stats. Subscribe now →
Chart Guide (2.0.35)
- Bubbles
- Color = surface: green (turf), brown (dirt), blue (synthetic)
- Top number = finishing position; bottom number in parentheses = starting post position
- Height above line = beaten lengths — closer means a smaller margin
- Border = track conditions: green (FST/GD/FM), yellow (WF/SL/YLD), red (SY/MY/FRZ/SFT/HVY)
- Connecting Line
- Solid = good conditions; dashed = bad conditions
- Line Symbol
- ▲ Triangle = sprint (7f or less); ● Circle = route (more than 7f)
- Days Between Races
- Small number above each bubble (e.g. 19d) = days since the previous race — helps spot freshness, layoffs, and tight scheduling.
- Shaded Band (Bollinger)
- Highlights volatility — a wider band means more variation in recent performance
- Performance Trend
- Straight line showing the overall performance direction — angled up = improving, angled down = declining
- Dashed Reference Line
- AI Opponent = AI analysis class-level par for the race
Notables: [Example] Key race notables appear here, such as post position bias, recent workouts, class changes, and trip notes flagged by our handicappers.
Lane Bias Guide
- Bar Direction
- Bars above the line = more favorable lane • Bars below = less favorable, relative to the average at this track.
- Color
- Green = above-average advantage • Yellow = near-average • Red = below-average • Blue = this horse’s lane.
- Bias Score
- Derived from weighted average finishing positions across historical races at this track. Shown in the tooltip on hover. To use the bias score, calculate your handicap for the horse (e.g. finish position), then add (detrimental bias) or subtract (favorable bias) the bias score.
- Races
- Number of historical races used to compute each lane’s bias score.
Race Pace Bias Guide
- Bar Height & Direction
- Positive (green) = pace favors this horse • Negative (red) = pace works against this horse • Near-zero (amber) = neutral.
- Race Shape
- Projected race shape based on running styles of all horses (e.g. EE = two early horses, EP = one early presser).
- Pace Category
- FAST = contested early pace • LONE EARLY = one speed horse controlling pace • HONEST = moderate early pressure • SLOW = closers’ race.
- Flag (★)
- A star above the bar means this horse’s pace bias figure is ≥ 1.5 — a meaningful pace advantage or disadvantage.
Total Pace Guide
- Bar Segments
- Green = Early Pace (E1) • Amber = Mid Pace (E2) • Red = Late Pace (LP)
- Bar Height
- Total height = sum of E1 + E2 + LP average pace figures. Taller bars indicate a faster-paced horse overall.
- Grades & Rankings
- Hover to see each horse’s letter grade and ranking vs. other horses in this race (e.g. 2/9 = 2nd best of 9).
- Border
- Thicker border = this horse’s post position.
Performance vs. Peers Guide
- Bars (per post)
- Blue = avg career performance • Amber = avg last 3 races • Green = last race (improved vs. avg) • Red = last race (declined vs. avg)
- Trend Line
- Angled line above the bars: rising = improving form • falling = declining form.
- Horizontal Line
- Field average — the mean career performance of all horses in this race.
- Color Circles
- Standard post-position colors below each lane — same as the Total Pace chart.
- Border
- Thicker border = this horse’s post position.
Race Pace Simulation Guide
- Slider
- Drag left→right to advance from gate to finish. Drag all the way back to reset the race.
- Predicted Finish Order
- Factors in contested pace burn, each horse’s effort curve (peaked-early vs. peaked-late), and wide trip cost from outside posts. Updated live when Track Bias changes.
- Pace Scenario
- Lone Speed: single E horse likely rates and holds. Contested: two E horses burn each other — closers benefit. Hot Pace: speed meltdown, deep closers thrive. Soft: no early speed, moderate fractions throughout.
- Track Bias
- Slider below canvas. −2 = strong closer/wet bias; +2 = strong speed/rail bias. Recomputes the predicted finish order.
- Boxed Indicator
- Dashed orange ring = horse is surrounded (rival ahead, rival behind, wall outside). In a real race this horse must find a clear path to run.
- Running Styles
- E/EE = early speed (rushes to rail). P = presser (stalks the pace). S = stalker. SS = slow starter / closer.
| Stat | vs. Current Card | vs. All Horses |
|---|---|---|
| Averages
Career-average metrics across all AI race analysis. Performance and pace averages reflect estimated historical performance; trainer and jockey grades score in-the-money percentages. Grading scale: A = elite • B = above average • C = average • D = below average • F = poor • — = no data |
||
| Pick Pony AI Rating | F | B |
| Speed | A | A |
| Early Pace | F | B |
| Mid Pace | F | A |
| Late Pace | A | A |
| Finish Pos | F | D |
| Dirt Speed | C | A |
| Turf Speed | A | A |
| Distance Speed | B | A |
| Trainer Effectiveness | D | C |
| Jockey Effectiveness | B | B |
| 3rd Party Ratings | F | A |
| Recent
Performance analysis from the horse's recent races, weighted to reflect current form. Sprint and Route FPS (Foot Per Second) measure pace efficiency over the horse's recent sprints and routes respectively. Grading scale: A = elite • B = above average • C = average • D = below average • F = poor • — = no data |
||
| Speed | B | A |
| Early Pace | F | C |
| Mid Pace | F | B |
| Late Pace | A | A |
| Sprint FPS | F | D |
| Route FPS | F | D |
| Trainer Effectiveness | D | C |
| Jockey Effectiveness | B | B |
| 3rd Party Ratings | F | A |
| Predictions
AI-generated projections for the upcoming race, derived from prior AI analysis for speed and pace trends, surface and distance suitability, and current conditions. Grading scale: A = elite • B = above average • C = average • D = below average • F = poor • — = no data |
||
| Speed | A | A |
| Early Pace | D | D |
| Mid Pace | F | B |
| Late Pace | C | C |
A paid membership is required to view all stats. Subscribe now →
Chart Guide (2.0.35)
- Bubbles
- Color = surface: green (turf), brown (dirt), blue (synthetic)
- Top number = finishing position; bottom number in parentheses = starting post position
- Height above line = beaten lengths — closer means a smaller margin
- Border = track conditions: green (FST/GD/FM), yellow (WF/SL/YLD), red (SY/MY/FRZ/SFT/HVY)
- Connecting Line
- Solid = good conditions; dashed = bad conditions
- Line Symbol
- ▲ Triangle = sprint (7f or less); ● Circle = route (more than 7f)
- Days Between Races
- Small number above each bubble (e.g. 19d) = days since the previous race — helps spot freshness, layoffs, and tight scheduling.
- Shaded Band (Bollinger)
- Highlights volatility — a wider band means more variation in recent performance
- Performance Trend
- Straight line showing the overall performance direction — angled up = improving, angled down = declining
- Dashed Reference Line
- AI Opponent = AI analysis class-level par for the race
Notables: [Example] Key race notables appear here, such as post position bias, recent workouts, class changes, and trip notes flagged by our handicappers.
Lane Bias Guide
- Bar Direction
- Bars above the line = more favorable lane • Bars below = less favorable, relative to the average at this track.
- Color
- Green = above-average advantage • Yellow = near-average • Red = below-average • Blue = this horse’s lane.
- Bias Score
- Derived from weighted average finishing positions across historical races at this track. Shown in the tooltip on hover. To use the bias score, calculate your handicap for the horse (e.g. finish position), then add (detrimental bias) or subtract (favorable bias) the bias score.
- Races
- Number of historical races used to compute each lane’s bias score.
Race Pace Bias Guide
- Bar Height & Direction
- Positive (green) = pace favors this horse • Negative (red) = pace works against this horse • Near-zero (amber) = neutral.
- Race Shape
- Projected race shape based on running styles of all horses (e.g. EE = two early horses, EP = one early presser).
- Pace Category
- FAST = contested early pace • LONE EARLY = one speed horse controlling pace • HONEST = moderate early pressure • SLOW = closers’ race.
- Flag (★)
- A star above the bar means this horse’s pace bias figure is ≥ 1.5 — a meaningful pace advantage or disadvantage.
Total Pace Guide
- Bar Segments
- Green = Early Pace (E1) • Amber = Mid Pace (E2) • Red = Late Pace (LP)
- Bar Height
- Total height = sum of E1 + E2 + LP average pace figures. Taller bars indicate a faster-paced horse overall.
- Grades & Rankings
- Hover to see each horse’s letter grade and ranking vs. other horses in this race (e.g. 2/9 = 2nd best of 9).
- Border
- Thicker border = this horse’s post position.
Performance vs. Peers Guide
- Bars (per post)
- Blue = avg career performance • Amber = avg last 3 races • Green = last race (improved vs. avg) • Red = last race (declined vs. avg)
- Trend Line
- Angled line above the bars: rising = improving form • falling = declining form.
- Horizontal Line
- Field average — the mean career performance of all horses in this race.
- Color Circles
- Standard post-position colors below each lane — same as the Total Pace chart.
- Border
- Thicker border = this horse’s post position.
Race Pace Simulation Guide
- Slider
- Drag left→right to advance from gate to finish. Drag all the way back to reset the race.
- Predicted Finish Order
- Factors in contested pace burn, each horse’s effort curve (peaked-early vs. peaked-late), and wide trip cost from outside posts. Updated live when Track Bias changes.
- Pace Scenario
- Lone Speed: single E horse likely rates and holds. Contested: two E horses burn each other — closers benefit. Hot Pace: speed meltdown, deep closers thrive. Soft: no early speed, moderate fractions throughout.
- Track Bias
- Slider below canvas. −2 = strong closer/wet bias; +2 = strong speed/rail bias. Recomputes the predicted finish order.
- Boxed Indicator
- Dashed orange ring = horse is surrounded (rival ahead, rival behind, wall outside). In a real race this horse must find a clear path to run.
- Running Styles
- E/EE = early speed (rushes to rail). P = presser (stalks the pace). S = stalker. SS = slow starter / closer.
| Stat | vs. Current Card | vs. All Horses |
|---|---|---|
| Averages
Career-average metrics across all AI race analysis. Performance and pace averages reflect estimated historical performance; trainer and jockey grades score in-the-money percentages. Grading scale: A = elite • B = above average • C = average • D = below average • F = poor • — = no data |
||
| Pick Pony AI Rating | A | A |
| Speed | A | A |
| Early Pace | B | A |
| Mid Pace | B | A |
| Late Pace | C | A |
| Finish Pos | A | A |
| Dirt Speed | A | A |
| Turf Speed | F | D |
| Distance Speed | A | A |
| Trainer Effectiveness | A | A |
| Jockey Effectiveness | A | A |
| 3rd Party Ratings | A | A |
| Recent
Performance analysis from the horse's recent races, weighted to reflect current form. Sprint and Route FPS (Foot Per Second) measure pace efficiency over the horse's recent sprints and routes respectively. Grading scale: A = elite • B = above average • C = average • D = below average • F = poor • — = no data |
||
| Speed | A | A |
| Early Pace | B | A |
| Mid Pace | B | A |
| Late Pace | A | A |
| Sprint FPS | B | B |
| Route FPS | B | B |
| Trainer Effectiveness | A | A |
| Jockey Effectiveness | A | A |
| 3rd Party Ratings | A | A |
| Predictions
AI-generated projections for the upcoming race, derived from prior AI analysis for speed and pace trends, surface and distance suitability, and current conditions. Grading scale: A = elite • B = above average • C = average • D = below average • F = poor • — = no data |
||
| Speed | A | A |
| Early Pace | A | A |
| Mid Pace | A | A |
| Late Pace | C | C |
A paid membership is required to view all stats. Subscribe now →
Chart Guide (2.0.35)
- Bubbles
- Color = surface: green (turf), brown (dirt), blue (synthetic)
- Top number = finishing position; bottom number in parentheses = starting post position
- Height above line = beaten lengths — closer means a smaller margin
- Border = track conditions: green (FST/GD/FM), yellow (WF/SL/YLD), red (SY/MY/FRZ/SFT/HVY)
- Connecting Line
- Solid = good conditions; dashed = bad conditions
- Line Symbol
- ▲ Triangle = sprint (7f or less); ● Circle = route (more than 7f)
- Days Between Races
- Small number above each bubble (e.g. 19d) = days since the previous race — helps spot freshness, layoffs, and tight scheduling.
- Shaded Band (Bollinger)
- Highlights volatility — a wider band means more variation in recent performance
- Performance Trend
- Straight line showing the overall performance direction — angled up = improving, angled down = declining
- Dashed Reference Line
- AI Opponent = AI analysis class-level par for the race
Notables: [Example] Key race notables appear here, such as post position bias, recent workouts, class changes, and trip notes flagged by our handicappers.
Lane Bias Guide
- Bar Direction
- Bars above the line = more favorable lane • Bars below = less favorable, relative to the average at this track.
- Color
- Green = above-average advantage • Yellow = near-average • Red = below-average • Blue = this horse’s lane.
- Bias Score
- Derived from weighted average finishing positions across historical races at this track. Shown in the tooltip on hover. To use the bias score, calculate your handicap for the horse (e.g. finish position), then add (detrimental bias) or subtract (favorable bias) the bias score.
- Races
- Number of historical races used to compute each lane’s bias score.
Race Pace Bias Guide
- Bar Height & Direction
- Positive (green) = pace favors this horse • Negative (red) = pace works against this horse • Near-zero (amber) = neutral.
- Race Shape
- Projected race shape based on running styles of all horses (e.g. EE = two early horses, EP = one early presser).
- Pace Category
- FAST = contested early pace • LONE EARLY = one speed horse controlling pace • HONEST = moderate early pressure • SLOW = closers’ race.
- Flag (★)
- A star above the bar means this horse’s pace bias figure is ≥ 1.5 — a meaningful pace advantage or disadvantage.
Total Pace Guide
- Bar Segments
- Green = Early Pace (E1) • Amber = Mid Pace (E2) • Red = Late Pace (LP)
- Bar Height
- Total height = sum of E1 + E2 + LP average pace figures. Taller bars indicate a faster-paced horse overall.
- Grades & Rankings
- Hover to see each horse’s letter grade and ranking vs. other horses in this race (e.g. 2/9 = 2nd best of 9).
- Border
- Thicker border = this horse’s post position.
Performance vs. Peers Guide
- Bars (per post)
- Blue = avg career performance • Amber = avg last 3 races • Green = last race (improved vs. avg) • Red = last race (declined vs. avg)
- Trend Line
- Angled line above the bars: rising = improving form • falling = declining form.
- Horizontal Line
- Field average — the mean career performance of all horses in this race.
- Color Circles
- Standard post-position colors below each lane — same as the Total Pace chart.
- Border
- Thicker border = this horse’s post position.
Race Pace Simulation Guide
- Slider
- Drag left→right to advance from gate to finish. Drag all the way back to reset the race.
- Predicted Finish Order
- Factors in contested pace burn, each horse’s effort curve (peaked-early vs. peaked-late), and wide trip cost from outside posts. Updated live when Track Bias changes.
- Pace Scenario
- Lone Speed: single E horse likely rates and holds. Contested: two E horses burn each other — closers benefit. Hot Pace: speed meltdown, deep closers thrive. Soft: no early speed, moderate fractions throughout.
- Track Bias
- Slider below canvas. −2 = strong closer/wet bias; +2 = strong speed/rail bias. Recomputes the predicted finish order.
- Boxed Indicator
- Dashed orange ring = horse is surrounded (rival ahead, rival behind, wall outside). In a real race this horse must find a clear path to run.
- Running Styles
- E/EE = early speed (rushes to rail). P = presser (stalks the pace). S = stalker. SS = slow starter / closer.
| Stat | vs. Current Card | vs. All Horses |
|---|---|---|
| Averages
Career-average metrics across all AI race analysis. Performance and pace averages reflect estimated historical performance; trainer and jockey grades score in-the-money percentages. Grading scale: A = elite • B = above average • C = average • D = below average • F = poor • — = no data |
||
| Pick Pony AI Rating | A | A |
| Speed | C | A |
| Early Pace | A | A |
| Mid Pace | A | A |
| Late Pace | F | C |
| Finish Pos | B | B |
| Dirt Speed | C | A |
| Turf Speed | C | B |
| Distance Speed | B | A |
| Trainer Effectiveness | C | B |
| Jockey Effectiveness | C | B |
| 3rd Party Ratings | B | A |
| Recent
Performance analysis from the horse's recent races, weighted to reflect current form. Sprint and Route FPS (Foot Per Second) measure pace efficiency over the horse's recent sprints and routes respectively. Grading scale: A = elite • B = above average • C = average • D = below average • F = poor • — = no data |
||
| Speed | B | A |
| Early Pace | A | A |
| Mid Pace | A | A |
| Late Pace | D | C |
| Sprint FPS | A | A |
| Route FPS | A | A |
| Trainer Effectiveness | C | B |
| Jockey Effectiveness | C | B |
| 3rd Party Ratings | B | A |
| Predictions
AI-generated projections for the upcoming race, derived from prior AI analysis for speed and pace trends, surface and distance suitability, and current conditions. Grading scale: A = elite • B = above average • C = average • D = below average • F = poor • — = no data |
||
| Speed | C | A |
| Early Pace | A | A |
| Mid Pace | A | A |
| Late Pace | C | C |
A paid membership is required to view all stats. Subscribe now →
Chart Guide (2.0.35)
- Bubbles
- Color = surface: green (turf), brown (dirt), blue (synthetic)
- Top number = finishing position; bottom number in parentheses = starting post position
- Height above line = beaten lengths — closer means a smaller margin
- Border = track conditions: green (FST/GD/FM), yellow (WF/SL/YLD), red (SY/MY/FRZ/SFT/HVY)
- Connecting Line
- Solid = good conditions; dashed = bad conditions
- Line Symbol
- ▲ Triangle = sprint (7f or less); ● Circle = route (more than 7f)
- Days Between Races
- Small number above each bubble (e.g. 19d) = days since the previous race — helps spot freshness, layoffs, and tight scheduling.
- Shaded Band (Bollinger)
- Highlights volatility — a wider band means more variation in recent performance
- Performance Trend
- Straight line showing the overall performance direction — angled up = improving, angled down = declining
- Dashed Reference Line
- AI Opponent = AI analysis class-level par for the race
Notables: [Example] Key race notables appear here, such as post position bias, recent workouts, class changes, and trip notes flagged by our handicappers.
Lane Bias Guide
- Bar Direction
- Bars above the line = more favorable lane • Bars below = less favorable, relative to the average at this track.
- Color
- Green = above-average advantage • Yellow = near-average • Red = below-average • Blue = this horse’s lane.
- Bias Score
- Derived from weighted average finishing positions across historical races at this track. Shown in the tooltip on hover. To use the bias score, calculate your handicap for the horse (e.g. finish position), then add (detrimental bias) or subtract (favorable bias) the bias score.
- Races
- Number of historical races used to compute each lane’s bias score.
Race Pace Bias Guide
- Bar Height & Direction
- Positive (green) = pace favors this horse • Negative (red) = pace works against this horse • Near-zero (amber) = neutral.
- Race Shape
- Projected race shape based on running styles of all horses (e.g. EE = two early horses, EP = one early presser).
- Pace Category
- FAST = contested early pace • LONE EARLY = one speed horse controlling pace • HONEST = moderate early pressure • SLOW = closers’ race.
- Flag (★)
- A star above the bar means this horse’s pace bias figure is ≥ 1.5 — a meaningful pace advantage or disadvantage.
Total Pace Guide
- Bar Segments
- Green = Early Pace (E1) • Amber = Mid Pace (E2) • Red = Late Pace (LP)
- Bar Height
- Total height = sum of E1 + E2 + LP average pace figures. Taller bars indicate a faster-paced horse overall.
- Grades & Rankings
- Hover to see each horse’s letter grade and ranking vs. other horses in this race (e.g. 2/9 = 2nd best of 9).
- Border
- Thicker border = this horse’s post position.
Performance vs. Peers Guide
- Bars (per post)
- Blue = avg career performance • Amber = avg last 3 races • Green = last race (improved vs. avg) • Red = last race (declined vs. avg)
- Trend Line
- Angled line above the bars: rising = improving form • falling = declining form.
- Horizontal Line
- Field average — the mean career performance of all horses in this race.
- Color Circles
- Standard post-position colors below each lane — same as the Total Pace chart.
- Border
- Thicker border = this horse’s post position.
Race Pace Simulation Guide
- Slider
- Drag left→right to advance from gate to finish. Drag all the way back to reset the race.
- Predicted Finish Order
- Factors in contested pace burn, each horse’s effort curve (peaked-early vs. peaked-late), and wide trip cost from outside posts. Updated live when Track Bias changes.
- Pace Scenario
- Lone Speed: single E horse likely rates and holds. Contested: two E horses burn each other — closers benefit. Hot Pace: speed meltdown, deep closers thrive. Soft: no early speed, moderate fractions throughout.
- Track Bias
- Slider below canvas. −2 = strong closer/wet bias; +2 = strong speed/rail bias. Recomputes the predicted finish order.
- Boxed Indicator
- Dashed orange ring = horse is surrounded (rival ahead, rival behind, wall outside). In a real race this horse must find a clear path to run.
- Running Styles
- E/EE = early speed (rushes to rail). P = presser (stalks the pace). S = stalker. SS = slow starter / closer.
| Stat | vs. Current Card | vs. All Horses |
|---|---|---|
| Averages
Career-average metrics across all AI race analysis. Performance and pace averages reflect estimated historical performance; trainer and jockey grades score in-the-money percentages. Grading scale: A = elite • B = above average • C = average • D = below average • F = poor • — = no data |
||
| Pick Pony AI Rating | A | A |
| Speed | A | B |
| Early Pace | C | D |
| Mid Pace | B | D |
| Late Pace | C | D |
| Finish Pos | B | C |
| Dirt Speed | A | B |
| Turf Speed | D | D |
| Distance Speed | A | C |
| Trainer Effectiveness | B | C |
| Jockey Effectiveness | D | D |
| 3rd Party Ratings | A | A |
| Recent
Performance analysis from the horse's recent races, weighted to reflect current form. Sprint and Route FPS (Foot Per Second) measure pace efficiency over the horse's recent sprints and routes respectively. Grading scale: A = elite • B = above average • C = average • D = below average • F = poor • — = no data |
||
| Speed | A | B |
| Early Pace | A | A |
| Mid Pace | A | A |
| Late Pace | D | D |
| Sprint FPS | A | A |
| Route FPS | B | B |
| Trainer Effectiveness | B | C |
| Jockey Effectiveness | D | D |
| 3rd Party Ratings | A | A |
| Predictions
AI-generated projections for the upcoming race, derived from prior AI analysis for speed and pace trends, surface and distance suitability, and current conditions. Grading scale: A = elite • B = above average • C = average • D = below average • F = poor • — = no data |
||
| Speed | B | C |
| Early Pace | A | A |
| Mid Pace | A | A |
| Late Pace | C | C |
A paid membership is required to view all stats. Subscribe now →
Chart Guide (2.0.35)
- Bubbles
- Color = surface: green (turf), brown (dirt), blue (synthetic)
- Top number = finishing position; bottom number in parentheses = starting post position
- Height above line = beaten lengths — closer means a smaller margin
- Border = track conditions: green (FST/GD/FM), yellow (WF/SL/YLD), red (SY/MY/FRZ/SFT/HVY)
- Connecting Line
- Solid = good conditions; dashed = bad conditions
- Line Symbol
- ▲ Triangle = sprint (7f or less); ● Circle = route (more than 7f)
- Days Between Races
- Small number above each bubble (e.g. 19d) = days since the previous race — helps spot freshness, layoffs, and tight scheduling.
- Shaded Band (Bollinger)
- Highlights volatility — a wider band means more variation in recent performance
- Performance Trend
- Straight line showing the overall performance direction — angled up = improving, angled down = declining
- Dashed Reference Line
- AI Opponent = AI analysis class-level par for the race
Notables: [Example] Key race notables appear here, such as post position bias, recent workouts, class changes, and trip notes flagged by our handicappers.
Lane Bias Guide
- Bar Direction
- Bars above the line = more favorable lane • Bars below = less favorable, relative to the average at this track.
- Color
- Green = above-average advantage • Yellow = near-average • Red = below-average • Blue = this horse’s lane.
- Bias Score
- Derived from weighted average finishing positions across historical races at this track. Shown in the tooltip on hover. To use the bias score, calculate your handicap for the horse (e.g. finish position), then add (detrimental bias) or subtract (favorable bias) the bias score.
- Races
- Number of historical races used to compute each lane’s bias score.
Race Pace Bias Guide
- Bar Height & Direction
- Positive (green) = pace favors this horse • Negative (red) = pace works against this horse • Near-zero (amber) = neutral.
- Race Shape
- Projected race shape based on running styles of all horses (e.g. EE = two early horses, EP = one early presser).
- Pace Category
- FAST = contested early pace • LONE EARLY = one speed horse controlling pace • HONEST = moderate early pressure • SLOW = closers’ race.
- Flag (★)
- A star above the bar means this horse’s pace bias figure is ≥ 1.5 — a meaningful pace advantage or disadvantage.
Total Pace Guide
- Bar Segments
- Green = Early Pace (E1) • Amber = Mid Pace (E2) • Red = Late Pace (LP)
- Bar Height
- Total height = sum of E1 + E2 + LP average pace figures. Taller bars indicate a faster-paced horse overall.
- Grades & Rankings
- Hover to see each horse’s letter grade and ranking vs. other horses in this race (e.g. 2/9 = 2nd best of 9).
- Border
- Thicker border = this horse’s post position.
Performance vs. Peers Guide
- Bars (per post)
- Blue = avg career performance • Amber = avg last 3 races • Green = last race (improved vs. avg) • Red = last race (declined vs. avg)
- Trend Line
- Angled line above the bars: rising = improving form • falling = declining form.
- Horizontal Line
- Field average — the mean career performance of all horses in this race.
- Color Circles
- Standard post-position colors below each lane — same as the Total Pace chart.
- Border
- Thicker border = this horse’s post position.
Race Pace Simulation Guide
- Slider
- Drag left→right to advance from gate to finish. Drag all the way back to reset the race.
- Predicted Finish Order
- Factors in contested pace burn, each horse’s effort curve (peaked-early vs. peaked-late), and wide trip cost from outside posts. Updated live when Track Bias changes.
- Pace Scenario
- Lone Speed: single E horse likely rates and holds. Contested: two E horses burn each other — closers benefit. Hot Pace: speed meltdown, deep closers thrive. Soft: no early speed, moderate fractions throughout.
- Track Bias
- Slider below canvas. −2 = strong closer/wet bias; +2 = strong speed/rail bias. Recomputes the predicted finish order.
- Boxed Indicator
- Dashed orange ring = horse is surrounded (rival ahead, rival behind, wall outside). In a real race this horse must find a clear path to run.
- Running Styles
- E/EE = early speed (rushes to rail). P = presser (stalks the pace). S = stalker. SS = slow starter / closer.
| Stat | vs. Current Card | vs. All Horses |
|---|---|---|
| Averages
Career-average metrics across all AI race analysis. Performance and pace averages reflect estimated historical performance; trainer and jockey grades score in-the-money percentages. Grading scale: A = elite • B = above average • C = average • D = below average • F = poor • — = no data |
||
| Pick Pony AI Rating | D | F |
| Speed | D | F |
| Early Pace | D | F |
| Mid Pace | D | F |
| Late Pace | B | D |
| Finish Pos | C | D |
| Dirt Speed | D | F |
| Turf Speed | D | D |
| Distance Speed | D | F |
| Trainer Effectiveness | C | C |
| Jockey Effectiveness | D | F |
| 3rd Party Ratings | D | D |
| Recent
Performance analysis from the horse's recent races, weighted to reflect current form. Sprint and Route FPS (Foot Per Second) measure pace efficiency over the horse's recent sprints and routes respectively. Grading scale: A = elite • B = above average • C = average • D = below average • F = poor • — = no data |
||
| Speed | D | F |
| Early Pace | D | F |
| Mid Pace | D | D |
| Late Pace | C | D |
| Sprint FPS | D | D |
| Route FPS | F | F |
| Trainer Effectiveness | C | C |
| Jockey Effectiveness | D | F |
| 3rd Party Ratings | D | D |
| Predictions
AI-generated projections for the upcoming race, derived from prior AI analysis for speed and pace trends, surface and distance suitability, and current conditions. Grading scale: A = elite • B = above average • C = average • D = below average • F = poor • — = no data |
||
| Speed | A | A |
| Early Pace | D | D |
| Mid Pace | D | D |
| Late Pace | C | C |
A paid membership is required to view all stats. Subscribe now →
Chart Guide (2.0.35)
- Bubbles
- Color = surface: green (turf), brown (dirt), blue (synthetic)
- Top number = finishing position; bottom number in parentheses = starting post position
- Height above line = beaten lengths — closer means a smaller margin
- Border = track conditions: green (FST/GD/FM), yellow (WF/SL/YLD), red (SY/MY/FRZ/SFT/HVY)
- Connecting Line
- Solid = good conditions; dashed = bad conditions
- Line Symbol
- ▲ Triangle = sprint (7f or less); ● Circle = route (more than 7f)
- Days Between Races
- Small number above each bubble (e.g. 19d) = days since the previous race — helps spot freshness, layoffs, and tight scheduling.
- Shaded Band (Bollinger)
- Highlights volatility — a wider band means more variation in recent performance
- Performance Trend
- Straight line showing the overall performance direction — angled up = improving, angled down = declining
- Dashed Reference Line
- AI Opponent = AI analysis class-level par for the race
Notables: [Example] Key race notables appear here, such as post position bias, recent workouts, class changes, and trip notes flagged by our handicappers.
Lane Bias Guide
- Bar Direction
- Bars above the line = more favorable lane • Bars below = less favorable, relative to the average at this track.
- Color
- Green = above-average advantage • Yellow = near-average • Red = below-average • Blue = this horse’s lane.
- Bias Score
- Derived from weighted average finishing positions across historical races at this track. Shown in the tooltip on hover. To use the bias score, calculate your handicap for the horse (e.g. finish position), then add (detrimental bias) or subtract (favorable bias) the bias score.
- Races
- Number of historical races used to compute each lane’s bias score.
Race Pace Bias Guide
- Bar Height & Direction
- Positive (green) = pace favors this horse • Negative (red) = pace works against this horse • Near-zero (amber) = neutral.
- Race Shape
- Projected race shape based on running styles of all horses (e.g. EE = two early horses, EP = one early presser).
- Pace Category
- FAST = contested early pace • LONE EARLY = one speed horse controlling pace • HONEST = moderate early pressure • SLOW = closers’ race.
- Flag (★)
- A star above the bar means this horse’s pace bias figure is ≥ 1.5 — a meaningful pace advantage or disadvantage.
Total Pace Guide
- Bar Segments
- Green = Early Pace (E1) • Amber = Mid Pace (E2) • Red = Late Pace (LP)
- Bar Height
- Total height = sum of E1 + E2 + LP average pace figures. Taller bars indicate a faster-paced horse overall.
- Grades & Rankings
- Hover to see each horse’s letter grade and ranking vs. other horses in this race (e.g. 2/9 = 2nd best of 9).
- Border
- Thicker border = this horse’s post position.
Performance vs. Peers Guide
- Bars (per post)
- Blue = avg career performance • Amber = avg last 3 races • Green = last race (improved vs. avg) • Red = last race (declined vs. avg)
- Trend Line
- Angled line above the bars: rising = improving form • falling = declining form.
- Horizontal Line
- Field average — the mean career performance of all horses in this race.
- Color Circles
- Standard post-position colors below each lane — same as the Total Pace chart.
- Border
- Thicker border = this horse’s post position.
Race Pace Simulation Guide
- Slider
- Drag left→right to advance from gate to finish. Drag all the way back to reset the race.
- Predicted Finish Order
- Factors in contested pace burn, each horse’s effort curve (peaked-early vs. peaked-late), and wide trip cost from outside posts. Updated live when Track Bias changes.
- Pace Scenario
- Lone Speed: single E horse likely rates and holds. Contested: two E horses burn each other — closers benefit. Hot Pace: speed meltdown, deep closers thrive. Soft: no early speed, moderate fractions throughout.
- Track Bias
- Slider below canvas. −2 = strong closer/wet bias; +2 = strong speed/rail bias. Recomputes the predicted finish order.
- Boxed Indicator
- Dashed orange ring = horse is surrounded (rival ahead, rival behind, wall outside). In a real race this horse must find a clear path to run.
- Running Styles
- E/EE = early speed (rushes to rail). P = presser (stalks the pace). S = stalker. SS = slow starter / closer.
| Stat | vs. Current Card | vs. All Horses |
|---|---|---|
| Averages
Career-average metrics across all AI race analysis. Performance and pace averages reflect estimated historical performance; trainer and jockey grades score in-the-money percentages. Grading scale: A = elite • B = above average • C = average • D = below average • F = poor • — = no data |
||
| Pick Pony AI Rating | D | F |
| Speed | C | D |
| Early Pace | B | D |
| Mid Pace | C | D |
| Late Pace | B | C |
| Finish Pos | D | F |
| Dirt Speed | D | F |
| Turf Speed | A | B |
| Distance Speed | D | F |
| Trainer Effectiveness | C | C |
| Jockey Effectiveness | F | F |
| 3rd Party Ratings | D | D |
| Recent
Performance analysis from the horse's recent races, weighted to reflect current form. Sprint and Route FPS (Foot Per Second) measure pace efficiency over the horse's recent sprints and routes respectively. Grading scale: A = elite • B = above average • C = average • D = below average • F = poor • — = no data |
||
| Speed | C | D |
| Early Pace | C | C |
| Mid Pace | C | C |
| Late Pace | B | C |
| Sprint FPS | C | C |
| Route FPS | C | D |
| Trainer Effectiveness | C | C |
| Jockey Effectiveness | F | F |
| 3rd Party Ratings | D | D |
| Predictions
AI-generated projections for the upcoming race, derived from prior AI analysis for speed and pace trends, surface and distance suitability, and current conditions. Grading scale: A = elite • B = above average • C = average • D = below average • F = poor • — = no data |
||
| Speed | D | D |
| Early Pace | B | C |
| Mid Pace | C | D |
| Late Pace | C | C |
A paid membership is required to view all stats. Subscribe now →
Chart Guide (2.0.35)
- Bubbles
- Color = surface: green (turf), brown (dirt), blue (synthetic)
- Top number = finishing position; bottom number in parentheses = starting post position
- Height above line = beaten lengths — closer means a smaller margin
- Border = track conditions: green (FST/GD/FM), yellow (WF/SL/YLD), red (SY/MY/FRZ/SFT/HVY)
- Connecting Line
- Solid = good conditions; dashed = bad conditions
- Line Symbol
- ▲ Triangle = sprint (7f or less); ● Circle = route (more than 7f)
- Days Between Races
- Small number above each bubble (e.g. 19d) = days since the previous race — helps spot freshness, layoffs, and tight scheduling.
- Shaded Band (Bollinger)
- Highlights volatility — a wider band means more variation in recent performance
- Performance Trend
- Straight line showing the overall performance direction — angled up = improving, angled down = declining
- Dashed Reference Line
- AI Opponent = AI analysis class-level par for the race
Notables: [Example] Key race notables appear here, such as post position bias, recent workouts, class changes, and trip notes flagged by our handicappers.
Lane Bias Guide
- Bar Direction
- Bars above the line = more favorable lane • Bars below = less favorable, relative to the average at this track.
- Color
- Green = above-average advantage • Yellow = near-average • Red = below-average • Blue = this horse’s lane.
- Bias Score
- Derived from weighted average finishing positions across historical races at this track. Shown in the tooltip on hover. To use the bias score, calculate your handicap for the horse (e.g. finish position), then add (detrimental bias) or subtract (favorable bias) the bias score.
- Races
- Number of historical races used to compute each lane’s bias score.
Race Pace Bias Guide
- Bar Height & Direction
- Positive (green) = pace favors this horse • Negative (red) = pace works against this horse • Near-zero (amber) = neutral.
- Race Shape
- Projected race shape based on running styles of all horses (e.g. EE = two early horses, EP = one early presser).
- Pace Category
- FAST = contested early pace • LONE EARLY = one speed horse controlling pace • HONEST = moderate early pressure • SLOW = closers’ race.
- Flag (★)
- A star above the bar means this horse’s pace bias figure is ≥ 1.5 — a meaningful pace advantage or disadvantage.
Total Pace Guide
- Bar Segments
- Green = Early Pace (E1) • Amber = Mid Pace (E2) • Red = Late Pace (LP)
- Bar Height
- Total height = sum of E1 + E2 + LP average pace figures. Taller bars indicate a faster-paced horse overall.
- Grades & Rankings
- Hover to see each horse’s letter grade and ranking vs. other horses in this race (e.g. 2/9 = 2nd best of 9).
- Border
- Thicker border = this horse’s post position.
Performance vs. Peers Guide
- Bars (per post)
- Blue = avg career performance • Amber = avg last 3 races • Green = last race (improved vs. avg) • Red = last race (declined vs. avg)
- Trend Line
- Angled line above the bars: rising = improving form • falling = declining form.
- Horizontal Line
- Field average — the mean career performance of all horses in this race.
- Color Circles
- Standard post-position colors below each lane — same as the Total Pace chart.
- Border
- Thicker border = this horse’s post position.
Race Pace Simulation Guide
- Slider
- Drag left→right to advance from gate to finish. Drag all the way back to reset the race.
- Predicted Finish Order
- Factors in contested pace burn, each horse’s effort curve (peaked-early vs. peaked-late), and wide trip cost from outside posts. Updated live when Track Bias changes.
- Pace Scenario
- Lone Speed: single E horse likely rates and holds. Contested: two E horses burn each other — closers benefit. Hot Pace: speed meltdown, deep closers thrive. Soft: no early speed, moderate fractions throughout.
- Track Bias
- Slider below canvas. −2 = strong closer/wet bias; +2 = strong speed/rail bias. Recomputes the predicted finish order.
- Boxed Indicator
- Dashed orange ring = horse is surrounded (rival ahead, rival behind, wall outside). In a real race this horse must find a clear path to run.
- Running Styles
- E/EE = early speed (rushes to rail). P = presser (stalks the pace). S = stalker. SS = slow starter / closer.
| Stat | vs. Current Card | vs. All Horses |
|---|---|---|
| Averages
Career-average metrics across all AI race analysis. Performance and pace averages reflect estimated historical performance; trainer and jockey grades score in-the-money percentages. Grading scale: A = elite • B = above average • C = average • D = below average • F = poor • — = no data |
||
| Pick Pony AI Rating | B | C |
| Speed | A | B |
| Early Pace | F | F |
| Mid Pace | D | F |
| Late Pace | A | A |
| Finish Pos | A | A |
| Dirt Speed | B | C |
| Turf Speed | D | D |
| Distance Speed | D | F |
| Trainer Effectiveness | D | D |
| Jockey Effectiveness | B | B |
| 3rd Party Ratings | B | C |
| Recent
Performance analysis from the horse's recent races, weighted to reflect current form. Sprint and Route FPS (Foot Per Second) measure pace efficiency over the horse's recent sprints and routes respectively. Grading scale: A = elite • B = above average • C = average • D = below average • F = poor • — = no data |
||
| Speed | A | B |
| Early Pace | F | F |
| Mid Pace | D | F |
| Late Pace | A | B |
| Sprint FPS | B | B |
| Route FPS | A | A |
| Trainer Effectiveness | D | D |
| Jockey Effectiveness | B | B |
| 3rd Party Ratings | B | C |
| Predictions
AI-generated projections for the upcoming race, derived from prior AI analysis for speed and pace trends, surface and distance suitability, and current conditions. Grading scale: A = elite • B = above average • C = average • D = below average • F = poor • — = no data |
||
| Speed | A | B |
| Early Pace | F | F |
| Mid Pace | F | F |
| Late Pace | C | C |
A paid membership is required to view all stats. Subscribe now →
Chart Guide (2.0.35)
- Bubbles
- Color = surface: green (turf), brown (dirt), blue (synthetic)
- Top number = finishing position; bottom number in parentheses = starting post position
- Height above line = beaten lengths — closer means a smaller margin
- Border = track conditions: green (FST/GD/FM), yellow (WF/SL/YLD), red (SY/MY/FRZ/SFT/HVY)
- Connecting Line
- Solid = good conditions; dashed = bad conditions
- Line Symbol
- ▲ Triangle = sprint (7f or less); ● Circle = route (more than 7f)
- Days Between Races
- Small number above each bubble (e.g. 19d) = days since the previous race — helps spot freshness, layoffs, and tight scheduling.
- Shaded Band (Bollinger)
- Highlights volatility — a wider band means more variation in recent performance
- Performance Trend
- Straight line showing the overall performance direction — angled up = improving, angled down = declining
- Dashed Reference Line
- AI Opponent = AI analysis class-level par for the race
Notables: [Example] Key race notables appear here, such as post position bias, recent workouts, class changes, and trip notes flagged by our handicappers.
Lane Bias Guide
- Bar Direction
- Bars above the line = more favorable lane • Bars below = less favorable, relative to the average at this track.
- Color
- Green = above-average advantage • Yellow = near-average • Red = below-average • Blue = this horse’s lane.
- Bias Score
- Derived from weighted average finishing positions across historical races at this track. Shown in the tooltip on hover. To use the bias score, calculate your handicap for the horse (e.g. finish position), then add (detrimental bias) or subtract (favorable bias) the bias score.
- Races
- Number of historical races used to compute each lane’s bias score.
Race Pace Bias Guide
- Bar Height & Direction
- Positive (green) = pace favors this horse • Negative (red) = pace works against this horse • Near-zero (amber) = neutral.
- Race Shape
- Projected race shape based on running styles of all horses (e.g. EE = two early horses, EP = one early presser).
- Pace Category
- FAST = contested early pace • LONE EARLY = one speed horse controlling pace • HONEST = moderate early pressure • SLOW = closers’ race.
- Flag (★)
- A star above the bar means this horse’s pace bias figure is ≥ 1.5 — a meaningful pace advantage or disadvantage.
Total Pace Guide
- Bar Segments
- Green = Early Pace (E1) • Amber = Mid Pace (E2) • Red = Late Pace (LP)
- Bar Height
- Total height = sum of E1 + E2 + LP average pace figures. Taller bars indicate a faster-paced horse overall.
- Grades & Rankings
- Hover to see each horse’s letter grade and ranking vs. other horses in this race (e.g. 2/9 = 2nd best of 9).
- Border
- Thicker border = this horse’s post position.
Performance vs. Peers Guide
- Bars (per post)
- Blue = avg career performance • Amber = avg last 3 races • Green = last race (improved vs. avg) • Red = last race (declined vs. avg)
- Trend Line
- Angled line above the bars: rising = improving form • falling = declining form.
- Horizontal Line
- Field average — the mean career performance of all horses in this race.
- Color Circles
- Standard post-position colors below each lane — same as the Total Pace chart.
- Border
- Thicker border = this horse’s post position.
Race Pace Simulation Guide
- Slider
- Drag left→right to advance from gate to finish. Drag all the way back to reset the race.
- Predicted Finish Order
- Factors in contested pace burn, each horse’s effort curve (peaked-early vs. peaked-late), and wide trip cost from outside posts. Updated live when Track Bias changes.
- Pace Scenario
- Lone Speed: single E horse likely rates and holds. Contested: two E horses burn each other — closers benefit. Hot Pace: speed meltdown, deep closers thrive. Soft: no early speed, moderate fractions throughout.
- Track Bias
- Slider below canvas. −2 = strong closer/wet bias; +2 = strong speed/rail bias. Recomputes the predicted finish order.
- Boxed Indicator
- Dashed orange ring = horse is surrounded (rival ahead, rival behind, wall outside). In a real race this horse must find a clear path to run.
- Running Styles
- E/EE = early speed (rushes to rail). P = presser (stalks the pace). S = stalker. SS = slow starter / closer.
| Stat | vs. Current Card | vs. All Horses |
|---|---|---|
| Averages
Career-average metrics across all AI race analysis. Performance and pace averages reflect estimated historical performance; trainer and jockey grades score in-the-money percentages. Grading scale: A = elite • B = above average • C = average • D = below average • F = poor • — = no data |
||
| Pick Pony AI Rating | C | D |
| Speed | C | D |
| Early Pace | A | D |
| Mid Pace | A | C |
| Late Pace | C | D |
| Finish Pos | B | D |
| Dirt Speed | B | C |
| Turf Speed | B | C |
| Distance Speed | A | C |
| Trainer Effectiveness | A | A |
| Jockey Effectiveness | C | C |
| 3rd Party Ratings | B | C |
| Recent
Performance analysis from the horse's recent races, weighted to reflect current form. Sprint and Route FPS (Foot Per Second) measure pace efficiency over the horse's recent sprints and routes respectively. Grading scale: A = elite • B = above average • C = average • D = below average • F = poor • — = no data |
||
| Speed | C | D |
| Early Pace | C | C |
| Mid Pace | B | B |
| Late Pace | B | C |
| Sprint FPS | D | C |
| Route FPS | D | D |
| Trainer Effectiveness | A | A |
| Jockey Effectiveness | C | C |
| 3rd Party Ratings | B | C |
| Predictions
AI-generated projections for the upcoming race, derived from prior AI analysis for speed and pace trends, surface and distance suitability, and current conditions. Grading scale: A = elite • B = above average • C = average • D = below average • F = poor • — = no data |
||
| Speed | C | D |
| Early Pace | C | C |
| Mid Pace | B | C |
| Late Pace | C | C |
A paid membership is required to view all stats. Subscribe now →
Chart Guide (2.0.35)
- Bubbles
- Color = surface: green (turf), brown (dirt), blue (synthetic)
- Top number = finishing position; bottom number in parentheses = starting post position
- Height above line = beaten lengths — closer means a smaller margin
- Border = track conditions: green (FST/GD/FM), yellow (WF/SL/YLD), red (SY/MY/FRZ/SFT/HVY)
- Connecting Line
- Solid = good conditions; dashed = bad conditions
- Line Symbol
- ▲ Triangle = sprint (7f or less); ● Circle = route (more than 7f)
- Days Between Races
- Small number above each bubble (e.g. 19d) = days since the previous race — helps spot freshness, layoffs, and tight scheduling.
- Shaded Band (Bollinger)
- Highlights volatility — a wider band means more variation in recent performance
- Performance Trend
- Straight line showing the overall performance direction — angled up = improving, angled down = declining
- Dashed Reference Line
- AI Opponent = AI analysis class-level par for the race
Notables: [Example] Key race notables appear here, such as post position bias, recent workouts, class changes, and trip notes flagged by our handicappers.
Lane Bias Guide
- Bar Direction
- Bars above the line = more favorable lane • Bars below = less favorable, relative to the average at this track.
- Color
- Green = above-average advantage • Yellow = near-average • Red = below-average • Blue = this horse’s lane.
- Bias Score
- Derived from weighted average finishing positions across historical races at this track. Shown in the tooltip on hover. To use the bias score, calculate your handicap for the horse (e.g. finish position), then add (detrimental bias) or subtract (favorable bias) the bias score.
- Races
- Number of historical races used to compute each lane’s bias score.
Race Pace Bias Guide
- Bar Height & Direction
- Positive (green) = pace favors this horse • Negative (red) = pace works against this horse • Near-zero (amber) = neutral.
- Race Shape
- Projected race shape based on running styles of all horses (e.g. EE = two early horses, EP = one early presser).
- Pace Category
- FAST = contested early pace • LONE EARLY = one speed horse controlling pace • HONEST = moderate early pressure • SLOW = closers’ race.
- Flag (★)
- A star above the bar means this horse’s pace bias figure is ≥ 1.5 — a meaningful pace advantage or disadvantage.
Total Pace Guide
- Bar Segments
- Green = Early Pace (E1) • Amber = Mid Pace (E2) • Red = Late Pace (LP)
- Bar Height
- Total height = sum of E1 + E2 + LP average pace figures. Taller bars indicate a faster-paced horse overall.
- Grades & Rankings
- Hover to see each horse’s letter grade and ranking vs. other horses in this race (e.g. 2/9 = 2nd best of 9).
- Border
- Thicker border = this horse’s post position.
Performance vs. Peers Guide
- Bars (per post)
- Blue = avg career performance • Amber = avg last 3 races • Green = last race (improved vs. avg) • Red = last race (declined vs. avg)
- Trend Line
- Angled line above the bars: rising = improving form • falling = declining form.
- Horizontal Line
- Field average — the mean career performance of all horses in this race.
- Color Circles
- Standard post-position colors below each lane — same as the Total Pace chart.
- Border
- Thicker border = this horse’s post position.
Race Pace Simulation Guide
- Slider
- Drag left→right to advance from gate to finish. Drag all the way back to reset the race.
- Predicted Finish Order
- Factors in contested pace burn, each horse’s effort curve (peaked-early vs. peaked-late), and wide trip cost from outside posts. Updated live when Track Bias changes.
- Pace Scenario
- Lone Speed: single E horse likely rates and holds. Contested: two E horses burn each other — closers benefit. Hot Pace: speed meltdown, deep closers thrive. Soft: no early speed, moderate fractions throughout.
- Track Bias
- Slider below canvas. −2 = strong closer/wet bias; +2 = strong speed/rail bias. Recomputes the predicted finish order.
- Boxed Indicator
- Dashed orange ring = horse is surrounded (rival ahead, rival behind, wall outside). In a real race this horse must find a clear path to run.
- Running Styles
- E/EE = early speed (rushes to rail). P = presser (stalks the pace). S = stalker. SS = slow starter / closer.
| Stat | vs. Current Card | vs. All Horses |
|---|---|---|
| Averages
Career-average metrics across all AI race analysis. Performance and pace averages reflect estimated historical performance; trainer and jockey grades score in-the-money percentages. Grading scale: A = elite • B = above average • C = average • D = below average • F = poor • — = no data |
||
| Pick Pony AI Rating | C | D |
| Speed | B | D |
| Early Pace | A | C |
| Mid Pace | A | C |
| Late Pace | A | C |
| Finish Pos | A | C |
| Dirt Speed | C | C |
| Turf Speed | B | C |
| Distance Speed | D | F |
| Trainer Effectiveness | B | A |
| Jockey Effectiveness | B | A |
| 3rd Party Ratings | C | C |
| Recent
Performance analysis from the horse's recent races, weighted to reflect current form. Sprint and Route FPS (Foot Per Second) measure pace efficiency over the horse's recent sprints and routes respectively. Grading scale: A = elite • B = above average • C = average • D = below average • F = poor • — = no data |
||
| Speed | B | C |
| Early Pace | B | B |
| Mid Pace | C | C |
| Late Pace | A | C |
| Sprint FPS | B | B |
| Route FPS | A | B |
| Trainer Effectiveness | B | A |
| Jockey Effectiveness | B | A |
| 3rd Party Ratings | C | C |
| Predictions
AI-generated projections for the upcoming race, derived from prior AI analysis for speed and pace trends, surface and distance suitability, and current conditions. Grading scale: A = elite • B = above average • C = average • D = below average • F = poor • — = no data |
||
| Speed | B | C |
| Early Pace | C | C |
| Mid Pace | C | D |
| Late Pace | C | C |
A paid membership is required to view all stats. Subscribe now →
Chart Guide (2.0.35)
- Bubbles
- Color = surface: green (turf), brown (dirt), blue (synthetic)
- Top number = finishing position; bottom number in parentheses = starting post position
- Height above line = beaten lengths — closer means a smaller margin
- Border = track conditions: green (FST/GD/FM), yellow (WF/SL/YLD), red (SY/MY/FRZ/SFT/HVY)
- Connecting Line
- Solid = good conditions; dashed = bad conditions
- Line Symbol
- ▲ Triangle = sprint (7f or less); ● Circle = route (more than 7f)
- Days Between Races
- Small number above each bubble (e.g. 19d) = days since the previous race — helps spot freshness, layoffs, and tight scheduling.
- Shaded Band (Bollinger)
- Highlights volatility — a wider band means more variation in recent performance
- Performance Trend
- Straight line showing the overall performance direction — angled up = improving, angled down = declining
- Dashed Reference Line
- AI Opponent = AI analysis class-level par for the race
Notables: [Example] Key race notables appear here, such as post position bias, recent workouts, class changes, and trip notes flagged by our handicappers.
Lane Bias Guide
- Bar Direction
- Bars above the line = more favorable lane • Bars below = less favorable, relative to the average at this track.
- Color
- Green = above-average advantage • Yellow = near-average • Red = below-average • Blue = this horse’s lane.
- Bias Score
- Derived from weighted average finishing positions across historical races at this track. Shown in the tooltip on hover. To use the bias score, calculate your handicap for the horse (e.g. finish position), then add (detrimental bias) or subtract (favorable bias) the bias score.
- Races
- Number of historical races used to compute each lane’s bias score.
Race Pace Bias Guide
- Bar Height & Direction
- Positive (green) = pace favors this horse • Negative (red) = pace works against this horse • Near-zero (amber) = neutral.
- Race Shape
- Projected race shape based on running styles of all horses (e.g. EE = two early horses, EP = one early presser).
- Pace Category
- FAST = contested early pace • LONE EARLY = one speed horse controlling pace • HONEST = moderate early pressure • SLOW = closers’ race.
- Flag (★)
- A star above the bar means this horse’s pace bias figure is ≥ 1.5 — a meaningful pace advantage or disadvantage.
Total Pace Guide
- Bar Segments
- Green = Early Pace (E1) • Amber = Mid Pace (E2) • Red = Late Pace (LP)
- Bar Height
- Total height = sum of E1 + E2 + LP average pace figures. Taller bars indicate a faster-paced horse overall.
- Grades & Rankings
- Hover to see each horse’s letter grade and ranking vs. other horses in this race (e.g. 2/9 = 2nd best of 9).
- Border
- Thicker border = this horse’s post position.
Performance vs. Peers Guide
- Bars (per post)
- Blue = avg career performance • Amber = avg last 3 races • Green = last race (improved vs. avg) • Red = last race (declined vs. avg)
- Trend Line
- Angled line above the bars: rising = improving form • falling = declining form.
- Horizontal Line
- Field average — the mean career performance of all horses in this race.
- Color Circles
- Standard post-position colors below each lane — same as the Total Pace chart.
- Border
- Thicker border = this horse’s post position.
Race Pace Simulation Guide
- Slider
- Drag left→right to advance from gate to finish. Drag all the way back to reset the race.
- Predicted Finish Order
- Factors in contested pace burn, each horse’s effort curve (peaked-early vs. peaked-late), and wide trip cost from outside posts. Updated live when Track Bias changes.
- Pace Scenario
- Lone Speed: single E horse likely rates and holds. Contested: two E horses burn each other — closers benefit. Hot Pace: speed meltdown, deep closers thrive. Soft: no early speed, moderate fractions throughout.
- Track Bias
- Slider below canvas. −2 = strong closer/wet bias; +2 = strong speed/rail bias. Recomputes the predicted finish order.
- Boxed Indicator
- Dashed orange ring = horse is surrounded (rival ahead, rival behind, wall outside). In a real race this horse must find a clear path to run.
- Running Styles
- E/EE = early speed (rushes to rail). P = presser (stalks the pace). S = stalker. SS = slow starter / closer.
| Stat | vs. Current Card | vs. All Horses |
|---|---|---|
| Averages
Career-average metrics across all AI race analysis. Performance and pace averages reflect estimated historical performance; trainer and jockey grades score in-the-money percentages. Grading scale: A = elite • B = above average • C = average • D = below average • F = poor • — = no data |
||
| Pick Pony AI Rating | A | B |
| Speed | B | C |
| Early Pace | B | D |
| Mid Pace | B | D |
| Late Pace | D | D |
| Finish Pos | C | F |
| Dirt Speed | A | C |
| Turf Speed | A | B |
| Distance Speed | B | C |
| Trainer Effectiveness | A | A |
| Jockey Effectiveness | A | A |
| 3rd Party Ratings | A | B |
| Recent
Performance analysis from the horse's recent races, weighted to reflect current form. Sprint and Route FPS (Foot Per Second) measure pace efficiency over the horse's recent sprints and routes respectively. Grading scale: A = elite • B = above average • C = average • D = below average • F = poor • — = no data |
||
| Speed | B | C |
| Early Pace | A | B |
| Mid Pace | A | A |
| Late Pace | C | D |
| Sprint FPS | A | B |
| Route FPS | B | C |
| Trainer Effectiveness | A | A |
| Jockey Effectiveness | A | A |
| 3rd Party Ratings | A | B |
| Predictions
AI-generated projections for the upcoming race, derived from prior AI analysis for speed and pace trends, surface and distance suitability, and current conditions. Grading scale: A = elite • B = above average • C = average • D = below average • F = poor • — = no data |
||
| Speed | C | D |
| Early Pace | B | B |
| Mid Pace | B | B |
| Late Pace | C | C |
A paid membership is required to view all stats. Subscribe now →
Chart Guide (2.0.35)
- Bubbles
- Color = surface: green (turf), brown (dirt), blue (synthetic)
- Top number = finishing position; bottom number in parentheses = starting post position
- Height above line = beaten lengths — closer means a smaller margin
- Border = track conditions: green (FST/GD/FM), yellow (WF/SL/YLD), red (SY/MY/FRZ/SFT/HVY)
- Connecting Line
- Solid = good conditions; dashed = bad conditions
- Line Symbol
- ▲ Triangle = sprint (7f or less); ● Circle = route (more than 7f)
- Days Between Races
- Small number above each bubble (e.g. 19d) = days since the previous race — helps spot freshness, layoffs, and tight scheduling.
- Shaded Band (Bollinger)
- Highlights volatility — a wider band means more variation in recent performance
- Performance Trend
- Straight line showing the overall performance direction — angled up = improving, angled down = declining
- Dashed Reference Line
- AI Opponent = AI analysis class-level par for the race
Notables: [Example] Key race notables appear here, such as post position bias, recent workouts, class changes, and trip notes flagged by our handicappers.
Lane Bias Guide
- Bar Direction
- Bars above the line = more favorable lane • Bars below = less favorable, relative to the average at this track.
- Color
- Green = above-average advantage • Yellow = near-average • Red = below-average • Blue = this horse’s lane.
- Bias Score
- Derived from weighted average finishing positions across historical races at this track. Shown in the tooltip on hover. To use the bias score, calculate your handicap for the horse (e.g. finish position), then add (detrimental bias) or subtract (favorable bias) the bias score.
- Races
- Number of historical races used to compute each lane’s bias score.
Race Pace Bias Guide
- Bar Height & Direction
- Positive (green) = pace favors this horse • Negative (red) = pace works against this horse • Near-zero (amber) = neutral.
- Race Shape
- Projected race shape based on running styles of all horses (e.g. EE = two early horses, EP = one early presser).
- Pace Category
- FAST = contested early pace • LONE EARLY = one speed horse controlling pace • HONEST = moderate early pressure • SLOW = closers’ race.
- Flag (★)
- A star above the bar means this horse’s pace bias figure is ≥ 1.5 — a meaningful pace advantage or disadvantage.
Total Pace Guide
- Bar Segments
- Green = Early Pace (E1) • Amber = Mid Pace (E2) • Red = Late Pace (LP)
- Bar Height
- Total height = sum of E1 + E2 + LP average pace figures. Taller bars indicate a faster-paced horse overall.
- Grades & Rankings
- Hover to see each horse’s letter grade and ranking vs. other horses in this race (e.g. 2/9 = 2nd best of 9).
- Border
- Thicker border = this horse’s post position.
Performance vs. Peers Guide
- Bars (per post)
- Blue = avg career performance • Amber = avg last 3 races • Green = last race (improved vs. avg) • Red = last race (declined vs. avg)
- Trend Line
- Angled line above the bars: rising = improving form • falling = declining form.
- Horizontal Line
- Field average — the mean career performance of all horses in this race.
- Color Circles
- Standard post-position colors below each lane — same as the Total Pace chart.
- Border
- Thicker border = this horse’s post position.
Race Pace Simulation Guide
- Slider
- Drag left→right to advance from gate to finish. Drag all the way back to reset the race.
- Predicted Finish Order
- Factors in contested pace burn, each horse’s effort curve (peaked-early vs. peaked-late), and wide trip cost from outside posts. Updated live when Track Bias changes.
- Pace Scenario
- Lone Speed: single E horse likely rates and holds. Contested: two E horses burn each other — closers benefit. Hot Pace: speed meltdown, deep closers thrive. Soft: no early speed, moderate fractions throughout.
- Track Bias
- Slider below canvas. −2 = strong closer/wet bias; +2 = strong speed/rail bias. Recomputes the predicted finish order.
- Boxed Indicator
- Dashed orange ring = horse is surrounded (rival ahead, rival behind, wall outside). In a real race this horse must find a clear path to run.
- Running Styles
- E/EE = early speed (rushes to rail). P = presser (stalks the pace). S = stalker. SS = slow starter / closer.
| Stat | vs. Current Card | vs. All Horses |
|---|---|---|
| Averages
Career-average metrics across all AI race analysis. Performance and pace averages reflect estimated historical performance; trainer and jockey grades score in-the-money percentages. Grading scale: A = elite • B = above average • C = average • D = below average • F = poor • — = no data |
||
| Pick Pony AI Rating | F | F |
| Speed | F | F |
| Early Pace | F | F |
| Mid Pace | F | F |
| Late Pace | F | F |
| Finish Pos | F | F |
| Dirt Speed | D | F |
| Turf Speed | C | C |
| Distance Speed | D | F |
| Trainer Effectiveness | D | C |
| Jockey Effectiveness | C | D |
| 3rd Party Ratings | F | F |
| Recent
Performance analysis from the horse's recent races, weighted to reflect current form. Sprint and Route FPS (Foot Per Second) measure pace efficiency over the horse's recent sprints and routes respectively. Grading scale: A = elite • B = above average • C = average • D = below average • F = poor • — = no data |
||
| Speed | F | F |
| Early Pace | F | F |
| Mid Pace | F | F |
| Late Pace | F | F |
| Sprint FPS | F | D |
| Route FPS | D | F |
| Trainer Effectiveness | D | C |
| Jockey Effectiveness | C | D |
| 3rd Party Ratings | F | F |
| Predictions
AI-generated projections for the upcoming race, derived from prior AI analysis for speed and pace trends, surface and distance suitability, and current conditions. Grading scale: A = elite • B = above average • C = average • D = below average • F = poor • — = no data |
||
| Speed | F | F |
| Early Pace | F | F |
| Mid Pace | F | F |
| Late Pace | C | C |
A paid membership is required to view all stats. Subscribe now →
Chart Guide (2.0.35)
- Bubbles
- Color = surface: green (turf), brown (dirt), blue (synthetic)
- Top number = finishing position; bottom number in parentheses = starting post position
- Height above line = beaten lengths — closer means a smaller margin
- Border = track conditions: green (FST/GD/FM), yellow (WF/SL/YLD), red (SY/MY/FRZ/SFT/HVY)
- Connecting Line
- Solid = good conditions; dashed = bad conditions
- Line Symbol
- ▲ Triangle = sprint (7f or less); ● Circle = route (more than 7f)
- Days Between Races
- Small number above each bubble (e.g. 19d) = days since the previous race — helps spot freshness, layoffs, and tight scheduling.
- Shaded Band (Bollinger)
- Highlights volatility — a wider band means more variation in recent performance
- Performance Trend
- Straight line showing the overall performance direction — angled up = improving, angled down = declining
- Dashed Reference Line
- AI Opponent = AI analysis class-level par for the race
Notables: [Example] Key race notables appear here, such as post position bias, recent workouts, class changes, and trip notes flagged by our handicappers.
Lane Bias Guide
- Bar Direction
- Bars above the line = more favorable lane • Bars below = less favorable, relative to the average at this track.
- Color
- Green = above-average advantage • Yellow = near-average • Red = below-average • Blue = this horse’s lane.
- Bias Score
- Derived from weighted average finishing positions across historical races at this track. Shown in the tooltip on hover. To use the bias score, calculate your handicap for the horse (e.g. finish position), then add (detrimental bias) or subtract (favorable bias) the bias score.
- Races
- Number of historical races used to compute each lane’s bias score.
Race Pace Bias Guide
- Bar Height & Direction
- Positive (green) = pace favors this horse • Negative (red) = pace works against this horse • Near-zero (amber) = neutral.
- Race Shape
- Projected race shape based on running styles of all horses (e.g. EE = two early horses, EP = one early presser).
- Pace Category
- FAST = contested early pace • LONE EARLY = one speed horse controlling pace • HONEST = moderate early pressure • SLOW = closers’ race.
- Flag (★)
- A star above the bar means this horse’s pace bias figure is ≥ 1.5 — a meaningful pace advantage or disadvantage.
Total Pace Guide
- Bar Segments
- Green = Early Pace (E1) • Amber = Mid Pace (E2) • Red = Late Pace (LP)
- Bar Height
- Total height = sum of E1 + E2 + LP average pace figures. Taller bars indicate a faster-paced horse overall.
- Grades & Rankings
- Hover to see each horse’s letter grade and ranking vs. other horses in this race (e.g. 2/9 = 2nd best of 9).
- Border
- Thicker border = this horse’s post position.
Performance vs. Peers Guide
- Bars (per post)
- Blue = avg career performance • Amber = avg last 3 races • Green = last race (improved vs. avg) • Red = last race (declined vs. avg)
- Trend Line
- Angled line above the bars: rising = improving form • falling = declining form.
- Horizontal Line
- Field average — the mean career performance of all horses in this race.
- Color Circles
- Standard post-position colors below each lane — same as the Total Pace chart.
- Border
- Thicker border = this horse’s post position.
Race Pace Simulation Guide
- Slider
- Drag left→right to advance from gate to finish. Drag all the way back to reset the race.
- Predicted Finish Order
- Factors in contested pace burn, each horse’s effort curve (peaked-early vs. peaked-late), and wide trip cost from outside posts. Updated live when Track Bias changes.
- Pace Scenario
- Lone Speed: single E horse likely rates and holds. Contested: two E horses burn each other — closers benefit. Hot Pace: speed meltdown, deep closers thrive. Soft: no early speed, moderate fractions throughout.
- Track Bias
- Slider below canvas. −2 = strong closer/wet bias; +2 = strong speed/rail bias. Recomputes the predicted finish order.
- Boxed Indicator
- Dashed orange ring = horse is surrounded (rival ahead, rival behind, wall outside). In a real race this horse must find a clear path to run.
- Running Styles
- E/EE = early speed (rushes to rail). P = presser (stalks the pace). S = stalker. SS = slow starter / closer.
| Stat | vs. Current Card | vs. All Horses |
|---|---|---|
| Averages
Career-average metrics across all AI race analysis. Performance and pace averages reflect estimated historical performance; trainer and jockey grades score in-the-money percentages. Grading scale: A = elite • B = above average • C = average • D = below average • F = poor • — = no data |
||
| Pick Pony AI Rating | B | C |
| Speed | D | F |
| Early Pace | C | D |
| Mid Pace | C | D |
| Late Pace | D | F |
| Finish Pos | D | F |
| Dirt Speed | C | D |
| Turf Speed | D | D |
| Distance Speed | D | F |
| Trainer Effectiveness | F | D |
| Jockey Effectiveness | A | A |
| 3rd Party Ratings | C | C |
| Recent
Performance analysis from the horse's recent races, weighted to reflect current form. Sprint and Route FPS (Foot Per Second) measure pace efficiency over the horse's recent sprints and routes respectively. Grading scale: A = elite • B = above average • C = average • D = below average • F = poor • — = no data |
||
| Speed | D | F |
| Early Pace | A | B |
| Mid Pace | B | B |
| Late Pace | D | F |
| Sprint FPS | C | C |
| Route FPS | C | C |
| Trainer Effectiveness | F | D |
| Jockey Effectiveness | A | A |
| 3rd Party Ratings | C | C |
| Predictions
AI-generated projections for the upcoming race, derived from prior AI analysis for speed and pace trends, surface and distance suitability, and current conditions. Grading scale: A = elite • B = above average • C = average • D = below average • F = poor • — = no data |
||
| Speed | D | F |
| Early Pace | A | B |
| Mid Pace | A | B |
| Late Pace | C | C |
A paid membership is required to view all stats. Subscribe now →
Chart Guide (2.0.35)
- Bubbles
- Color = surface: green (turf), brown (dirt), blue (synthetic)
- Top number = finishing position; bottom number in parentheses = starting post position
- Height above line = beaten lengths — closer means a smaller margin
- Border = track conditions: green (FST/GD/FM), yellow (WF/SL/YLD), red (SY/MY/FRZ/SFT/HVY)
- Connecting Line
- Solid = good conditions; dashed = bad conditions
- Line Symbol
- ▲ Triangle = sprint (7f or less); ● Circle = route (more than 7f)
- Days Between Races
- Small number above each bubble (e.g. 19d) = days since the previous race — helps spot freshness, layoffs, and tight scheduling.
- Shaded Band (Bollinger)
- Highlights volatility — a wider band means more variation in recent performance
- Performance Trend
- Straight line showing the overall performance direction — angled up = improving, angled down = declining
- Dashed Reference Line
- AI Opponent = AI analysis class-level par for the race
Notables: [Example] Key race notables appear here, such as post position bias, recent workouts, class changes, and trip notes flagged by our handicappers.
Lane Bias Guide
- Bar Direction
- Bars above the line = more favorable lane • Bars below = less favorable, relative to the average at this track.
- Color
- Green = above-average advantage • Yellow = near-average • Red = below-average • Blue = this horse’s lane.
- Bias Score
- Derived from weighted average finishing positions across historical races at this track. Shown in the tooltip on hover. To use the bias score, calculate your handicap for the horse (e.g. finish position), then add (detrimental bias) or subtract (favorable bias) the bias score.
- Races
- Number of historical races used to compute each lane’s bias score.
Race Pace Bias Guide
- Bar Height & Direction
- Positive (green) = pace favors this horse • Negative (red) = pace works against this horse • Near-zero (amber) = neutral.
- Race Shape
- Projected race shape based on running styles of all horses (e.g. EE = two early horses, EP = one early presser).
- Pace Category
- FAST = contested early pace • LONE EARLY = one speed horse controlling pace • HONEST = moderate early pressure • SLOW = closers’ race.
- Flag (★)
- A star above the bar means this horse’s pace bias figure is ≥ 1.5 — a meaningful pace advantage or disadvantage.
Total Pace Guide
- Bar Segments
- Green = Early Pace (E1) • Amber = Mid Pace (E2) • Red = Late Pace (LP)
- Bar Height
- Total height = sum of E1 + E2 + LP average pace figures. Taller bars indicate a faster-paced horse overall.
- Grades & Rankings
- Hover to see each horse’s letter grade and ranking vs. other horses in this race (e.g. 2/9 = 2nd best of 9).
- Border
- Thicker border = this horse’s post position.
Performance vs. Peers Guide
- Bars (per post)
- Blue = avg career performance • Amber = avg last 3 races • Green = last race (improved vs. avg) • Red = last race (declined vs. avg)
- Trend Line
- Angled line above the bars: rising = improving form • falling = declining form.
- Horizontal Line
- Field average — the mean career performance of all horses in this race.
- Color Circles
- Standard post-position colors below each lane — same as the Total Pace chart.
- Border
- Thicker border = this horse’s post position.
Race Pace Simulation Guide
- Slider
- Drag left→right to advance from gate to finish. Drag all the way back to reset the race.
- Predicted Finish Order
- Factors in contested pace burn, each horse’s effort curve (peaked-early vs. peaked-late), and wide trip cost from outside posts. Updated live when Track Bias changes.
- Pace Scenario
- Lone Speed: single E horse likely rates and holds. Contested: two E horses burn each other — closers benefit. Hot Pace: speed meltdown, deep closers thrive. Soft: no early speed, moderate fractions throughout.
- Track Bias
- Slider below canvas. −2 = strong closer/wet bias; +2 = strong speed/rail bias. Recomputes the predicted finish order.
- Boxed Indicator
- Dashed orange ring = horse is surrounded (rival ahead, rival behind, wall outside). In a real race this horse must find a clear path to run.
- Running Styles
- E/EE = early speed (rushes to rail). P = presser (stalks the pace). S = stalker. SS = slow starter / closer.
| Stat | vs. Current Card | vs. All Horses |
|---|---|---|
| Averages
Career-average metrics across all AI race analysis. Performance and pace averages reflect estimated historical performance; trainer and jockey grades score in-the-money percentages. Grading scale: A = elite • B = above average • C = average • D = below average • F = poor • — = no data |
||
| Pick Pony AI Rating | A | B |
| Speed | B | D |
| Early Pace | A | D |
| Mid Pace | A | D |
| Late Pace | C | D |
| Finish Pos | D | D |
| Dirt Speed | B | D |
| Turf Speed | C | D |
| Distance Speed | C | F |
| Trainer Effectiveness | C | C |
| Jockey Effectiveness | C | B |
| 3rd Party Ratings | C | C |
| Recent
Performance analysis from the horse's recent races, weighted to reflect current form. Sprint and Route FPS (Foot Per Second) measure pace efficiency over the horse's recent sprints and routes respectively. Grading scale: A = elite • B = above average • C = average • D = below average • F = poor • — = no data |
||
| Speed | C | D |
| Early Pace | A | A |
| Mid Pace | A | A |
| Late Pace | C | D |
| Sprint FPS | A | A |
| Route FPS | B | B |
| Trainer Effectiveness | C | C |
| Jockey Effectiveness | C | B |
| 3rd Party Ratings | C | C |
| Predictions
AI-generated projections for the upcoming race, derived from prior AI analysis for speed and pace trends, surface and distance suitability, and current conditions. Grading scale: A = elite • B = above average • C = average • D = below average • F = poor • — = no data |
||
| Speed | C | D |
| Early Pace | A | A |
| Mid Pace | A | B |
| Late Pace | C | C |
A paid membership is required to view all stats. Subscribe now →
Chart Guide (2.0.35)
- Bubbles
- Color = surface: green (turf), brown (dirt), blue (synthetic)
- Top number = finishing position; bottom number in parentheses = starting post position
- Height above line = beaten lengths — closer means a smaller margin
- Border = track conditions: green (FST/GD/FM), yellow (WF/SL/YLD), red (SY/MY/FRZ/SFT/HVY)
- Connecting Line
- Solid = good conditions; dashed = bad conditions
- Line Symbol
- ▲ Triangle = sprint (7f or less); ● Circle = route (more than 7f)
- Days Between Races
- Small number above each bubble (e.g. 19d) = days since the previous race — helps spot freshness, layoffs, and tight scheduling.
- Shaded Band (Bollinger)
- Highlights volatility — a wider band means more variation in recent performance
- Performance Trend
- Straight line showing the overall performance direction — angled up = improving, angled down = declining
- Dashed Reference Line
- AI Opponent = AI analysis class-level par for the race
Notables: [Example] Key race notables appear here, such as post position bias, recent workouts, class changes, and trip notes flagged by our handicappers.
Lane Bias Guide
- Bar Direction
- Bars above the line = more favorable lane • Bars below = less favorable, relative to the average at this track.
- Color
- Green = above-average advantage • Yellow = near-average • Red = below-average • Blue = this horse’s lane.
- Bias Score
- Derived from weighted average finishing positions across historical races at this track. Shown in the tooltip on hover. To use the bias score, calculate your handicap for the horse (e.g. finish position), then add (detrimental bias) or subtract (favorable bias) the bias score.
- Races
- Number of historical races used to compute each lane’s bias score.
Race Pace Bias Guide
- Bar Height & Direction
- Positive (green) = pace favors this horse • Negative (red) = pace works against this horse • Near-zero (amber) = neutral.
- Race Shape
- Projected race shape based on running styles of all horses (e.g. EE = two early horses, EP = one early presser).
- Pace Category
- FAST = contested early pace • LONE EARLY = one speed horse controlling pace • HONEST = moderate early pressure • SLOW = closers’ race.
- Flag (★)
- A star above the bar means this horse’s pace bias figure is ≥ 1.5 — a meaningful pace advantage or disadvantage.
Total Pace Guide
- Bar Segments
- Green = Early Pace (E1) • Amber = Mid Pace (E2) • Red = Late Pace (LP)
- Bar Height
- Total height = sum of E1 + E2 + LP average pace figures. Taller bars indicate a faster-paced horse overall.
- Grades & Rankings
- Hover to see each horse’s letter grade and ranking vs. other horses in this race (e.g. 2/9 = 2nd best of 9).
- Border
- Thicker border = this horse’s post position.
Performance vs. Peers Guide
- Bars (per post)
- Blue = avg career performance • Amber = avg last 3 races • Green = last race (improved vs. avg) • Red = last race (declined vs. avg)
- Trend Line
- Angled line above the bars: rising = improving form • falling = declining form.
- Horizontal Line
- Field average — the mean career performance of all horses in this race.
- Color Circles
- Standard post-position colors below each lane — same as the Total Pace chart.
- Border
- Thicker border = this horse’s post position.
Race Pace Simulation Guide
- Slider
- Drag left→right to advance from gate to finish. Drag all the way back to reset the race.
- Predicted Finish Order
- Factors in contested pace burn, each horse’s effort curve (peaked-early vs. peaked-late), and wide trip cost from outside posts. Updated live when Track Bias changes.
- Pace Scenario
- Lone Speed: single E horse likely rates and holds. Contested: two E horses burn each other — closers benefit. Hot Pace: speed meltdown, deep closers thrive. Soft: no early speed, moderate fractions throughout.
- Track Bias
- Slider below canvas. −2 = strong closer/wet bias; +2 = strong speed/rail bias. Recomputes the predicted finish order.
- Boxed Indicator
- Dashed orange ring = horse is surrounded (rival ahead, rival behind, wall outside). In a real race this horse must find a clear path to run.
- Running Styles
- E/EE = early speed (rushes to rail). P = presser (stalks the pace). S = stalker. SS = slow starter / closer.
| Stat | vs. Current Card | vs. All Horses |
|---|---|---|
| Averages
Career-average metrics across all AI race analysis. Performance and pace averages reflect estimated historical performance; trainer and jockey grades score in-the-money percentages. Grading scale: A = elite • B = above average • C = average • D = below average • F = poor • — = no data |
||
| Pick Pony AI Rating | B | D |
| Speed | A | C |
| Early Pace | B | F |
| Mid Pace | B | F |
| Late Pace | B | C |
| Finish Pos | F | F |
| Dirt Speed | D | F |
| Turf Speed | C | D |
| Distance Speed | C | F |
| Trainer Effectiveness | D | D |
| Jockey Effectiveness | D | C |
| 3rd Party Ratings | A | B |
| Recent
Performance analysis from the horse's recent races, weighted to reflect current form. Sprint and Route FPS (Foot Per Second) measure pace efficiency over the horse's recent sprints and routes respectively. Grading scale: A = elite • B = above average • C = average • D = below average • F = poor • — = no data |
||
| Speed | A | C |
| Early Pace | B | F |
| Mid Pace | B | D |
| Late Pace | A | C |
| Sprint FPS | C | D |
| Route FPS | C | D |
| Trainer Effectiveness | D | D |
| Jockey Effectiveness | D | C |
| 3rd Party Ratings | A | B |
| Predictions
AI-generated projections for the upcoming race, derived from prior AI analysis for speed and pace trends, surface and distance suitability, and current conditions. Grading scale: A = elite • B = above average • C = average • D = below average • F = poor • — = no data |
||
| Speed | A | C |
| Early Pace | C | F |
| Mid Pace | C | F |
| Late Pace | C | C |
A paid membership is required to view all stats. Subscribe now →
Notables: [Example] Key race notables appear here, such as post position bias, recent workouts, class changes, and trip notes flagged by our handicappers.
Lane Bias Guide
- Bar Direction
- Bars above the line = more favorable lane • Bars below = less favorable, relative to the average at this track.
- Color
- Green = above-average advantage • Yellow = near-average • Red = below-average • Blue = this horse’s lane.
- Bias Score
- Derived from weighted average finishing positions across historical races at this track. Shown in the tooltip on hover. To use the bias score, calculate your handicap for the horse (e.g. finish position), then add (detrimental bias) or subtract (favorable bias) the bias score.
- Races
- Number of historical races used to compute each lane’s bias score.
Race Pace Bias Guide
- Bar Height & Direction
- Positive (green) = pace favors this horse • Negative (red) = pace works against this horse • Near-zero (amber) = neutral.
- Race Shape
- Projected race shape based on running styles of all horses (e.g. EE = two early horses, EP = one early presser).
- Pace Category
- FAST = contested early pace • LONE EARLY = one speed horse controlling pace • HONEST = moderate early pressure • SLOW = closers’ race.
- Flag (★)
- A star above the bar means this horse’s pace bias figure is ≥ 1.5 — a meaningful pace advantage or disadvantage.
Total Pace Guide
- Bar Segments
- Green = Early Pace (E1) • Amber = Mid Pace (E2) • Red = Late Pace (LP)
- Bar Height
- Total height = sum of E1 + E2 + LP average pace figures. Taller bars indicate a faster-paced horse overall.
- Grades & Rankings
- Hover to see each horse’s letter grade and ranking vs. other horses in this race (e.g. 2/9 = 2nd best of 9).
- Border
- Thicker border = this horse’s post position.
Performance vs. Peers Guide
- Bars (per post)
- Blue = avg career performance • Amber = avg last 3 races • Green = last race (improved vs. avg) • Red = last race (declined vs. avg)
- Trend Line
- Angled line above the bars: rising = improving form • falling = declining form.
- Horizontal Line
- Field average — the mean career performance of all horses in this race.
- Color Circles
- Standard post-position colors below each lane — same as the Total Pace chart.
- Border
- Thicker border = this horse’s post position.
Race Pace Simulation Guide
- Slider
- Drag left→right to advance from gate to finish. Drag all the way back to reset the race.
- Predicted Finish Order
- Factors in contested pace burn, each horse’s effort curve (peaked-early vs. peaked-late), and wide trip cost from outside posts. Updated live when Track Bias changes.
- Pace Scenario
- Lone Speed: single E horse likely rates and holds. Contested: two E horses burn each other — closers benefit. Hot Pace: speed meltdown, deep closers thrive. Soft: no early speed, moderate fractions throughout.
- Track Bias
- Slider below canvas. −2 = strong closer/wet bias; +2 = strong speed/rail bias. Recomputes the predicted finish order.
- Boxed Indicator
- Dashed orange ring = horse is surrounded (rival ahead, rival behind, wall outside). In a real race this horse must find a clear path to run.
- Running Styles
- E/EE = early speed (rushes to rail). P = presser (stalks the pace). S = stalker. SS = slow starter / closer.
| Stat | vs. Current Card | vs. All Horses |
|---|---|---|
| Averages
Career-average metrics across all AI race analysis. Performance and pace averages reflect estimated historical performance; trainer and jockey grades score in-the-money percentages. Grading scale: A = elite • B = above average • C = average • D = below average • F = poor • — = no data |
||
| Pick Pony AI Rating | D | F |
| Speed | F | F |
| Early Pace | F | F |
| Mid Pace | F | F |
| Late Pace | F | F |
| Finish Pos | B | A |
| Dirt Speed | D | F |
| Turf Speed | C | D |
| Distance Speed | C | F |
| Trainer Effectiveness | A | A |
| Jockey Effectiveness | A | A |
| 3rd Party Ratings | F | F |
| Recent
Performance analysis from the horse's recent races, weighted to reflect current form. Sprint and Route FPS (Foot Per Second) measure pace efficiency over the horse's recent sprints and routes respectively. Grading scale: A = elite • B = above average • C = average • D = below average • F = poor • — = no data |
||
| Speed | F | F |
| Early Pace | F | F |
| Mid Pace | F | F |
| Late Pace | F | F |
| Sprint FPS | F | F |
| Route FPS | F | F |
| Trainer Effectiveness | A | A |
| Jockey Effectiveness | A | A |
| 3rd Party Ratings | F | F |
| Predictions
AI-generated projections for the upcoming race, derived from prior AI analysis for speed and pace trends, surface and distance suitability, and current conditions. Grading scale: A = elite • B = above average • C = average • D = below average • F = poor • — = no data |
||
| Speed | F | F |
| Early Pace | C | F |
| Mid Pace | C | F |
| Late Pace | C | C |
A paid membership is required to view all stats. Subscribe now →
Chart Guide (2.0.35)
- Bubbles
- Color = surface: green (turf), brown (dirt), blue (synthetic)
- Top number = finishing position; bottom number in parentheses = starting post position
- Height above line = beaten lengths — closer means a smaller margin
- Border = track conditions: green (FST/GD/FM), yellow (WF/SL/YLD), red (SY/MY/FRZ/SFT/HVY)
- Connecting Line
- Solid = good conditions; dashed = bad conditions
- Line Symbol
- ▲ Triangle = sprint (7f or less); ● Circle = route (more than 7f)
- Days Between Races
- Small number above each bubble (e.g. 19d) = days since the previous race — helps spot freshness, layoffs, and tight scheduling.
- Shaded Band (Bollinger)
- Highlights volatility — a wider band means more variation in recent performance
- Performance Trend
- Straight line showing the overall performance direction — angled up = improving, angled down = declining
- Dashed Reference Line
- AI Opponent = AI analysis class-level par for the race
Notables: [Example] Key race notables appear here, such as post position bias, recent workouts, class changes, and trip notes flagged by our handicappers.
Lane Bias Guide
- Bar Direction
- Bars above the line = more favorable lane • Bars below = less favorable, relative to the average at this track.
- Color
- Green = above-average advantage • Yellow = near-average • Red = below-average • Blue = this horse’s lane.
- Bias Score
- Derived from weighted average finishing positions across historical races at this track. Shown in the tooltip on hover. To use the bias score, calculate your handicap for the horse (e.g. finish position), then add (detrimental bias) or subtract (favorable bias) the bias score.
- Races
- Number of historical races used to compute each lane’s bias score.
Race Pace Bias Guide
- Bar Height & Direction
- Positive (green) = pace favors this horse • Negative (red) = pace works against this horse • Near-zero (amber) = neutral.
- Race Shape
- Projected race shape based on running styles of all horses (e.g. EE = two early horses, EP = one early presser).
- Pace Category
- FAST = contested early pace • LONE EARLY = one speed horse controlling pace • HONEST = moderate early pressure • SLOW = closers’ race.
- Flag (★)
- A star above the bar means this horse’s pace bias figure is ≥ 1.5 — a meaningful pace advantage or disadvantage.
Total Pace Guide
- Bar Segments
- Green = Early Pace (E1) • Amber = Mid Pace (E2) • Red = Late Pace (LP)
- Bar Height
- Total height = sum of E1 + E2 + LP average pace figures. Taller bars indicate a faster-paced horse overall.
- Grades & Rankings
- Hover to see each horse’s letter grade and ranking vs. other horses in this race (e.g. 2/9 = 2nd best of 9).
- Border
- Thicker border = this horse’s post position.
Performance vs. Peers Guide
- Bars (per post)
- Blue = avg career performance • Amber = avg last 3 races • Green = last race (improved vs. avg) • Red = last race (declined vs. avg)
- Trend Line
- Angled line above the bars: rising = improving form • falling = declining form.
- Horizontal Line
- Field average — the mean career performance of all horses in this race.
- Color Circles
- Standard post-position colors below each lane — same as the Total Pace chart.
- Border
- Thicker border = this horse’s post position.
Race Pace Simulation Guide
- Slider
- Drag left→right to advance from gate to finish. Drag all the way back to reset the race.
- Predicted Finish Order
- Factors in contested pace burn, each horse’s effort curve (peaked-early vs. peaked-late), and wide trip cost from outside posts. Updated live when Track Bias changes.
- Pace Scenario
- Lone Speed: single E horse likely rates and holds. Contested: two E horses burn each other — closers benefit. Hot Pace: speed meltdown, deep closers thrive. Soft: no early speed, moderate fractions throughout.
- Track Bias
- Slider below canvas. −2 = strong closer/wet bias; +2 = strong speed/rail bias. Recomputes the predicted finish order.
- Boxed Indicator
- Dashed orange ring = horse is surrounded (rival ahead, rival behind, wall outside). In a real race this horse must find a clear path to run.
- Running Styles
- E/EE = early speed (rushes to rail). P = presser (stalks the pace). S = stalker. SS = slow starter / closer.
| Stat | vs. Current Card | vs. All Horses |
|---|---|---|
| Averages
Career-average metrics across all AI race analysis. Performance and pace averages reflect estimated historical performance; trainer and jockey grades score in-the-money percentages. Grading scale: A = elite • B = above average • C = average • D = below average • F = poor • — = no data |
||
| Pick Pony AI Rating | D | F |
| Speed | D | D |
| Early Pace | B | F |
| Mid Pace | B | F |
| Late Pace | D | F |
| Finish Pos | B | A |
| Dirt Speed | D | F |
| Turf Speed | C | D |
| Distance Speed | C | F |
| Trainer Effectiveness | B | A |
| Jockey Effectiveness | A | A |
| 3rd Party Ratings | B | C |
| Recent
Performance analysis from the horse's recent races, weighted to reflect current form. Sprint and Route FPS (Foot Per Second) measure pace efficiency over the horse's recent sprints and routes respectively. Grading scale: A = elite • B = above average • C = average • D = below average • F = poor • — = no data |
||
| Speed | D | D |
| Early Pace | B | F |
| Mid Pace | B | D |
| Late Pace | D | F |
| Sprint FPS | B | D |
| Route FPS | A | A |
| Trainer Effectiveness | B | A |
| Jockey Effectiveness | A | A |
| 3rd Party Ratings | B | C |
| Predictions
AI-generated projections for the upcoming race, derived from prior AI analysis for speed and pace trends, surface and distance suitability, and current conditions. Grading scale: A = elite • B = above average • C = average • D = below average • F = poor • — = no data |
||
| Speed | D | F |
| Early Pace | C | F |
| Mid Pace | C | F |
| Late Pace | C | C |
A paid membership is required to view all stats. Subscribe now →
Notables: [Example] Key race notables appear here, such as post position bias, recent workouts, class changes, and trip notes flagged by our handicappers.
Lane Bias Guide
- Bar Direction
- Bars above the line = more favorable lane • Bars below = less favorable, relative to the average at this track.
- Color
- Green = above-average advantage • Yellow = near-average • Red = below-average • Blue = this horse’s lane.
- Bias Score
- Derived from weighted average finishing positions across historical races at this track. Shown in the tooltip on hover. To use the bias score, calculate your handicap for the horse (e.g. finish position), then add (detrimental bias) or subtract (favorable bias) the bias score.
- Races
- Number of historical races used to compute each lane’s bias score.
Race Pace Bias Guide
- Bar Height & Direction
- Positive (green) = pace favors this horse • Negative (red) = pace works against this horse • Near-zero (amber) = neutral.
- Race Shape
- Projected race shape based on running styles of all horses (e.g. EE = two early horses, EP = one early presser).
- Pace Category
- FAST = contested early pace • LONE EARLY = one speed horse controlling pace • HONEST = moderate early pressure • SLOW = closers’ race.
- Flag (★)
- A star above the bar means this horse’s pace bias figure is ≥ 1.5 — a meaningful pace advantage or disadvantage.
Total Pace Guide
- Bar Segments
- Green = Early Pace (E1) • Amber = Mid Pace (E2) • Red = Late Pace (LP)
- Bar Height
- Total height = sum of E1 + E2 + LP average pace figures. Taller bars indicate a faster-paced horse overall.
- Grades & Rankings
- Hover to see each horse’s letter grade and ranking vs. other horses in this race (e.g. 2/9 = 2nd best of 9).
- Border
- Thicker border = this horse’s post position.
Performance vs. Peers Guide
- Bars (per post)
- Blue = avg career performance • Amber = avg last 3 races • Green = last race (improved vs. avg) • Red = last race (declined vs. avg)
- Trend Line
- Angled line above the bars: rising = improving form • falling = declining form.
- Horizontal Line
- Field average — the mean career performance of all horses in this race.
- Color Circles
- Standard post-position colors below each lane — same as the Total Pace chart.
- Border
- Thicker border = this horse’s post position.
Race Pace Simulation Guide
- Slider
- Drag left→right to advance from gate to finish. Drag all the way back to reset the race.
- Predicted Finish Order
- Factors in contested pace burn, each horse’s effort curve (peaked-early vs. peaked-late), and wide trip cost from outside posts. Updated live when Track Bias changes.
- Pace Scenario
- Lone Speed: single E horse likely rates and holds. Contested: two E horses burn each other — closers benefit. Hot Pace: speed meltdown, deep closers thrive. Soft: no early speed, moderate fractions throughout.
- Track Bias
- Slider below canvas. −2 = strong closer/wet bias; +2 = strong speed/rail bias. Recomputes the predicted finish order.
- Boxed Indicator
- Dashed orange ring = horse is surrounded (rival ahead, rival behind, wall outside). In a real race this horse must find a clear path to run.
- Running Styles
- E/EE = early speed (rushes to rail). P = presser (stalks the pace). S = stalker. SS = slow starter / closer.
| Stat | vs. Current Card | vs. All Horses |
|---|---|---|
| Averages
Career-average metrics across all AI race analysis. Performance and pace averages reflect estimated historical performance; trainer and jockey grades score in-the-money percentages. Grading scale: A = elite • B = above average • C = average • D = below average • F = poor • — = no data |
||
| Pick Pony AI Rating | F | F |
| Speed | F | F |
| Early Pace | F | F |
| Mid Pace | F | F |
| Late Pace | F | F |
| Finish Pos | B | A |
| Dirt Speed | D | F |
| Turf Speed | C | D |
| Distance Speed | C | F |
| Trainer Effectiveness | F | D |
| Jockey Effectiveness | F | D |
| 3rd Party Ratings | F | F |
| Recent
Performance analysis from the horse's recent races, weighted to reflect current form. Sprint and Route FPS (Foot Per Second) measure pace efficiency over the horse's recent sprints and routes respectively. Grading scale: A = elite • B = above average • C = average • D = below average • F = poor • — = no data |
||
| Speed | F | F |
| Early Pace | F | F |
| Mid Pace | F | F |
| Late Pace | F | F |
| Sprint FPS | F | F |
| Route FPS | F | F |
| Trainer Effectiveness | F | D |
| Jockey Effectiveness | F | D |
| 3rd Party Ratings | F | F |
| Predictions
AI-generated projections for the upcoming race, derived from prior AI analysis for speed and pace trends, surface and distance suitability, and current conditions. Grading scale: A = elite • B = above average • C = average • D = below average • F = poor • — = no data |
||
| Speed | F | F |
| Early Pace | C | F |
| Mid Pace | C | F |
| Late Pace | C | C |
A paid membership is required to view all stats. Subscribe now →
Chart Guide (2.0.35)
- Bubbles
- Color = surface: green (turf), brown (dirt), blue (synthetic)
- Top number = finishing position; bottom number in parentheses = starting post position
- Height above line = beaten lengths — closer means a smaller margin
- Border = track conditions: green (FST/GD/FM), yellow (WF/SL/YLD), red (SY/MY/FRZ/SFT/HVY)
- Connecting Line
- Solid = good conditions; dashed = bad conditions
- Line Symbol
- ▲ Triangle = sprint (7f or less); ● Circle = route (more than 7f)
- Days Between Races
- Small number above each bubble (e.g. 19d) = days since the previous race — helps spot freshness, layoffs, and tight scheduling.
- Shaded Band (Bollinger)
- Highlights volatility — a wider band means more variation in recent performance
- Performance Trend
- Straight line showing the overall performance direction — angled up = improving, angled down = declining
- Dashed Reference Line
- AI Opponent = AI analysis class-level par for the race
Notables: [Example] Key race notables appear here, such as post position bias, recent workouts, class changes, and trip notes flagged by our handicappers.
Lane Bias Guide
- Bar Direction
- Bars above the line = more favorable lane • Bars below = less favorable, relative to the average at this track.
- Color
- Green = above-average advantage • Yellow = near-average • Red = below-average • Blue = this horse’s lane.
- Bias Score
- Derived from weighted average finishing positions across historical races at this track. Shown in the tooltip on hover. To use the bias score, calculate your handicap for the horse (e.g. finish position), then add (detrimental bias) or subtract (favorable bias) the bias score.
- Races
- Number of historical races used to compute each lane’s bias score.
Race Pace Bias Guide
- Bar Height & Direction
- Positive (green) = pace favors this horse • Negative (red) = pace works against this horse • Near-zero (amber) = neutral.
- Race Shape
- Projected race shape based on running styles of all horses (e.g. EE = two early horses, EP = one early presser).
- Pace Category
- FAST = contested early pace • LONE EARLY = one speed horse controlling pace • HONEST = moderate early pressure • SLOW = closers’ race.
- Flag (★)
- A star above the bar means this horse’s pace bias figure is ≥ 1.5 — a meaningful pace advantage or disadvantage.
Total Pace Guide
- Bar Segments
- Green = Early Pace (E1) • Amber = Mid Pace (E2) • Red = Late Pace (LP)
- Bar Height
- Total height = sum of E1 + E2 + LP average pace figures. Taller bars indicate a faster-paced horse overall.
- Grades & Rankings
- Hover to see each horse’s letter grade and ranking vs. other horses in this race (e.g. 2/9 = 2nd best of 9).
- Border
- Thicker border = this horse’s post position.
Performance vs. Peers Guide
- Bars (per post)
- Blue = avg career performance • Amber = avg last 3 races • Green = last race (improved vs. avg) • Red = last race (declined vs. avg)
- Trend Line
- Angled line above the bars: rising = improving form • falling = declining form.
- Horizontal Line
- Field average — the mean career performance of all horses in this race.
- Color Circles
- Standard post-position colors below each lane — same as the Total Pace chart.
- Border
- Thicker border = this horse’s post position.
Race Pace Simulation Guide
- Slider
- Drag left→right to advance from gate to finish. Drag all the way back to reset the race.
- Predicted Finish Order
- Factors in contested pace burn, each horse’s effort curve (peaked-early vs. peaked-late), and wide trip cost from outside posts. Updated live when Track Bias changes.
- Pace Scenario
- Lone Speed: single E horse likely rates and holds. Contested: two E horses burn each other — closers benefit. Hot Pace: speed meltdown, deep closers thrive. Soft: no early speed, moderate fractions throughout.
- Track Bias
- Slider below canvas. −2 = strong closer/wet bias; +2 = strong speed/rail bias. Recomputes the predicted finish order.
- Boxed Indicator
- Dashed orange ring = horse is surrounded (rival ahead, rival behind, wall outside). In a real race this horse must find a clear path to run.
- Running Styles
- E/EE = early speed (rushes to rail). P = presser (stalks the pace). S = stalker. SS = slow starter / closer.
| Stat | vs. Current Card | vs. All Horses |
|---|---|---|
| Averages
Career-average metrics across all AI race analysis. Performance and pace averages reflect estimated historical performance; trainer and jockey grades score in-the-money percentages. Grading scale: A = elite • B = above average • C = average • D = below average • F = poor • — = no data |
||
| Pick Pony AI Rating | A | B |
| Speed | C | D |
| Early Pace | A | D |
| Mid Pace | A | D |
| Late Pace | A | C |
| Finish Pos | B | A |
| Dirt Speed | A | C |
| Turf Speed | C | D |
| Distance Speed | A | C |
| Trainer Effectiveness | A | A |
| Jockey Effectiveness | B | B |
| 3rd Party Ratings | A | B |
| Recent
Performance analysis from the horse's recent races, weighted to reflect current form. Sprint and Route FPS (Foot Per Second) measure pace efficiency over the horse's recent sprints and routes respectively. Grading scale: A = elite • B = above average • C = average • D = below average • F = poor • — = no data |
||
| Speed | A | C |
| Early Pace | A | B |
| Mid Pace | A | B |
| Late Pace | A | C |
| Sprint FPS | B | B |
| Route FPS | B | B |
| Trainer Effectiveness | A | A |
| Jockey Effectiveness | B | B |
| 3rd Party Ratings | A | B |
| Predictions
AI-generated projections for the upcoming race, derived from prior AI analysis for speed and pace trends, surface and distance suitability, and current conditions. Grading scale: A = elite • B = above average • C = average • D = below average • F = poor • — = no data |
||
| Speed | A | C |
| Early Pace | A | D |
| Mid Pace | A | D |
| Late Pace | C | C |
A paid membership is required to view all stats. Subscribe now →
Chart Guide (2.0.35)
- Bubbles
- Color = surface: green (turf), brown (dirt), blue (synthetic)
- Top number = finishing position; bottom number in parentheses = starting post position
- Height above line = beaten lengths — closer means a smaller margin
- Border = track conditions: green (FST/GD/FM), yellow (WF/SL/YLD), red (SY/MY/FRZ/SFT/HVY)
- Connecting Line
- Solid = good conditions; dashed = bad conditions
- Line Symbol
- ▲ Triangle = sprint (7f or less); ● Circle = route (more than 7f)
- Days Between Races
- Small number above each bubble (e.g. 19d) = days since the previous race — helps spot freshness, layoffs, and tight scheduling.
- Shaded Band (Bollinger)
- Highlights volatility — a wider band means more variation in recent performance
- Performance Trend
- Straight line showing the overall performance direction — angled up = improving, angled down = declining
- Dashed Reference Line
- AI Opponent = AI analysis class-level par for the race
Notables: [Example] Key race notables appear here, such as post position bias, recent workouts, class changes, and trip notes flagged by our handicappers.
Lane Bias Guide
- Bar Direction
- Bars above the line = more favorable lane • Bars below = less favorable, relative to the average at this track.
- Color
- Green = above-average advantage • Yellow = near-average • Red = below-average • Blue = this horse’s lane.
- Bias Score
- Derived from weighted average finishing positions across historical races at this track. Shown in the tooltip on hover. To use the bias score, calculate your handicap for the horse (e.g. finish position), then add (detrimental bias) or subtract (favorable bias) the bias score.
- Races
- Number of historical races used to compute each lane’s bias score.
Race Pace Bias Guide
- Bar Height & Direction
- Positive (green) = pace favors this horse • Negative (red) = pace works against this horse • Near-zero (amber) = neutral.
- Race Shape
- Projected race shape based on running styles of all horses (e.g. EE = two early horses, EP = one early presser).
- Pace Category
- FAST = contested early pace • LONE EARLY = one speed horse controlling pace • HONEST = moderate early pressure • SLOW = closers’ race.
- Flag (★)
- A star above the bar means this horse’s pace bias figure is ≥ 1.5 — a meaningful pace advantage or disadvantage.
Total Pace Guide
- Bar Segments
- Green = Early Pace (E1) • Amber = Mid Pace (E2) • Red = Late Pace (LP)
- Bar Height
- Total height = sum of E1 + E2 + LP average pace figures. Taller bars indicate a faster-paced horse overall.
- Grades & Rankings
- Hover to see each horse’s letter grade and ranking vs. other horses in this race (e.g. 2/9 = 2nd best of 9).
- Border
- Thicker border = this horse’s post position.
Performance vs. Peers Guide
- Bars (per post)
- Blue = avg career performance • Amber = avg last 3 races • Green = last race (improved vs. avg) • Red = last race (declined vs. avg)
- Trend Line
- Angled line above the bars: rising = improving form • falling = declining form.
- Horizontal Line
- Field average — the mean career performance of all horses in this race.
- Color Circles
- Standard post-position colors below each lane — same as the Total Pace chart.
- Border
- Thicker border = this horse’s post position.
Race Pace Simulation Guide
- Slider
- Drag left→right to advance from gate to finish. Drag all the way back to reset the race.
- Predicted Finish Order
- Factors in contested pace burn, each horse’s effort curve (peaked-early vs. peaked-late), and wide trip cost from outside posts. Updated live when Track Bias changes.
- Pace Scenario
- Lone Speed: single E horse likely rates and holds. Contested: two E horses burn each other — closers benefit. Hot Pace: speed meltdown, deep closers thrive. Soft: no early speed, moderate fractions throughout.
- Track Bias
- Slider below canvas. −2 = strong closer/wet bias; +2 = strong speed/rail bias. Recomputes the predicted finish order.
- Boxed Indicator
- Dashed orange ring = horse is surrounded (rival ahead, rival behind, wall outside). In a real race this horse must find a clear path to run.
- Running Styles
- E/EE = early speed (rushes to rail). P = presser (stalks the pace). S = stalker. SS = slow starter / closer.
| Stat | vs. Current Card | vs. All Horses |
|---|---|---|
| Averages
Career-average metrics across all AI race analysis. Performance and pace averages reflect estimated historical performance; trainer and jockey grades score in-the-money percentages. Grading scale: A = elite • B = above average • C = average • D = below average • F = poor • — = no data |
||
| Pick Pony AI Rating | B | D |
| Speed | A | C |
| Early Pace | D | F |
| Mid Pace | D | F |
| Late Pace | A | A |
| Finish Pos | B | A |
| Dirt Speed | D | F |
| Turf Speed | C | D |
| Distance Speed | C | F |
| Trainer Effectiveness | B | A |
| Jockey Effectiveness | D | C |
| 3rd Party Ratings | D | C |
| Recent
Performance analysis from the horse's recent races, weighted to reflect current form. Sprint and Route FPS (Foot Per Second) measure pace efficiency over the horse's recent sprints and routes respectively. Grading scale: A = elite • B = above average • C = average • D = below average • F = poor • — = no data |
||
| Speed | B | D |
| Early Pace | D | F |
| Mid Pace | D | F |
| Late Pace | A | A |
| Sprint FPS | D | F |
| Route FPS | D | F |
| Trainer Effectiveness | B | A |
| Jockey Effectiveness | D | C |
| 3rd Party Ratings | D | C |
| Predictions
AI-generated projections for the upcoming race, derived from prior AI analysis for speed and pace trends, surface and distance suitability, and current conditions. Grading scale: A = elite • B = above average • C = average • D = below average • F = poor • — = no data |
||
| Speed | B | D |
| Early Pace | C | F |
| Mid Pace | C | F |
| Late Pace | C | C |
A paid membership is required to view all stats. Subscribe now →
Chart Guide (2.0.35)
- Bubbles
- Color = surface: green (turf), brown (dirt), blue (synthetic)
- Top number = finishing position; bottom number in parentheses = starting post position
- Height above line = beaten lengths — closer means a smaller margin
- Border = track conditions: green (FST/GD/FM), yellow (WF/SL/YLD), red (SY/MY/FRZ/SFT/HVY)
- Connecting Line
- Solid = good conditions; dashed = bad conditions
- Line Symbol
- ▲ Triangle = sprint (7f or less); ● Circle = route (more than 7f)
- Days Between Races
- Small number above each bubble (e.g. 19d) = days since the previous race — helps spot freshness, layoffs, and tight scheduling.
- Shaded Band (Bollinger)
- Highlights volatility — a wider band means more variation in recent performance
- Performance Trend
- Straight line showing the overall performance direction — angled up = improving, angled down = declining
- Dashed Reference Line
- AI Opponent = AI analysis class-level par for the race
Notables: [Example] Key race notables appear here, such as post position bias, recent workouts, class changes, and trip notes flagged by our handicappers.
Lane Bias Guide
- Bar Direction
- Bars above the line = more favorable lane • Bars below = less favorable, relative to the average at this track.
- Color
- Green = above-average advantage • Yellow = near-average • Red = below-average • Blue = this horse’s lane.
- Bias Score
- Derived from weighted average finishing positions across historical races at this track. Shown in the tooltip on hover. To use the bias score, calculate your handicap for the horse (e.g. finish position), then add (detrimental bias) or subtract (favorable bias) the bias score.
- Races
- Number of historical races used to compute each lane’s bias score.
Race Pace Bias Guide
- Bar Height & Direction
- Positive (green) = pace favors this horse • Negative (red) = pace works against this horse • Near-zero (amber) = neutral.
- Race Shape
- Projected race shape based on running styles of all horses (e.g. EE = two early horses, EP = one early presser).
- Pace Category
- FAST = contested early pace • LONE EARLY = one speed horse controlling pace • HONEST = moderate early pressure • SLOW = closers’ race.
- Flag (★)
- A star above the bar means this horse’s pace bias figure is ≥ 1.5 — a meaningful pace advantage or disadvantage.
Total Pace Guide
- Bar Segments
- Green = Early Pace (E1) • Amber = Mid Pace (E2) • Red = Late Pace (LP)
- Bar Height
- Total height = sum of E1 + E2 + LP average pace figures. Taller bars indicate a faster-paced horse overall.
- Grades & Rankings
- Hover to see each horse’s letter grade and ranking vs. other horses in this race (e.g. 2/9 = 2nd best of 9).
- Border
- Thicker border = this horse’s post position.
Performance vs. Peers Guide
- Bars (per post)
- Blue = avg career performance • Amber = avg last 3 races • Green = last race (improved vs. avg) • Red = last race (declined vs. avg)
- Trend Line
- Angled line above the bars: rising = improving form • falling = declining form.
- Horizontal Line
- Field average — the mean career performance of all horses in this race.
- Color Circles
- Standard post-position colors below each lane — same as the Total Pace chart.
- Border
- Thicker border = this horse’s post position.
Race Pace Simulation Guide
- Slider
- Drag left→right to advance from gate to finish. Drag all the way back to reset the race.
- Predicted Finish Order
- Factors in contested pace burn, each horse’s effort curve (peaked-early vs. peaked-late), and wide trip cost from outside posts. Updated live when Track Bias changes.
- Pace Scenario
- Lone Speed: single E horse likely rates and holds. Contested: two E horses burn each other — closers benefit. Hot Pace: speed meltdown, deep closers thrive. Soft: no early speed, moderate fractions throughout.
- Track Bias
- Slider below canvas. −2 = strong closer/wet bias; +2 = strong speed/rail bias. Recomputes the predicted finish order.
- Boxed Indicator
- Dashed orange ring = horse is surrounded (rival ahead, rival behind, wall outside). In a real race this horse must find a clear path to run.
- Running Styles
- E/EE = early speed (rushes to rail). P = presser (stalks the pace). S = stalker. SS = slow starter / closer.
| Stat | vs. Current Card | vs. All Horses |
|---|---|---|
| Averages
Career-average metrics across all AI race analysis. Performance and pace averages reflect estimated historical performance; trainer and jockey grades score in-the-money percentages. Grading scale: A = elite • B = above average • C = average • D = below average • F = poor • — = no data |
||
| Pick Pony AI Rating | C | D |
| Speed | A | C |
| Early Pace | C | F |
| Mid Pace | C | F |
| Late Pace | B | D |
| Finish Pos | B | A |
| Dirt Speed | A | D |
| Turf Speed | C | D |
| Distance Speed | A | C |
| Trainer Effectiveness | D | D |
| Jockey Effectiveness | B | A |
| 3rd Party Ratings | B | B |
| Recent
Performance analysis from the horse's recent races, weighted to reflect current form. Sprint and Route FPS (Foot Per Second) measure pace efficiency over the horse's recent sprints and routes respectively. Grading scale: A = elite • B = above average • C = average • D = below average • F = poor • — = no data |
||
| Speed | B | D |
| Early Pace | C | F |
| Mid Pace | C | F |
| Late Pace | B | D |
| Sprint FPS | A | B |
| Route FPS | A | B |
| Trainer Effectiveness | D | D |
| Jockey Effectiveness | B | A |
| 3rd Party Ratings | B | B |
| Predictions
AI-generated projections for the upcoming race, derived from prior AI analysis for speed and pace trends, surface and distance suitability, and current conditions. Grading scale: A = elite • B = above average • C = average • D = below average • F = poor • — = no data |
||
| Speed | B | D |
| Early Pace | C | F |
| Mid Pace | C | F |
| Late Pace | C | C |
A paid membership is required to view all stats. Subscribe now →
Chart Guide (2.0.35)
- Bubbles
- Color = surface: green (turf), brown (dirt), blue (synthetic)
- Top number = finishing position; bottom number in parentheses = starting post position
- Height above line = beaten lengths — closer means a smaller margin
- Border = track conditions: green (FST/GD/FM), yellow (WF/SL/YLD), red (SY/MY/FRZ/SFT/HVY)
- Connecting Line
- Solid = good conditions; dashed = bad conditions
- Line Symbol
- ▲ Triangle = sprint (7f or less); ● Circle = route (more than 7f)
- Days Between Races
- Small number above each bubble (e.g. 19d) = days since the previous race — helps spot freshness, layoffs, and tight scheduling.
- Shaded Band (Bollinger)
- Highlights volatility — a wider band means more variation in recent performance
- Performance Trend
- Straight line showing the overall performance direction — angled up = improving, angled down = declining
- Dashed Reference Line
- AI Opponent = AI analysis class-level par for the race
Notables: [Example] Key race notables appear here, such as post position bias, recent workouts, class changes, and trip notes flagged by our handicappers.
Lane Bias Guide
- Bar Direction
- Bars above the line = more favorable lane • Bars below = less favorable, relative to the average at this track.
- Color
- Green = above-average advantage • Yellow = near-average • Red = below-average • Blue = this horse’s lane.
- Bias Score
- Derived from weighted average finishing positions across historical races at this track. Shown in the tooltip on hover. To use the bias score, calculate your handicap for the horse (e.g. finish position), then add (detrimental bias) or subtract (favorable bias) the bias score.
- Races
- Number of historical races used to compute each lane’s bias score.
Race Pace Bias Guide
- Bar Height & Direction
- Positive (green) = pace favors this horse • Negative (red) = pace works against this horse • Near-zero (amber) = neutral.
- Race Shape
- Projected race shape based on running styles of all horses (e.g. EE = two early horses, EP = one early presser).
- Pace Category
- FAST = contested early pace • LONE EARLY = one speed horse controlling pace • HONEST = moderate early pressure • SLOW = closers’ race.
- Flag (★)
- A star above the bar means this horse’s pace bias figure is ≥ 1.5 — a meaningful pace advantage or disadvantage.
Total Pace Guide
- Bar Segments
- Green = Early Pace (E1) • Amber = Mid Pace (E2) • Red = Late Pace (LP)
- Bar Height
- Total height = sum of E1 + E2 + LP average pace figures. Taller bars indicate a faster-paced horse overall.
- Grades & Rankings
- Hover to see each horse’s letter grade and ranking vs. other horses in this race (e.g. 2/9 = 2nd best of 9).
- Border
- Thicker border = this horse’s post position.
Performance vs. Peers Guide
- Bars (per post)
- Blue = avg career performance • Amber = avg last 3 races • Green = last race (improved vs. avg) • Red = last race (declined vs. avg)
- Trend Line
- Angled line above the bars: rising = improving form • falling = declining form.
- Horizontal Line
- Field average — the mean career performance of all horses in this race.
- Color Circles
- Standard post-position colors below each lane — same as the Total Pace chart.
- Border
- Thicker border = this horse’s post position.
Race Pace Simulation Guide
- Slider
- Drag left→right to advance from gate to finish. Drag all the way back to reset the race.
- Predicted Finish Order
- Factors in contested pace burn, each horse’s effort curve (peaked-early vs. peaked-late), and wide trip cost from outside posts. Updated live when Track Bias changes.
- Pace Scenario
- Lone Speed: single E horse likely rates and holds. Contested: two E horses burn each other — closers benefit. Hot Pace: speed meltdown, deep closers thrive. Soft: no early speed, moderate fractions throughout.
- Track Bias
- Slider below canvas. −2 = strong closer/wet bias; +2 = strong speed/rail bias. Recomputes the predicted finish order.
- Boxed Indicator
- Dashed orange ring = horse is surrounded (rival ahead, rival behind, wall outside). In a real race this horse must find a clear path to run.
- Running Styles
- E/EE = early speed (rushes to rail). P = presser (stalks the pace). S = stalker. SS = slow starter / closer.
| Stat | vs. Current Card | vs. All Horses |
|---|---|---|
| Averages
Career-average metrics across all AI race analysis. Performance and pace averages reflect estimated historical performance; trainer and jockey grades score in-the-money percentages. Grading scale: A = elite • B = above average • C = average • D = below average • F = poor • — = no data |
||
| Pick Pony AI Rating | A | A |
| Speed | C | A |
| Early Pace | A | A |
| Mid Pace | A | A |
| Late Pace | F | A |
| Finish Pos | D | D |
| Dirt Speed | A | A |
| Turf Speed | A | A |
| Distance Speed | B | A |
| Trainer Effectiveness | F | C |
| Jockey Effectiveness | B | A |
| 3rd Party Ratings | C | A |
| Recent
Performance analysis from the horse's recent races, weighted to reflect current form. Sprint and Route FPS (Foot Per Second) measure pace efficiency over the horse's recent sprints and routes respectively. Grading scale: A = elite • B = above average • C = average • D = below average • F = poor • — = no data |
||
| Speed | C | A |
| Early Pace | C | C |
| Mid Pace | C | A |
| Late Pace | C | A |
| Sprint FPS | A | C |
| Route FPS | A | A |
| Trainer Effectiveness | F | C |
| Jockey Effectiveness | B | A |
| 3rd Party Ratings | C | A |
| Predictions
AI-generated projections for the upcoming race, derived from prior AI analysis for speed and pace trends, surface and distance suitability, and current conditions. Grading scale: A = elite • B = above average • C = average • D = below average • F = poor • — = no data |
||
| Speed | C | A |
| Early Pace | A | B |
| Mid Pace | B | A |
| Late Pace | C | C |
A paid membership is required to view all stats. Subscribe now →
Chart Guide (2.0.35)
- Bubbles
- Color = surface: green (turf), brown (dirt), blue (synthetic)
- Top number = finishing position; bottom number in parentheses = starting post position
- Height above line = beaten lengths — closer means a smaller margin
- Border = track conditions: green (FST/GD/FM), yellow (WF/SL/YLD), red (SY/MY/FRZ/SFT/HVY)
- Connecting Line
- Solid = good conditions; dashed = bad conditions
- Line Symbol
- ▲ Triangle = sprint (7f or less); ● Circle = route (more than 7f)
- Days Between Races
- Small number above each bubble (e.g. 19d) = days since the previous race — helps spot freshness, layoffs, and tight scheduling.
- Shaded Band (Bollinger)
- Highlights volatility — a wider band means more variation in recent performance
- Performance Trend
- Straight line showing the overall performance direction — angled up = improving, angled down = declining
- Dashed Reference Line
- AI Opponent = AI analysis class-level par for the race
Notables: [Example] Key race notables appear here, such as post position bias, recent workouts, class changes, and trip notes flagged by our handicappers.
Lane Bias Guide
- Bar Direction
- Bars above the line = more favorable lane • Bars below = less favorable, relative to the average at this track.
- Color
- Green = above-average advantage • Yellow = near-average • Red = below-average • Blue = this horse’s lane.
- Bias Score
- Derived from weighted average finishing positions across historical races at this track. Shown in the tooltip on hover. To use the bias score, calculate your handicap for the horse (e.g. finish position), then add (detrimental bias) or subtract (favorable bias) the bias score.
- Races
- Number of historical races used to compute each lane’s bias score.
Race Pace Bias Guide
- Bar Height & Direction
- Positive (green) = pace favors this horse • Negative (red) = pace works against this horse • Near-zero (amber) = neutral.
- Race Shape
- Projected race shape based on running styles of all horses (e.g. EE = two early horses, EP = one early presser).
- Pace Category
- FAST = contested early pace • LONE EARLY = one speed horse controlling pace • HONEST = moderate early pressure • SLOW = closers’ race.
- Flag (★)
- A star above the bar means this horse’s pace bias figure is ≥ 1.5 — a meaningful pace advantage or disadvantage.
Total Pace Guide
- Bar Segments
- Green = Early Pace (E1) • Amber = Mid Pace (E2) • Red = Late Pace (LP)
- Bar Height
- Total height = sum of E1 + E2 + LP average pace figures. Taller bars indicate a faster-paced horse overall.
- Grades & Rankings
- Hover to see each horse’s letter grade and ranking vs. other horses in this race (e.g. 2/9 = 2nd best of 9).
- Border
- Thicker border = this horse’s post position.
Performance vs. Peers Guide
- Bars (per post)
- Blue = avg career performance • Amber = avg last 3 races • Green = last race (improved vs. avg) • Red = last race (declined vs. avg)
- Trend Line
- Angled line above the bars: rising = improving form • falling = declining form.
- Horizontal Line
- Field average — the mean career performance of all horses in this race.
- Color Circles
- Standard post-position colors below each lane — same as the Total Pace chart.
- Border
- Thicker border = this horse’s post position.
Race Pace Simulation Guide
- Slider
- Drag left→right to advance from gate to finish. Drag all the way back to reset the race.
- Predicted Finish Order
- Factors in contested pace burn, each horse’s effort curve (peaked-early vs. peaked-late), and wide trip cost from outside posts. Updated live when Track Bias changes.
- Pace Scenario
- Lone Speed: single E horse likely rates and holds. Contested: two E horses burn each other — closers benefit. Hot Pace: speed meltdown, deep closers thrive. Soft: no early speed, moderate fractions throughout.
- Track Bias
- Slider below canvas. −2 = strong closer/wet bias; +2 = strong speed/rail bias. Recomputes the predicted finish order.
- Boxed Indicator
- Dashed orange ring = horse is surrounded (rival ahead, rival behind, wall outside). In a real race this horse must find a clear path to run.
- Running Styles
- E/EE = early speed (rushes to rail). P = presser (stalks the pace). S = stalker. SS = slow starter / closer.
| Stat | vs. Current Card | vs. All Horses |
|---|---|---|
| Averages
Career-average metrics across all AI race analysis. Performance and pace averages reflect estimated historical performance; trainer and jockey grades score in-the-money percentages. Grading scale: A = elite • B = above average • C = average • D = below average • F = poor • — = no data |
||
| Pick Pony AI Rating | D | A |
| Speed | F | A |
| Early Pace | D | C |
| Mid Pace | D | B |
| Late Pace | C | A |
| Finish Pos | A | C |
| Dirt Speed | F | A |
| Turf Speed | D | D |
| Distance Speed | D | A |
| Trainer Effectiveness | C | A |
| Jockey Effectiveness | F | D |
| 3rd Party Ratings | D | A |
| Recent
Performance analysis from the horse's recent races, weighted to reflect current form. Sprint and Route FPS (Foot Per Second) measure pace efficiency over the horse's recent sprints and routes respectively. Grading scale: A = elite • B = above average • C = average • D = below average • F = poor • — = no data |
||
| Speed | C | A |
| Early Pace | C | C |
| Mid Pace | D | B |
| Late Pace | B | A |
| Sprint FPS | D | D |
| Route FPS | D | D |
| Trainer Effectiveness | C | A |
| Jockey Effectiveness | F | D |
| 3rd Party Ratings | D | A |
| Predictions
AI-generated projections for the upcoming race, derived from prior AI analysis for speed and pace trends, surface and distance suitability, and current conditions. Grading scale: A = elite • B = above average • C = average • D = below average • F = poor • — = no data |
||
| Speed | F | A |
| Early Pace | C | C |
| Mid Pace | D | B |
| Late Pace | C | C |
A paid membership is required to view all stats. Subscribe now →
Chart Guide (2.0.35)
- Bubbles
- Color = surface: green (turf), brown (dirt), blue (synthetic)
- Top number = finishing position; bottom number in parentheses = starting post position
- Height above line = beaten lengths — closer means a smaller margin
- Border = track conditions: green (FST/GD/FM), yellow (WF/SL/YLD), red (SY/MY/FRZ/SFT/HVY)
- Connecting Line
- Solid = good conditions; dashed = bad conditions
- Line Symbol
- ▲ Triangle = sprint (7f or less); ● Circle = route (more than 7f)
- Days Between Races
- Small number above each bubble (e.g. 19d) = days since the previous race — helps spot freshness, layoffs, and tight scheduling.
- Shaded Band (Bollinger)
- Highlights volatility — a wider band means more variation in recent performance
- Performance Trend
- Straight line showing the overall performance direction — angled up = improving, angled down = declining
- Dashed Reference Line
- AI Opponent = AI analysis class-level par for the race
Notables: [Example] Key race notables appear here, such as post position bias, recent workouts, class changes, and trip notes flagged by our handicappers.
Lane Bias Guide
- Bar Direction
- Bars above the line = more favorable lane • Bars below = less favorable, relative to the average at this track.
- Color
- Green = above-average advantage • Yellow = near-average • Red = below-average • Blue = this horse’s lane.
- Bias Score
- Derived from weighted average finishing positions across historical races at this track. Shown in the tooltip on hover. To use the bias score, calculate your handicap for the horse (e.g. finish position), then add (detrimental bias) or subtract (favorable bias) the bias score.
- Races
- Number of historical races used to compute each lane’s bias score.
Race Pace Bias Guide
- Bar Height & Direction
- Positive (green) = pace favors this horse • Negative (red) = pace works against this horse • Near-zero (amber) = neutral.
- Race Shape
- Projected race shape based on running styles of all horses (e.g. EE = two early horses, EP = one early presser).
- Pace Category
- FAST = contested early pace • LONE EARLY = one speed horse controlling pace • HONEST = moderate early pressure • SLOW = closers’ race.
- Flag (★)
- A star above the bar means this horse’s pace bias figure is ≥ 1.5 — a meaningful pace advantage or disadvantage.
Total Pace Guide
- Bar Segments
- Green = Early Pace (E1) • Amber = Mid Pace (E2) • Red = Late Pace (LP)
- Bar Height
- Total height = sum of E1 + E2 + LP average pace figures. Taller bars indicate a faster-paced horse overall.
- Grades & Rankings
- Hover to see each horse’s letter grade and ranking vs. other horses in this race (e.g. 2/9 = 2nd best of 9).
- Border
- Thicker border = this horse’s post position.
Performance vs. Peers Guide
- Bars (per post)
- Blue = avg career performance • Amber = avg last 3 races • Green = last race (improved vs. avg) • Red = last race (declined vs. avg)
- Trend Line
- Angled line above the bars: rising = improving form • falling = declining form.
- Horizontal Line
- Field average — the mean career performance of all horses in this race.
- Color Circles
- Standard post-position colors below each lane — same as the Total Pace chart.
- Border
- Thicker border = this horse’s post position.
Race Pace Simulation Guide
- Slider
- Drag left→right to advance from gate to finish. Drag all the way back to reset the race.
- Predicted Finish Order
- Factors in contested pace burn, each horse’s effort curve (peaked-early vs. peaked-late), and wide trip cost from outside posts. Updated live when Track Bias changes.
- Pace Scenario
- Lone Speed: single E horse likely rates and holds. Contested: two E horses burn each other — closers benefit. Hot Pace: speed meltdown, deep closers thrive. Soft: no early speed, moderate fractions throughout.
- Track Bias
- Slider below canvas. −2 = strong closer/wet bias; +2 = strong speed/rail bias. Recomputes the predicted finish order.
- Boxed Indicator
- Dashed orange ring = horse is surrounded (rival ahead, rival behind, wall outside). In a real race this horse must find a clear path to run.
- Running Styles
- E/EE = early speed (rushes to rail). P = presser (stalks the pace). S = stalker. SS = slow starter / closer.
| Stat | vs. Current Card | vs. All Horses |
|---|---|---|
| Averages
Career-average metrics across all AI race analysis. Performance and pace averages reflect estimated historical performance; trainer and jockey grades score in-the-money percentages. Grading scale: A = elite • B = above average • C = average • D = below average • F = poor • — = no data |
||
| Pick Pony AI Rating | C | A |
| Speed | C | A |
| Early Pace | D | C |
| Mid Pace | C | B |
| Late Pace | A | A |
| Finish Pos | B | C |
| Dirt Speed | C | A |
| Turf Speed | D | D |
| Distance Speed | F | A |
| Trainer Effectiveness | D | C |
| Jockey Effectiveness | D | D |
| 3rd Party Ratings | C | A |
| Recent
Performance analysis from the horse's recent races, weighted to reflect current form. Sprint and Route FPS (Foot Per Second) measure pace efficiency over the horse's recent sprints and routes respectively. Grading scale: A = elite • B = above average • C = average • D = below average • F = poor • — = no data |
||
| Speed | B | A |
| Early Pace | F | D |
| Mid Pace | F | C |
| Late Pace | A | A |
| Sprint FPS | F | F |
| Route FPS | F | F |
| Trainer Effectiveness | D | C |
| Jockey Effectiveness | D | D |
| 3rd Party Ratings | C | A |
| Predictions
AI-generated projections for the upcoming race, derived from prior AI analysis for speed and pace trends, surface and distance suitability, and current conditions. Grading scale: A = elite • B = above average • C = average • D = below average • F = poor • — = no data |
||
| Speed | A | A |
| Early Pace | F | D |
| Mid Pace | F | C |
| Late Pace | C | C |
A paid membership is required to view all stats. Subscribe now →
Chart Guide (2.0.35)
- Bubbles
- Color = surface: green (turf), brown (dirt), blue (synthetic)
- Top number = finishing position; bottom number in parentheses = starting post position
- Height above line = beaten lengths — closer means a smaller margin
- Border = track conditions: green (FST/GD/FM), yellow (WF/SL/YLD), red (SY/MY/FRZ/SFT/HVY)
- Connecting Line
- Solid = good conditions; dashed = bad conditions
- Line Symbol
- ▲ Triangle = sprint (7f or less); ● Circle = route (more than 7f)
- Days Between Races
- Small number above each bubble (e.g. 19d) = days since the previous race — helps spot freshness, layoffs, and tight scheduling.
- Shaded Band (Bollinger)
- Highlights volatility — a wider band means more variation in recent performance
- Performance Trend
- Straight line showing the overall performance direction — angled up = improving, angled down = declining
- Dashed Reference Line
- AI Opponent = AI analysis class-level par for the race
Notables: [Example] Key race notables appear here, such as post position bias, recent workouts, class changes, and trip notes flagged by our handicappers.
Lane Bias Guide
- Bar Direction
- Bars above the line = more favorable lane • Bars below = less favorable, relative to the average at this track.
- Color
- Green = above-average advantage • Yellow = near-average • Red = below-average • Blue = this horse’s lane.
- Bias Score
- Derived from weighted average finishing positions across historical races at this track. Shown in the tooltip on hover. To use the bias score, calculate your handicap for the horse (e.g. finish position), then add (detrimental bias) or subtract (favorable bias) the bias score.
- Races
- Number of historical races used to compute each lane’s bias score.
Race Pace Bias Guide
- Bar Height & Direction
- Positive (green) = pace favors this horse • Negative (red) = pace works against this horse • Near-zero (amber) = neutral.
- Race Shape
- Projected race shape based on running styles of all horses (e.g. EE = two early horses, EP = one early presser).
- Pace Category
- FAST = contested early pace • LONE EARLY = one speed horse controlling pace • HONEST = moderate early pressure • SLOW = closers’ race.
- Flag (★)
- A star above the bar means this horse’s pace bias figure is ≥ 1.5 — a meaningful pace advantage or disadvantage.
Total Pace Guide
- Bar Segments
- Green = Early Pace (E1) • Amber = Mid Pace (E2) • Red = Late Pace (LP)
- Bar Height
- Total height = sum of E1 + E2 + LP average pace figures. Taller bars indicate a faster-paced horse overall.
- Grades & Rankings
- Hover to see each horse’s letter grade and ranking vs. other horses in this race (e.g. 2/9 = 2nd best of 9).
- Border
- Thicker border = this horse’s post position.
Performance vs. Peers Guide
- Bars (per post)
- Blue = avg career performance • Amber = avg last 3 races • Green = last race (improved vs. avg) • Red = last race (declined vs. avg)
- Trend Line
- Angled line above the bars: rising = improving form • falling = declining form.
- Horizontal Line
- Field average — the mean career performance of all horses in this race.
- Color Circles
- Standard post-position colors below each lane — same as the Total Pace chart.
- Border
- Thicker border = this horse’s post position.
Race Pace Simulation Guide
- Slider
- Drag left→right to advance from gate to finish. Drag all the way back to reset the race.
- Predicted Finish Order
- Factors in contested pace burn, each horse’s effort curve (peaked-early vs. peaked-late), and wide trip cost from outside posts. Updated live when Track Bias changes.
- Pace Scenario
- Lone Speed: single E horse likely rates and holds. Contested: two E horses burn each other — closers benefit. Hot Pace: speed meltdown, deep closers thrive. Soft: no early speed, moderate fractions throughout.
- Track Bias
- Slider below canvas. −2 = strong closer/wet bias; +2 = strong speed/rail bias. Recomputes the predicted finish order.
- Boxed Indicator
- Dashed orange ring = horse is surrounded (rival ahead, rival behind, wall outside). In a real race this horse must find a clear path to run.
- Running Styles
- E/EE = early speed (rushes to rail). P = presser (stalks the pace). S = stalker. SS = slow starter / closer.
| Stat | vs. Current Card | vs. All Horses |
|---|---|---|
| Averages
Career-average metrics across all AI race analysis. Performance and pace averages reflect estimated historical performance; trainer and jockey grades score in-the-money percentages. Grading scale: A = elite • B = above average • C = average • D = below average • F = poor • — = no data |
||
| Pick Pony AI Rating | F | A |
| Speed | A | A |
| Early Pace | A | A |
| Mid Pace | F | B |
| Late Pace | C | A |
| Finish Pos | C | D |
| Dirt Speed | D | A |
| Turf Speed | A | A |
| Distance Speed | C | A |
| Trainer Effectiveness | D | C |
| Jockey Effectiveness | C | C |
| 3rd Party Ratings | B | A |
| Recent
Performance analysis from the horse's recent races, weighted to reflect current form. Sprint and Route FPS (Foot Per Second) measure pace efficiency over the horse's recent sprints and routes respectively. Grading scale: A = elite • B = above average • C = average • D = below average • F = poor • — = no data |
||
| Speed | A | A |
| Early Pace | A | A |
| Mid Pace | A | A |
| Late Pace | D | A |
| Sprint FPS | A | A |
| Route FPS | A | B |
| Trainer Effectiveness | D | C |
| Jockey Effectiveness | C | C |
| 3rd Party Ratings | B | A |
| Predictions
AI-generated projections for the upcoming race, derived from prior AI analysis for speed and pace trends, surface and distance suitability, and current conditions. Grading scale: A = elite • B = above average • C = average • D = below average • F = poor • — = no data |
||
| Speed | C | A |
| Early Pace | A | B |
| Mid Pace | A | A |
| Late Pace | C | C |
A paid membership is required to view all stats. Subscribe now →
Chart Guide (2.0.35)
- Bubbles
- Color = surface: green (turf), brown (dirt), blue (synthetic)
- Top number = finishing position; bottom number in parentheses = starting post position
- Height above line = beaten lengths — closer means a smaller margin
- Border = track conditions: green (FST/GD/FM), yellow (WF/SL/YLD), red (SY/MY/FRZ/SFT/HVY)
- Connecting Line
- Solid = good conditions; dashed = bad conditions
- Line Symbol
- ▲ Triangle = sprint (7f or less); ● Circle = route (more than 7f)
- Days Between Races
- Small number above each bubble (e.g. 19d) = days since the previous race — helps spot freshness, layoffs, and tight scheduling.
- Shaded Band (Bollinger)
- Highlights volatility — a wider band means more variation in recent performance
- Performance Trend
- Straight line showing the overall performance direction — angled up = improving, angled down = declining
- Dashed Reference Line
- AI Opponent = AI analysis class-level par for the race
Notables: [Example] Key race notables appear here, such as post position bias, recent workouts, class changes, and trip notes flagged by our handicappers.
Lane Bias Guide
- Bar Direction
- Bars above the line = more favorable lane • Bars below = less favorable, relative to the average at this track.
- Color
- Green = above-average advantage • Yellow = near-average • Red = below-average • Blue = this horse’s lane.
- Bias Score
- Derived from weighted average finishing positions across historical races at this track. Shown in the tooltip on hover. To use the bias score, calculate your handicap for the horse (e.g. finish position), then add (detrimental bias) or subtract (favorable bias) the bias score.
- Races
- Number of historical races used to compute each lane’s bias score.
Race Pace Bias Guide
- Bar Height & Direction
- Positive (green) = pace favors this horse • Negative (red) = pace works against this horse • Near-zero (amber) = neutral.
- Race Shape
- Projected race shape based on running styles of all horses (e.g. EE = two early horses, EP = one early presser).
- Pace Category
- FAST = contested early pace • LONE EARLY = one speed horse controlling pace • HONEST = moderate early pressure • SLOW = closers’ race.
- Flag (★)
- A star above the bar means this horse’s pace bias figure is ≥ 1.5 — a meaningful pace advantage or disadvantage.
Total Pace Guide
- Bar Segments
- Green = Early Pace (E1) • Amber = Mid Pace (E2) • Red = Late Pace (LP)
- Bar Height
- Total height = sum of E1 + E2 + LP average pace figures. Taller bars indicate a faster-paced horse overall.
- Grades & Rankings
- Hover to see each horse’s letter grade and ranking vs. other horses in this race (e.g. 2/9 = 2nd best of 9).
- Border
- Thicker border = this horse’s post position.
Performance vs. Peers Guide
- Bars (per post)
- Blue = avg career performance • Amber = avg last 3 races • Green = last race (improved vs. avg) • Red = last race (declined vs. avg)
- Trend Line
- Angled line above the bars: rising = improving form • falling = declining form.
- Horizontal Line
- Field average — the mean career performance of all horses in this race.
- Color Circles
- Standard post-position colors below each lane — same as the Total Pace chart.
- Border
- Thicker border = this horse’s post position.
Race Pace Simulation Guide
- Slider
- Drag left→right to advance from gate to finish. Drag all the way back to reset the race.
- Predicted Finish Order
- Factors in contested pace burn, each horse’s effort curve (peaked-early vs. peaked-late), and wide trip cost from outside posts. Updated live when Track Bias changes.
- Pace Scenario
- Lone Speed: single E horse likely rates and holds. Contested: two E horses burn each other — closers benefit. Hot Pace: speed meltdown, deep closers thrive. Soft: no early speed, moderate fractions throughout.
- Track Bias
- Slider below canvas. −2 = strong closer/wet bias; +2 = strong speed/rail bias. Recomputes the predicted finish order.
- Boxed Indicator
- Dashed orange ring = horse is surrounded (rival ahead, rival behind, wall outside). In a real race this horse must find a clear path to run.
- Running Styles
- E/EE = early speed (rushes to rail). P = presser (stalks the pace). S = stalker. SS = slow starter / closer.
| Stat | vs. Current Card | vs. All Horses |
|---|---|---|
| Averages
Career-average metrics across all AI race analysis. Performance and pace averages reflect estimated historical performance; trainer and jockey grades score in-the-money percentages. Grading scale: A = elite • B = above average • C = average • D = below average • F = poor • — = no data |
||
| Pick Pony AI Rating | B | A |
| Speed | D | A |
| Early Pace | C | B |
| Mid Pace | A | A |
| Late Pace | D | A |
| Finish Pos | F | D |
| Dirt Speed | B | A |
| Turf Speed | D | D |
| Distance Speed | C | A |
| Trainer Effectiveness | A | A |
| Jockey Effectiveness | A | A |
| 3rd Party Ratings | F | A |
| Recent
Performance analysis from the horse's recent races, weighted to reflect current form. Sprint and Route FPS (Foot Per Second) measure pace efficiency over the horse's recent sprints and routes respectively. Grading scale: A = elite • B = above average • C = average • D = below average • F = poor • — = no data |
||
| Speed | F | B |
| Early Pace | D | C |
| Mid Pace | C | B |
| Late Pace | F | C |
| Sprint FPS | B | C |
| Route FPS | B | C |
| Trainer Effectiveness | A | A |
| Jockey Effectiveness | A | A |
| 3rd Party Ratings | F | A |
| Predictions
AI-generated projections for the upcoming race, derived from prior AI analysis for speed and pace trends, surface and distance suitability, and current conditions. Grading scale: A = elite • B = above average • C = average • D = below average • F = poor • — = no data |
||
| Speed | D | A |
| Early Pace | C | D |
| Mid Pace | C | B |
| Late Pace | C | C |
A paid membership is required to view all stats. Subscribe now →
Chart Guide (2.0.35)
- Bubbles
- Color = surface: green (turf), brown (dirt), blue (synthetic)
- Top number = finishing position; bottom number in parentheses = starting post position
- Height above line = beaten lengths — closer means a smaller margin
- Border = track conditions: green (FST/GD/FM), yellow (WF/SL/YLD), red (SY/MY/FRZ/SFT/HVY)
- Connecting Line
- Solid = good conditions; dashed = bad conditions
- Line Symbol
- ▲ Triangle = sprint (7f or less); ● Circle = route (more than 7f)
- Days Between Races
- Small number above each bubble (e.g. 19d) = days since the previous race — helps spot freshness, layoffs, and tight scheduling.
- Shaded Band (Bollinger)
- Highlights volatility — a wider band means more variation in recent performance
- Performance Trend
- Straight line showing the overall performance direction — angled up = improving, angled down = declining
- Dashed Reference Line
- AI Opponent = AI analysis class-level par for the race
Notables: [Example] Key race notables appear here, such as post position bias, recent workouts, class changes, and trip notes flagged by our handicappers.
Lane Bias Guide
- Bar Direction
- Bars above the line = more favorable lane • Bars below = less favorable, relative to the average at this track.
- Color
- Green = above-average advantage • Yellow = near-average • Red = below-average • Blue = this horse’s lane.
- Bias Score
- Derived from weighted average finishing positions across historical races at this track. Shown in the tooltip on hover. To use the bias score, calculate your handicap for the horse (e.g. finish position), then add (detrimental bias) or subtract (favorable bias) the bias score.
- Races
- Number of historical races used to compute each lane’s bias score.
Race Pace Bias Guide
- Bar Height & Direction
- Positive (green) = pace favors this horse • Negative (red) = pace works against this horse • Near-zero (amber) = neutral.
- Race Shape
- Projected race shape based on running styles of all horses (e.g. EE = two early horses, EP = one early presser).
- Pace Category
- FAST = contested early pace • LONE EARLY = one speed horse controlling pace • HONEST = moderate early pressure • SLOW = closers’ race.
- Flag (★)
- A star above the bar means this horse’s pace bias figure is ≥ 1.5 — a meaningful pace advantage or disadvantage.
Total Pace Guide
- Bar Segments
- Green = Early Pace (E1) • Amber = Mid Pace (E2) • Red = Late Pace (LP)
- Bar Height
- Total height = sum of E1 + E2 + LP average pace figures. Taller bars indicate a faster-paced horse overall.
- Grades & Rankings
- Hover to see each horse’s letter grade and ranking vs. other horses in this race (e.g. 2/9 = 2nd best of 9).
- Border
- Thicker border = this horse’s post position.
Performance vs. Peers Guide
- Bars (per post)
- Blue = avg career performance • Amber = avg last 3 races • Green = last race (improved vs. avg) • Red = last race (declined vs. avg)
- Trend Line
- Angled line above the bars: rising = improving form • falling = declining form.
- Horizontal Line
- Field average — the mean career performance of all horses in this race.
- Color Circles
- Standard post-position colors below each lane — same as the Total Pace chart.
- Border
- Thicker border = this horse’s post position.
Race Pace Simulation Guide
- Slider
- Drag left→right to advance from gate to finish. Drag all the way back to reset the race.
- Predicted Finish Order
- Factors in contested pace burn, each horse’s effort curve (peaked-early vs. peaked-late), and wide trip cost from outside posts. Updated live when Track Bias changes.
- Pace Scenario
- Lone Speed: single E horse likely rates and holds. Contested: two E horses burn each other — closers benefit. Hot Pace: speed meltdown, deep closers thrive. Soft: no early speed, moderate fractions throughout.
- Track Bias
- Slider below canvas. −2 = strong closer/wet bias; +2 = strong speed/rail bias. Recomputes the predicted finish order.
- Boxed Indicator
- Dashed orange ring = horse is surrounded (rival ahead, rival behind, wall outside). In a real race this horse must find a clear path to run.
- Running Styles
- E/EE = early speed (rushes to rail). P = presser (stalks the pace). S = stalker. SS = slow starter / closer.
| Stat | vs. Current Card | vs. All Horses |
|---|---|---|
| Averages
Career-average metrics across all AI race analysis. Performance and pace averages reflect estimated historical performance; trainer and jockey grades score in-the-money percentages. Grading scale: A = elite • B = above average • C = average • D = below average • F = poor • — = no data |
||
| Pick Pony AI Rating | C | A |
| Speed | B | A |
| Early Pace | C | B |
| Mid Pace | B | A |
| Late Pace | B | A |
| Finish Pos | C | D |
| Dirt Speed | A | A |
| Turf Speed | B | B |
| Distance Speed | A | A |
| Trainer Effectiveness | B | A |
| Jockey Effectiveness | A | A |
| 3rd Party Ratings | A | A |
| Recent
Performance analysis from the horse's recent races, weighted to reflect current form. Sprint and Route FPS (Foot Per Second) measure pace efficiency over the horse's recent sprints and routes respectively. Grading scale: A = elite • B = above average • C = average • D = below average • F = poor • — = no data |
||
| Speed | D | A |
| Early Pace | B | B |
| Mid Pace | B | A |
| Late Pace | C | A |
| Sprint FPS | C | D |
| Route FPS | C | D |
| Trainer Effectiveness | B | A |
| Jockey Effectiveness | A | A |
| 3rd Party Ratings | A | A |
| Predictions
AI-generated projections for the upcoming race, derived from prior AI analysis for speed and pace trends, surface and distance suitability, and current conditions. Grading scale: A = elite • B = above average • C = average • D = below average • F = poor • — = no data |
||
| Speed | B | A |
| Early Pace | D | D |
| Mid Pace | C | B |
| Late Pace | C | C |
A paid membership is required to view all stats. Subscribe now →
Chart Guide (2.0.35)
- Bubbles
- Color = surface: green (turf), brown (dirt), blue (synthetic)
- Top number = finishing position; bottom number in parentheses = starting post position
- Height above line = beaten lengths — closer means a smaller margin
- Border = track conditions: green (FST/GD/FM), yellow (WF/SL/YLD), red (SY/MY/FRZ/SFT/HVY)
- Connecting Line
- Solid = good conditions; dashed = bad conditions
- Line Symbol
- ▲ Triangle = sprint (7f or less); ● Circle = route (more than 7f)
- Days Between Races
- Small number above each bubble (e.g. 19d) = days since the previous race — helps spot freshness, layoffs, and tight scheduling.
- Shaded Band (Bollinger)
- Highlights volatility — a wider band means more variation in recent performance
- Performance Trend
- Straight line showing the overall performance direction — angled up = improving, angled down = declining
- Dashed Reference Line
- AI Opponent = AI analysis class-level par for the race
Notables: [Example] Key race notables appear here, such as post position bias, recent workouts, class changes, and trip notes flagged by our handicappers.
Lane Bias Guide
- Bar Direction
- Bars above the line = more favorable lane • Bars below = less favorable, relative to the average at this track.
- Color
- Green = above-average advantage • Yellow = near-average • Red = below-average • Blue = this horse’s lane.
- Bias Score
- Derived from weighted average finishing positions across historical races at this track. Shown in the tooltip on hover. To use the bias score, calculate your handicap for the horse (e.g. finish position), then add (detrimental bias) or subtract (favorable bias) the bias score.
- Races
- Number of historical races used to compute each lane’s bias score.
Race Pace Bias Guide
- Bar Height & Direction
- Positive (green) = pace favors this horse • Negative (red) = pace works against this horse • Near-zero (amber) = neutral.
- Race Shape
- Projected race shape based on running styles of all horses (e.g. EE = two early horses, EP = one early presser).
- Pace Category
- FAST = contested early pace • LONE EARLY = one speed horse controlling pace • HONEST = moderate early pressure • SLOW = closers’ race.
- Flag (★)
- A star above the bar means this horse’s pace bias figure is ≥ 1.5 — a meaningful pace advantage or disadvantage.
Total Pace Guide
- Bar Segments
- Green = Early Pace (E1) • Amber = Mid Pace (E2) • Red = Late Pace (LP)
- Bar Height
- Total height = sum of E1 + E2 + LP average pace figures. Taller bars indicate a faster-paced horse overall.
- Grades & Rankings
- Hover to see each horse’s letter grade and ranking vs. other horses in this race (e.g. 2/9 = 2nd best of 9).
- Border
- Thicker border = this horse’s post position.
Performance vs. Peers Guide
- Bars (per post)
- Blue = avg career performance • Amber = avg last 3 races • Green = last race (improved vs. avg) • Red = last race (declined vs. avg)
- Trend Line
- Angled line above the bars: rising = improving form • falling = declining form.
- Horizontal Line
- Field average — the mean career performance of all horses in this race.
- Color Circles
- Standard post-position colors below each lane — same as the Total Pace chart.
- Border
- Thicker border = this horse’s post position.
Race Pace Simulation Guide
- Slider
- Drag left→right to advance from gate to finish. Drag all the way back to reset the race.
- Predicted Finish Order
- Factors in contested pace burn, each horse’s effort curve (peaked-early vs. peaked-late), and wide trip cost from outside posts. Updated live when Track Bias changes.
- Pace Scenario
- Lone Speed: single E horse likely rates and holds. Contested: two E horses burn each other — closers benefit. Hot Pace: speed meltdown, deep closers thrive. Soft: no early speed, moderate fractions throughout.
- Track Bias
- Slider below canvas. −2 = strong closer/wet bias; +2 = strong speed/rail bias. Recomputes the predicted finish order.
- Boxed Indicator
- Dashed orange ring = horse is surrounded (rival ahead, rival behind, wall outside). In a real race this horse must find a clear path to run.
- Running Styles
- E/EE = early speed (rushes to rail). P = presser (stalks the pace). S = stalker. SS = slow starter / closer.
| Stat | vs. Current Card | vs. All Horses |
|---|---|---|
| Averages
Career-average metrics across all AI race analysis. Performance and pace averages reflect estimated historical performance; trainer and jockey grades score in-the-money percentages. Grading scale: A = elite • B = above average • C = average • D = below average • F = poor • — = no data |
||
| Pick Pony AI Rating | A | A |
| Speed | A | A |
| Early Pace | B | B |
| Mid Pace | C | A |
| Late Pace | A | A |
| Finish Pos | A | B |
| Dirt Speed | C | A |
| Turf Speed | D | D |
| Distance Speed | A | A |
| Trainer Effectiveness | A | A |
| Jockey Effectiveness | C | C |
| 3rd Party Ratings | A | A |
| Recent
Performance analysis from the horse's recent races, weighted to reflect current form. Sprint and Route FPS (Foot Per Second) measure pace efficiency over the horse's recent sprints and routes respectively. Grading scale: A = elite • B = above average • C = average • D = below average • F = poor • — = no data |
||
| Speed | A | A |
| Early Pace | A | B |
| Mid Pace | A | A |
| Late Pace | A | A |
| Sprint FPS | C | D |
| Route FPS | C | C |
| Trainer Effectiveness | A | A |
| Jockey Effectiveness | C | C |
| 3rd Party Ratings | A | A |
| Predictions
AI-generated projections for the upcoming race, derived from prior AI analysis for speed and pace trends, surface and distance suitability, and current conditions. Grading scale: A = elite • B = above average • C = average • D = below average • F = poor • — = no data |
||
| Speed | A | A |
| Early Pace | B | C |
| Mid Pace | A | A |
| Late Pace | C | C |
A paid membership is required to view all stats. Subscribe now →
Chart Guide (2.0.35)
- Bubbles
- Color = surface: green (turf), brown (dirt), blue (synthetic)
- Top number = finishing position; bottom number in parentheses = starting post position
- Height above line = beaten lengths — closer means a smaller margin
- Border = track conditions: green (FST/GD/FM), yellow (WF/SL/YLD), red (SY/MY/FRZ/SFT/HVY)
- Connecting Line
- Solid = good conditions; dashed = bad conditions
- Line Symbol
- ▲ Triangle = sprint (7f or less); ● Circle = route (more than 7f)
- Days Between Races
- Small number above each bubble (e.g. 19d) = days since the previous race — helps spot freshness, layoffs, and tight scheduling.
- Shaded Band (Bollinger)
- Highlights volatility — a wider band means more variation in recent performance
- Performance Trend
- Straight line showing the overall performance direction — angled up = improving, angled down = declining
- Dashed Reference Line
- AI Opponent = AI analysis class-level par for the race
Notables: [Example] Key race notables appear here, such as post position bias, recent workouts, class changes, and trip notes flagged by our handicappers.
Lane Bias Guide
- Bar Direction
- Bars above the line = more favorable lane • Bars below = less favorable, relative to the average at this track.
- Color
- Green = above-average advantage • Yellow = near-average • Red = below-average • Blue = this horse’s lane.
- Bias Score
- Derived from weighted average finishing positions across historical races at this track. Shown in the tooltip on hover. To use the bias score, calculate your handicap for the horse (e.g. finish position), then add (detrimental bias) or subtract (favorable bias) the bias score.
- Races
- Number of historical races used to compute each lane’s bias score.
Race Pace Bias Guide
- Bar Height & Direction
- Positive (green) = pace favors this horse • Negative (red) = pace works against this horse • Near-zero (amber) = neutral.
- Race Shape
- Projected race shape based on running styles of all horses (e.g. EE = two early horses, EP = one early presser).
- Pace Category
- FAST = contested early pace • LONE EARLY = one speed horse controlling pace • HONEST = moderate early pressure • SLOW = closers’ race.
- Flag (★)
- A star above the bar means this horse’s pace bias figure is ≥ 1.5 — a meaningful pace advantage or disadvantage.
Total Pace Guide
- Bar Segments
- Green = Early Pace (E1) • Amber = Mid Pace (E2) • Red = Late Pace (LP)
- Bar Height
- Total height = sum of E1 + E2 + LP average pace figures. Taller bars indicate a faster-paced horse overall.
- Grades & Rankings
- Hover to see each horse’s letter grade and ranking vs. other horses in this race (e.g. 2/9 = 2nd best of 9).
- Border
- Thicker border = this horse’s post position.
Performance vs. Peers Guide
- Bars (per post)
- Blue = avg career performance • Amber = avg last 3 races • Green = last race (improved vs. avg) • Red = last race (declined vs. avg)
- Trend Line
- Angled line above the bars: rising = improving form • falling = declining form.
- Horizontal Line
- Field average — the mean career performance of all horses in this race.
- Color Circles
- Standard post-position colors below each lane — same as the Total Pace chart.
- Border
- Thicker border = this horse’s post position.
Race Pace Simulation Guide
- Slider
- Drag left→right to advance from gate to finish. Drag all the way back to reset the race.
- Predicted Finish Order
- Factors in contested pace burn, each horse’s effort curve (peaked-early vs. peaked-late), and wide trip cost from outside posts. Updated live when Track Bias changes.
- Pace Scenario
- Lone Speed: single E horse likely rates and holds. Contested: two E horses burn each other — closers benefit. Hot Pace: speed meltdown, deep closers thrive. Soft: no early speed, moderate fractions throughout.
- Track Bias
- Slider below canvas. −2 = strong closer/wet bias; +2 = strong speed/rail bias. Recomputes the predicted finish order.
- Boxed Indicator
- Dashed orange ring = horse is surrounded (rival ahead, rival behind, wall outside). In a real race this horse must find a clear path to run.
- Running Styles
- E/EE = early speed (rushes to rail). P = presser (stalks the pace). S = stalker. SS = slow starter / closer.
| Stat | vs. Current Card | vs. All Horses |
|---|---|---|
| Averages
Career-average metrics across all AI race analysis. Performance and pace averages reflect estimated historical performance; trainer and jockey grades score in-the-money percentages. Grading scale: A = elite • B = above average • C = average • D = below average • F = poor • — = no data |
||
| Pick Pony AI Rating | F | D |
| Speed | F | F |
| Early Pace | C | C |
| Mid Pace | C | C |
| Late Pace | C | D |
| Finish Pos | C | D |
| Dirt Speed | B | B |
| Turf Speed | D | D |
| Distance Speed | D | F |
| Trainer Effectiveness | D | C |
| Jockey Effectiveness | D | D |
| 3rd Party Ratings | D | C |
| Recent
Performance analysis from the horse's recent races, weighted to reflect current form. Sprint and Route FPS (Foot Per Second) measure pace efficiency over the horse's recent sprints and routes respectively. Grading scale: A = elite • B = above average • C = average • D = below average • F = poor • — = no data |
||
| Speed | F | F |
| Early Pace | A | A |
| Mid Pace | C | A |
| Late Pace | D | D |
| Sprint FPS | B | B |
| Route FPS | C | C |
| Trainer Effectiveness | D | C |
| Jockey Effectiveness | D | D |
| 3rd Party Ratings | D | C |
| Predictions
AI-generated projections for the upcoming race, derived from prior AI analysis for speed and pace trends, surface and distance suitability, and current conditions. Grading scale: A = elite • B = above average • C = average • D = below average • F = poor • — = no data |
||
| Speed | F | F |
| Early Pace | A | A |
| Mid Pace | C | B |
| Late Pace | C | C |
A paid membership is required to view all stats. Subscribe now →
Chart Guide (2.0.35)
- Bubbles
- Color = surface: green (turf), brown (dirt), blue (synthetic)
- Top number = finishing position; bottom number in parentheses = starting post position
- Height above line = beaten lengths — closer means a smaller margin
- Border = track conditions: green (FST/GD/FM), yellow (WF/SL/YLD), red (SY/MY/FRZ/SFT/HVY)
- Connecting Line
- Solid = good conditions; dashed = bad conditions
- Line Symbol
- ▲ Triangle = sprint (7f or less); ● Circle = route (more than 7f)
- Days Between Races
- Small number above each bubble (e.g. 19d) = days since the previous race — helps spot freshness, layoffs, and tight scheduling.
- Shaded Band (Bollinger)
- Highlights volatility — a wider band means more variation in recent performance
- Performance Trend
- Straight line showing the overall performance direction — angled up = improving, angled down = declining
- Dashed Reference Line
- AI Opponent = AI analysis class-level par for the race
Notables: [Example] Key race notables appear here, such as post position bias, recent workouts, class changes, and trip notes flagged by our handicappers.
Lane Bias Guide
- Bar Direction
- Bars above the line = more favorable lane • Bars below = less favorable, relative to the average at this track.
- Color
- Green = above-average advantage • Yellow = near-average • Red = below-average • Blue = this horse’s lane.
- Bias Score
- Derived from weighted average finishing positions across historical races at this track. Shown in the tooltip on hover. To use the bias score, calculate your handicap for the horse (e.g. finish position), then add (detrimental bias) or subtract (favorable bias) the bias score.
- Races
- Number of historical races used to compute each lane’s bias score.
Race Pace Bias Guide
- Bar Height & Direction
- Positive (green) = pace favors this horse • Negative (red) = pace works against this horse • Near-zero (amber) = neutral.
- Race Shape
- Projected race shape based on running styles of all horses (e.g. EE = two early horses, EP = one early presser).
- Pace Category
- FAST = contested early pace • LONE EARLY = one speed horse controlling pace • HONEST = moderate early pressure • SLOW = closers’ race.
- Flag (★)
- A star above the bar means this horse’s pace bias figure is ≥ 1.5 — a meaningful pace advantage or disadvantage.
Total Pace Guide
- Bar Segments
- Green = Early Pace (E1) • Amber = Mid Pace (E2) • Red = Late Pace (LP)
- Bar Height
- Total height = sum of E1 + E2 + LP average pace figures. Taller bars indicate a faster-paced horse overall.
- Grades & Rankings
- Hover to see each horse’s letter grade and ranking vs. other horses in this race (e.g. 2/9 = 2nd best of 9).
- Border
- Thicker border = this horse’s post position.
Performance vs. Peers Guide
- Bars (per post)
- Blue = avg career performance • Amber = avg last 3 races • Green = last race (improved vs. avg) • Red = last race (declined vs. avg)
- Trend Line
- Angled line above the bars: rising = improving form • falling = declining form.
- Horizontal Line
- Field average — the mean career performance of all horses in this race.
- Color Circles
- Standard post-position colors below each lane — same as the Total Pace chart.
- Border
- Thicker border = this horse’s post position.
Race Pace Simulation Guide
- Slider
- Drag left→right to advance from gate to finish. Drag all the way back to reset the race.
- Predicted Finish Order
- Factors in contested pace burn, each horse’s effort curve (peaked-early vs. peaked-late), and wide trip cost from outside posts. Updated live when Track Bias changes.
- Pace Scenario
- Lone Speed: single E horse likely rates and holds. Contested: two E horses burn each other — closers benefit. Hot Pace: speed meltdown, deep closers thrive. Soft: no early speed, moderate fractions throughout.
- Track Bias
- Slider below canvas. −2 = strong closer/wet bias; +2 = strong speed/rail bias. Recomputes the predicted finish order.
- Boxed Indicator
- Dashed orange ring = horse is surrounded (rival ahead, rival behind, wall outside). In a real race this horse must find a clear path to run.
- Running Styles
- E/EE = early speed (rushes to rail). P = presser (stalks the pace). S = stalker. SS = slow starter / closer.
| Stat | vs. Current Card | vs. All Horses |
|---|---|---|
| Averages
Career-average metrics across all AI race analysis. Performance and pace averages reflect estimated historical performance; trainer and jockey grades score in-the-money percentages. Grading scale: A = elite • B = above average • C = average • D = below average • F = poor • — = no data |
||
| Pick Pony AI Rating | A | A |
| Speed | C | C |
| Early Pace | C | C |
| Mid Pace | D | C |
| Late Pace | D | D |
| Finish Pos | A | B |
| Dirt Speed | B | B |
| Turf Speed | D | D |
| Distance Speed | D | F |
| Trainer Effectiveness | A | A |
| Jockey Effectiveness | A | A |
| 3rd Party Ratings | A | B |
| Recent
Performance analysis from the horse's recent races, weighted to reflect current form. Sprint and Route FPS (Foot Per Second) measure pace efficiency over the horse's recent sprints and routes respectively. Grading scale: A = elite • B = above average • C = average • D = below average • F = poor • — = no data |
||
| Speed | A | B |
| Early Pace | A | A |
| Mid Pace | A | A |
| Late Pace | A | C |
| Sprint FPS | A | A |
| Route FPS | A | B |
| Trainer Effectiveness | A | A |
| Jockey Effectiveness | A | A |
| 3rd Party Ratings | A | B |
| Predictions
AI-generated projections for the upcoming race, derived from prior AI analysis for speed and pace trends, surface and distance suitability, and current conditions. Grading scale: A = elite • B = above average • C = average • D = below average • F = poor • — = no data |
||
| Speed | C | C |
| Early Pace | A | A |
| Mid Pace | A | A |
| Late Pace | C | C |
A paid membership is required to view all stats. Subscribe now →
Chart Guide (2.0.35)
- Bubbles
- Color = surface: green (turf), brown (dirt), blue (synthetic)
- Top number = finishing position; bottom number in parentheses = starting post position
- Height above line = beaten lengths — closer means a smaller margin
- Border = track conditions: green (FST/GD/FM), yellow (WF/SL/YLD), red (SY/MY/FRZ/SFT/HVY)
- Connecting Line
- Solid = good conditions; dashed = bad conditions
- Line Symbol
- ▲ Triangle = sprint (7f or less); ● Circle = route (more than 7f)
- Days Between Races
- Small number above each bubble (e.g. 19d) = days since the previous race — helps spot freshness, layoffs, and tight scheduling.
- Shaded Band (Bollinger)
- Highlights volatility — a wider band means more variation in recent performance
- Performance Trend
- Straight line showing the overall performance direction — angled up = improving, angled down = declining
- Dashed Reference Line
- AI Opponent = AI analysis class-level par for the race
Notables: [Example] Key race notables appear here, such as post position bias, recent workouts, class changes, and trip notes flagged by our handicappers.
Lane Bias Guide
- Bar Direction
- Bars above the line = more favorable lane • Bars below = less favorable, relative to the average at this track.
- Color
- Green = above-average advantage • Yellow = near-average • Red = below-average • Blue = this horse’s lane.
- Bias Score
- Derived from weighted average finishing positions across historical races at this track. Shown in the tooltip on hover. To use the bias score, calculate your handicap for the horse (e.g. finish position), then add (detrimental bias) or subtract (favorable bias) the bias score.
- Races
- Number of historical races used to compute each lane’s bias score.
Race Pace Bias Guide
- Bar Height & Direction
- Positive (green) = pace favors this horse • Negative (red) = pace works against this horse • Near-zero (amber) = neutral.
- Race Shape
- Projected race shape based on running styles of all horses (e.g. EE = two early horses, EP = one early presser).
- Pace Category
- FAST = contested early pace • LONE EARLY = one speed horse controlling pace • HONEST = moderate early pressure • SLOW = closers’ race.
- Flag (★)
- A star above the bar means this horse’s pace bias figure is ≥ 1.5 — a meaningful pace advantage or disadvantage.
Total Pace Guide
- Bar Segments
- Green = Early Pace (E1) • Amber = Mid Pace (E2) • Red = Late Pace (LP)
- Bar Height
- Total height = sum of E1 + E2 + LP average pace figures. Taller bars indicate a faster-paced horse overall.
- Grades & Rankings
- Hover to see each horse’s letter grade and ranking vs. other horses in this race (e.g. 2/9 = 2nd best of 9).
- Border
- Thicker border = this horse’s post position.
Performance vs. Peers Guide
- Bars (per post)
- Blue = avg career performance • Amber = avg last 3 races • Green = last race (improved vs. avg) • Red = last race (declined vs. avg)
- Trend Line
- Angled line above the bars: rising = improving form • falling = declining form.
- Horizontal Line
- Field average — the mean career performance of all horses in this race.
- Color Circles
- Standard post-position colors below each lane — same as the Total Pace chart.
- Border
- Thicker border = this horse’s post position.
Race Pace Simulation Guide
- Slider
- Drag left→right to advance from gate to finish. Drag all the way back to reset the race.
- Predicted Finish Order
- Factors in contested pace burn, each horse’s effort curve (peaked-early vs. peaked-late), and wide trip cost from outside posts. Updated live when Track Bias changes.
- Pace Scenario
- Lone Speed: single E horse likely rates and holds. Contested: two E horses burn each other — closers benefit. Hot Pace: speed meltdown, deep closers thrive. Soft: no early speed, moderate fractions throughout.
- Track Bias
- Slider below canvas. −2 = strong closer/wet bias; +2 = strong speed/rail bias. Recomputes the predicted finish order.
- Boxed Indicator
- Dashed orange ring = horse is surrounded (rival ahead, rival behind, wall outside). In a real race this horse must find a clear path to run.
- Running Styles
- E/EE = early speed (rushes to rail). P = presser (stalks the pace). S = stalker. SS = slow starter / closer.
| Stat | vs. Current Card | vs. All Horses |
|---|---|---|
| Averages
Career-average metrics across all AI race analysis. Performance and pace averages reflect estimated historical performance; trainer and jockey grades score in-the-money percentages. Grading scale: A = elite • B = above average • C = average • D = below average • F = poor • — = no data |
||
| Pick Pony AI Rating | C | C |
| Speed | A | B |
| Early Pace | D | C |
| Mid Pace | C | C |
| Late Pace | C | D |
| Finish Pos | B | D |
| Dirt Speed | A | B |
| Turf Speed | D | D |
| Distance Speed | D | F |
| Trainer Effectiveness | B | A |
| Jockey Effectiveness | B | B |
| 3rd Party Ratings | A | A |
| Recent
Performance analysis from the horse's recent races, weighted to reflect current form. Sprint and Route FPS (Foot Per Second) measure pace efficiency over the horse's recent sprints and routes respectively. Grading scale: A = elite • B = above average • C = average • D = below average • F = poor • — = no data |
||
| Speed | B | B |
| Early Pace | C | B |
| Mid Pace | C | B |
| Late Pace | B | C |
| Sprint FPS | C | C |
| Route FPS | D | D |
| Trainer Effectiveness | B | A |
| Jockey Effectiveness | B | B |
| 3rd Party Ratings | A | A |
| Predictions
AI-generated projections for the upcoming race, derived from prior AI analysis for speed and pace trends, surface and distance suitability, and current conditions. Grading scale: A = elite • B = above average • C = average • D = below average • F = poor • — = no data |
||
| Speed | A | C |
| Early Pace | B | A |
| Mid Pace | B | A |
| Late Pace | C | C |
A paid membership is required to view all stats. Subscribe now →
Chart Guide (2.0.35)
- Bubbles
- Color = surface: green (turf), brown (dirt), blue (synthetic)
- Top number = finishing position; bottom number in parentheses = starting post position
- Height above line = beaten lengths — closer means a smaller margin
- Border = track conditions: green (FST/GD/FM), yellow (WF/SL/YLD), red (SY/MY/FRZ/SFT/HVY)
- Connecting Line
- Solid = good conditions; dashed = bad conditions
- Line Symbol
- ▲ Triangle = sprint (7f or less); ● Circle = route (more than 7f)
- Days Between Races
- Small number above each bubble (e.g. 19d) = days since the previous race — helps spot freshness, layoffs, and tight scheduling.
- Shaded Band (Bollinger)
- Highlights volatility — a wider band means more variation in recent performance
- Performance Trend
- Straight line showing the overall performance direction — angled up = improving, angled down = declining
- Dashed Reference Line
- AI Opponent = AI analysis class-level par for the race
Notables: [Example] Key race notables appear here, such as post position bias, recent workouts, class changes, and trip notes flagged by our handicappers.
Lane Bias Guide
- Bar Direction
- Bars above the line = more favorable lane • Bars below = less favorable, relative to the average at this track.
- Color
- Green = above-average advantage • Yellow = near-average • Red = below-average • Blue = this horse’s lane.
- Bias Score
- Derived from weighted average finishing positions across historical races at this track. Shown in the tooltip on hover. To use the bias score, calculate your handicap for the horse (e.g. finish position), then add (detrimental bias) or subtract (favorable bias) the bias score.
- Races
- Number of historical races used to compute each lane’s bias score.
Race Pace Bias Guide
- Bar Height & Direction
- Positive (green) = pace favors this horse • Negative (red) = pace works against this horse • Near-zero (amber) = neutral.
- Race Shape
- Projected race shape based on running styles of all horses (e.g. EE = two early horses, EP = one early presser).
- Pace Category
- FAST = contested early pace • LONE EARLY = one speed horse controlling pace • HONEST = moderate early pressure • SLOW = closers’ race.
- Flag (★)
- A star above the bar means this horse’s pace bias figure is ≥ 1.5 — a meaningful pace advantage or disadvantage.
Total Pace Guide
- Bar Segments
- Green = Early Pace (E1) • Amber = Mid Pace (E2) • Red = Late Pace (LP)
- Bar Height
- Total height = sum of E1 + E2 + LP average pace figures. Taller bars indicate a faster-paced horse overall.
- Grades & Rankings
- Hover to see each horse’s letter grade and ranking vs. other horses in this race (e.g. 2/9 = 2nd best of 9).
- Border
- Thicker border = this horse’s post position.
Performance vs. Peers Guide
- Bars (per post)
- Blue = avg career performance • Amber = avg last 3 races • Green = last race (improved vs. avg) • Red = last race (declined vs. avg)
- Trend Line
- Angled line above the bars: rising = improving form • falling = declining form.
- Horizontal Line
- Field average — the mean career performance of all horses in this race.
- Color Circles
- Standard post-position colors below each lane — same as the Total Pace chart.
- Border
- Thicker border = this horse’s post position.
Race Pace Simulation Guide
- Slider
- Drag left→right to advance from gate to finish. Drag all the way back to reset the race.
- Predicted Finish Order
- Factors in contested pace burn, each horse’s effort curve (peaked-early vs. peaked-late), and wide trip cost from outside posts. Updated live when Track Bias changes.
- Pace Scenario
- Lone Speed: single E horse likely rates and holds. Contested: two E horses burn each other — closers benefit. Hot Pace: speed meltdown, deep closers thrive. Soft: no early speed, moderate fractions throughout.
- Track Bias
- Slider below canvas. −2 = strong closer/wet bias; +2 = strong speed/rail bias. Recomputes the predicted finish order.
- Boxed Indicator
- Dashed orange ring = horse is surrounded (rival ahead, rival behind, wall outside). In a real race this horse must find a clear path to run.
- Running Styles
- E/EE = early speed (rushes to rail). P = presser (stalks the pace). S = stalker. SS = slow starter / closer.
| Stat | vs. Current Card | vs. All Horses |
|---|---|---|
| Averages
Career-average metrics across all AI race analysis. Performance and pace averages reflect estimated historical performance; trainer and jockey grades score in-the-money percentages. Grading scale: A = elite • B = above average • C = average • D = below average • F = poor • — = no data |
||
| Pick Pony AI Rating | C | D |
| Speed | B | C |
| Early Pace | A | B |
| Mid Pace | A | A |
| Late Pace | B | D |
| Finish Pos | A | C |
| Dirt Speed | D | C |
| Turf Speed | C | B |
| Distance Speed | A | B |
| Trainer Effectiveness | C | A |
| Jockey Effectiveness | C | C |
| 3rd Party Ratings | B | B |
| Recent
Performance analysis from the horse's recent races, weighted to reflect current form. Sprint and Route FPS (Foot Per Second) measure pace efficiency over the horse's recent sprints and routes respectively. Grading scale: A = elite • B = above average • C = average • D = below average • F = poor • — = no data |
||
| Speed | A | B |
| Early Pace | B | A |
| Mid Pace | A | A |
| Late Pace | B | D |
| Sprint FPS | C | C |
| Route FPS | A | B |
| Trainer Effectiveness | C | A |
| Jockey Effectiveness | C | C |
| 3rd Party Ratings | B | B |
| Predictions
AI-generated projections for the upcoming race, derived from prior AI analysis for speed and pace trends, surface and distance suitability, and current conditions. Grading scale: A = elite • B = above average • C = average • D = below average • F = poor • — = no data |
||
| Speed | A | C |
| Early Pace | C | C |
| Mid Pace | B | B |
| Late Pace | C | C |
A paid membership is required to view all stats. Subscribe now →
Chart Guide (2.0.35)
- Bubbles
- Color = surface: green (turf), brown (dirt), blue (synthetic)
- Top number = finishing position; bottom number in parentheses = starting post position
- Height above line = beaten lengths — closer means a smaller margin
- Border = track conditions: green (FST/GD/FM), yellow (WF/SL/YLD), red (SY/MY/FRZ/SFT/HVY)
- Connecting Line
- Solid = good conditions; dashed = bad conditions
- Line Symbol
- ▲ Triangle = sprint (7f or less); ● Circle = route (more than 7f)
- Days Between Races
- Small number above each bubble (e.g. 19d) = days since the previous race — helps spot freshness, layoffs, and tight scheduling.
- Shaded Band (Bollinger)
- Highlights volatility — a wider band means more variation in recent performance
- Performance Trend
- Straight line showing the overall performance direction — angled up = improving, angled down = declining
- Dashed Reference Line
- AI Opponent = AI analysis class-level par for the race
Notables: [Example] Key race notables appear here, such as post position bias, recent workouts, class changes, and trip notes flagged by our handicappers.
Lane Bias Guide
- Bar Direction
- Bars above the line = more favorable lane • Bars below = less favorable, relative to the average at this track.
- Color
- Green = above-average advantage • Yellow = near-average • Red = below-average • Blue = this horse’s lane.
- Bias Score
- Derived from weighted average finishing positions across historical races at this track. Shown in the tooltip on hover. To use the bias score, calculate your handicap for the horse (e.g. finish position), then add (detrimental bias) or subtract (favorable bias) the bias score.
- Races
- Number of historical races used to compute each lane’s bias score.
Race Pace Bias Guide
- Bar Height & Direction
- Positive (green) = pace favors this horse • Negative (red) = pace works against this horse • Near-zero (amber) = neutral.
- Race Shape
- Projected race shape based on running styles of all horses (e.g. EE = two early horses, EP = one early presser).
- Pace Category
- FAST = contested early pace • LONE EARLY = one speed horse controlling pace • HONEST = moderate early pressure • SLOW = closers’ race.
- Flag (★)
- A star above the bar means this horse’s pace bias figure is ≥ 1.5 — a meaningful pace advantage or disadvantage.
Total Pace Guide
- Bar Segments
- Green = Early Pace (E1) • Amber = Mid Pace (E2) • Red = Late Pace (LP)
- Bar Height
- Total height = sum of E1 + E2 + LP average pace figures. Taller bars indicate a faster-paced horse overall.
- Grades & Rankings
- Hover to see each horse’s letter grade and ranking vs. other horses in this race (e.g. 2/9 = 2nd best of 9).
- Border
- Thicker border = this horse’s post position.
Performance vs. Peers Guide
- Bars (per post)
- Blue = avg career performance • Amber = avg last 3 races • Green = last race (improved vs. avg) • Red = last race (declined vs. avg)
- Trend Line
- Angled line above the bars: rising = improving form • falling = declining form.
- Horizontal Line
- Field average — the mean career performance of all horses in this race.
- Color Circles
- Standard post-position colors below each lane — same as the Total Pace chart.
- Border
- Thicker border = this horse’s post position.
Race Pace Simulation Guide
- Slider
- Drag left→right to advance from gate to finish. Drag all the way back to reset the race.
- Predicted Finish Order
- Factors in contested pace burn, each horse’s effort curve (peaked-early vs. peaked-late), and wide trip cost from outside posts. Updated live when Track Bias changes.
- Pace Scenario
- Lone Speed: single E horse likely rates and holds. Contested: two E horses burn each other — closers benefit. Hot Pace: speed meltdown, deep closers thrive. Soft: no early speed, moderate fractions throughout.
- Track Bias
- Slider below canvas. −2 = strong closer/wet bias; +2 = strong speed/rail bias. Recomputes the predicted finish order.
- Boxed Indicator
- Dashed orange ring = horse is surrounded (rival ahead, rival behind, wall outside). In a real race this horse must find a clear path to run.
- Running Styles
- E/EE = early speed (rushes to rail). P = presser (stalks the pace). S = stalker. SS = slow starter / closer.
| Stat | vs. Current Card | vs. All Horses |
|---|---|---|
| Averages
Career-average metrics across all AI race analysis. Performance and pace averages reflect estimated historical performance; trainer and jockey grades score in-the-money percentages. Grading scale: A = elite • B = above average • C = average • D = below average • F = poor • — = no data |
||
| Pick Pony AI Rating | A | B |
| Speed | A | B |
| Early Pace | B | B |
| Mid Pace | B | A |
| Late Pace | A | C |
| Finish Pos | C | D |
| Dirt Speed | D | C |
| Turf Speed | A | A |
| Distance Speed | D | F |
| Trainer Effectiveness | A | A |
| Jockey Effectiveness | B | C |
| 3rd Party Ratings | C | C |
| Recent
Performance analysis from the horse's recent races, weighted to reflect current form. Sprint and Route FPS (Foot Per Second) measure pace efficiency over the horse's recent sprints and routes respectively. Grading scale: A = elite • B = above average • C = average • D = below average • F = poor • — = no data |
||
| Speed | B | C |
| Early Pace | D | C |
| Mid Pace | D | B |
| Late Pace | C | D |
| Sprint FPS | B | B |
| Route FPS | B | B |
| Trainer Effectiveness | A | A |
| Jockey Effectiveness | B | C |
| 3rd Party Ratings | C | C |
| Predictions
AI-generated projections for the upcoming race, derived from prior AI analysis for speed and pace trends, surface and distance suitability, and current conditions. Grading scale: A = elite • B = above average • C = average • D = below average • F = poor • — = no data |
||
| Speed | B | C |
| Early Pace | D | D |
| Mid Pace | D | B |
| Late Pace | C | C |
A paid membership is required to view all stats. Subscribe now →
Chart Guide (2.0.35)
- Bubbles
- Color = surface: green (turf), brown (dirt), blue (synthetic)
- Top number = finishing position; bottom number in parentheses = starting post position
- Height above line = beaten lengths — closer means a smaller margin
- Border = track conditions: green (FST/GD/FM), yellow (WF/SL/YLD), red (SY/MY/FRZ/SFT/HVY)
- Connecting Line
- Solid = good conditions; dashed = bad conditions
- Line Symbol
- ▲ Triangle = sprint (7f or less); ● Circle = route (more than 7f)
- Days Between Races
- Small number above each bubble (e.g. 19d) = days since the previous race — helps spot freshness, layoffs, and tight scheduling.
- Shaded Band (Bollinger)
- Highlights volatility — a wider band means more variation in recent performance
- Performance Trend
- Straight line showing the overall performance direction — angled up = improving, angled down = declining
- Dashed Reference Line
- AI Opponent = AI analysis class-level par for the race
Notables: [Example] Key race notables appear here, such as post position bias, recent workouts, class changes, and trip notes flagged by our handicappers.
Lane Bias Guide
- Bar Direction
- Bars above the line = more favorable lane • Bars below = less favorable, relative to the average at this track.
- Color
- Green = above-average advantage • Yellow = near-average • Red = below-average • Blue = this horse’s lane.
- Bias Score
- Derived from weighted average finishing positions across historical races at this track. Shown in the tooltip on hover. To use the bias score, calculate your handicap for the horse (e.g. finish position), then add (detrimental bias) or subtract (favorable bias) the bias score.
- Races
- Number of historical races used to compute each lane’s bias score.
Race Pace Bias Guide
- Bar Height & Direction
- Positive (green) = pace favors this horse • Negative (red) = pace works against this horse • Near-zero (amber) = neutral.
- Race Shape
- Projected race shape based on running styles of all horses (e.g. EE = two early horses, EP = one early presser).
- Pace Category
- FAST = contested early pace • LONE EARLY = one speed horse controlling pace • HONEST = moderate early pressure • SLOW = closers’ race.
- Flag (★)
- A star above the bar means this horse’s pace bias figure is ≥ 1.5 — a meaningful pace advantage or disadvantage.
Total Pace Guide
- Bar Segments
- Green = Early Pace (E1) • Amber = Mid Pace (E2) • Red = Late Pace (LP)
- Bar Height
- Total height = sum of E1 + E2 + LP average pace figures. Taller bars indicate a faster-paced horse overall.
- Grades & Rankings
- Hover to see each horse’s letter grade and ranking vs. other horses in this race (e.g. 2/9 = 2nd best of 9).
- Border
- Thicker border = this horse’s post position.
Performance vs. Peers Guide
- Bars (per post)
- Blue = avg career performance • Amber = avg last 3 races • Green = last race (improved vs. avg) • Red = last race (declined vs. avg)
- Trend Line
- Angled line above the bars: rising = improving form • falling = declining form.
- Horizontal Line
- Field average — the mean career performance of all horses in this race.
- Color Circles
- Standard post-position colors below each lane — same as the Total Pace chart.
- Border
- Thicker border = this horse’s post position.
Race Pace Simulation Guide
- Slider
- Drag left→right to advance from gate to finish. Drag all the way back to reset the race.
- Predicted Finish Order
- Factors in contested pace burn, each horse’s effort curve (peaked-early vs. peaked-late), and wide trip cost from outside posts. Updated live when Track Bias changes.
- Pace Scenario
- Lone Speed: single E horse likely rates and holds. Contested: two E horses burn each other — closers benefit. Hot Pace: speed meltdown, deep closers thrive. Soft: no early speed, moderate fractions throughout.
- Track Bias
- Slider below canvas. −2 = strong closer/wet bias; +2 = strong speed/rail bias. Recomputes the predicted finish order.
- Boxed Indicator
- Dashed orange ring = horse is surrounded (rival ahead, rival behind, wall outside). In a real race this horse must find a clear path to run.
- Running Styles
- E/EE = early speed (rushes to rail). P = presser (stalks the pace). S = stalker. SS = slow starter / closer.
| Stat | vs. Current Card | vs. All Horses |
|---|---|---|
| Averages
Career-average metrics across all AI race analysis. Performance and pace averages reflect estimated historical performance; trainer and jockey grades score in-the-money percentages. Grading scale: A = elite • B = above average • C = average • D = below average • F = poor • — = no data |
||
| Pick Pony AI Rating | D | D |
| Speed | B | C |
| Early Pace | F | D |
| Mid Pace | D | C |
| Late Pace | B | D |
| Finish Pos | B | D |
| Dirt Speed | A | B |
| Turf Speed | D | D |
| Distance Speed | D | F |
| Trainer Effectiveness | B | A |
| Jockey Effectiveness | F | D |
| 3rd Party Ratings | B | B |
| Recent
Performance analysis from the horse's recent races, weighted to reflect current form. Sprint and Route FPS (Foot Per Second) measure pace efficiency over the horse's recent sprints and routes respectively. Grading scale: A = elite • B = above average • C = average • D = below average • F = poor • — = no data |
||
| Speed | C | C |
| Early Pace | B | B |
| Mid Pace | B | A |
| Late Pace | C | D |
| Sprint FPS | D | C |
| Route FPS | D | D |
| Trainer Effectiveness | B | A |
| Jockey Effectiveness | F | D |
| 3rd Party Ratings | B | B |
| Predictions
AI-generated projections for the upcoming race, derived from prior AI analysis for speed and pace trends, surface and distance suitability, and current conditions. Grading scale: A = elite • B = above average • C = average • D = below average • F = poor • — = no data |
||
| Speed | B | C |
| Early Pace | B | B |
| Mid Pace | A | A |
| Late Pace | C | C |
A paid membership is required to view all stats. Subscribe now →
Chart Guide (2.0.35)
- Bubbles
- Color = surface: green (turf), brown (dirt), blue (synthetic)
- Top number = finishing position; bottom number in parentheses = starting post position
- Height above line = beaten lengths — closer means a smaller margin
- Border = track conditions: green (FST/GD/FM), yellow (WF/SL/YLD), red (SY/MY/FRZ/SFT/HVY)
- Connecting Line
- Solid = good conditions; dashed = bad conditions
- Line Symbol
- ▲ Triangle = sprint (7f or less); ● Circle = route (more than 7f)
- Days Between Races
- Small number above each bubble (e.g. 19d) = days since the previous race — helps spot freshness, layoffs, and tight scheduling.
- Shaded Band (Bollinger)
- Highlights volatility — a wider band means more variation in recent performance
- Performance Trend
- Straight line showing the overall performance direction — angled up = improving, angled down = declining
- Dashed Reference Line
- AI Opponent = AI analysis class-level par for the race
Notables: [Example] Key race notables appear here, such as post position bias, recent workouts, class changes, and trip notes flagged by our handicappers.
Lane Bias Guide
- Bar Direction
- Bars above the line = more favorable lane • Bars below = less favorable, relative to the average at this track.
- Color
- Green = above-average advantage • Yellow = near-average • Red = below-average • Blue = this horse’s lane.
- Bias Score
- Derived from weighted average finishing positions across historical races at this track. Shown in the tooltip on hover. To use the bias score, calculate your handicap for the horse (e.g. finish position), then add (detrimental bias) or subtract (favorable bias) the bias score.
- Races
- Number of historical races used to compute each lane’s bias score.
Race Pace Bias Guide
- Bar Height & Direction
- Positive (green) = pace favors this horse • Negative (red) = pace works against this horse • Near-zero (amber) = neutral.
- Race Shape
- Projected race shape based on running styles of all horses (e.g. EE = two early horses, EP = one early presser).
- Pace Category
- FAST = contested early pace • LONE EARLY = one speed horse controlling pace • HONEST = moderate early pressure • SLOW = closers’ race.
- Flag (★)
- A star above the bar means this horse’s pace bias figure is ≥ 1.5 — a meaningful pace advantage or disadvantage.
Total Pace Guide
- Bar Segments
- Green = Early Pace (E1) • Amber = Mid Pace (E2) • Red = Late Pace (LP)
- Bar Height
- Total height = sum of E1 + E2 + LP average pace figures. Taller bars indicate a faster-paced horse overall.
- Grades & Rankings
- Hover to see each horse’s letter grade and ranking vs. other horses in this race (e.g. 2/9 = 2nd best of 9).
- Border
- Thicker border = this horse’s post position.
Performance vs. Peers Guide
- Bars (per post)
- Blue = avg career performance • Amber = avg last 3 races • Green = last race (improved vs. avg) • Red = last race (declined vs. avg)
- Trend Line
- Angled line above the bars: rising = improving form • falling = declining form.
- Horizontal Line
- Field average — the mean career performance of all horses in this race.
- Color Circles
- Standard post-position colors below each lane — same as the Total Pace chart.
- Border
- Thicker border = this horse’s post position.
Race Pace Simulation Guide
- Slider
- Drag left→right to advance from gate to finish. Drag all the way back to reset the race.
- Predicted Finish Order
- Factors in contested pace burn, each horse’s effort curve (peaked-early vs. peaked-late), and wide trip cost from outside posts. Updated live when Track Bias changes.
- Pace Scenario
- Lone Speed: single E horse likely rates and holds. Contested: two E horses burn each other — closers benefit. Hot Pace: speed meltdown, deep closers thrive. Soft: no early speed, moderate fractions throughout.
- Track Bias
- Slider below canvas. −2 = strong closer/wet bias; +2 = strong speed/rail bias. Recomputes the predicted finish order.
- Boxed Indicator
- Dashed orange ring = horse is surrounded (rival ahead, rival behind, wall outside). In a real race this horse must find a clear path to run.
- Running Styles
- E/EE = early speed (rushes to rail). P = presser (stalks the pace). S = stalker. SS = slow starter / closer.
| Stat | vs. Current Card | vs. All Horses |
|---|---|---|
| Averages
Career-average metrics across all AI race analysis. Performance and pace averages reflect estimated historical performance; trainer and jockey grades score in-the-money percentages. Grading scale: A = elite • B = above average • C = average • D = below average • F = poor • — = no data |
||
| Pick Pony AI Rating | B | C |
| Speed | D | D |
| Early Pace | A | A |
| Mid Pace | A | A |
| Late Pace | F | D |
| Finish Pos | D | F |
| Dirt Speed | B | B |
| Turf Speed | A | B |
| Distance Speed | B | D |
| Trainer Effectiveness | D | B |
| Jockey Effectiveness | A | A |
| 3rd Party Ratings | D | D |
| Recent
Performance analysis from the horse's recent races, weighted to reflect current form. Sprint and Route FPS (Foot Per Second) measure pace efficiency over the horse's recent sprints and routes respectively. Grading scale: A = elite • B = above average • C = average • D = below average • F = poor • — = no data |
||
| Speed | D | F |
| Early Pace | C | B |
| Mid Pace | B | A |
| Late Pace | F | F |
| Sprint FPS | A | B |
| Route FPS | C | C |
| Trainer Effectiveness | D | B |
| Jockey Effectiveness | A | A |
| 3rd Party Ratings | D | D |
| Predictions
AI-generated projections for the upcoming race, derived from prior AI analysis for speed and pace trends, surface and distance suitability, and current conditions. Grading scale: A = elite • B = above average • C = average • D = below average • F = poor • — = no data |
||
| Speed | D | F |
| Early Pace | C | B |
| Mid Pace | C | B |
| Late Pace | C | C |
A paid membership is required to view all stats. Subscribe now →
Chart Guide (2.0.35)
- Bubbles
- Color = surface: green (turf), brown (dirt), blue (synthetic)
- Top number = finishing position; bottom number in parentheses = starting post position
- Height above line = beaten lengths — closer means a smaller margin
- Border = track conditions: green (FST/GD/FM), yellow (WF/SL/YLD), red (SY/MY/FRZ/SFT/HVY)
- Connecting Line
- Solid = good conditions; dashed = bad conditions
- Line Symbol
- ▲ Triangle = sprint (7f or less); ● Circle = route (more than 7f)
- Days Between Races
- Small number above each bubble (e.g. 19d) = days since the previous race — helps spot freshness, layoffs, and tight scheduling.
- Shaded Band (Bollinger)
- Highlights volatility — a wider band means more variation in recent performance
- Performance Trend
- Straight line showing the overall performance direction — angled up = improving, angled down = declining
- Dashed Reference Line
- AI Opponent = AI analysis class-level par for the race
Notables: [Example] Key race notables appear here, such as post position bias, recent workouts, class changes, and trip notes flagged by our handicappers.
Lane Bias Guide
- Bar Direction
- Bars above the line = more favorable lane • Bars below = less favorable, relative to the average at this track.
- Color
- Green = above-average advantage • Yellow = near-average • Red = below-average • Blue = this horse’s lane.
- Bias Score
- Derived from weighted average finishing positions across historical races at this track. Shown in the tooltip on hover. To use the bias score, calculate your handicap for the horse (e.g. finish position), then add (detrimental bias) or subtract (favorable bias) the bias score.
- Races
- Number of historical races used to compute each lane’s bias score.
Race Pace Bias Guide
- Bar Height & Direction
- Positive (green) = pace favors this horse • Negative (red) = pace works against this horse • Near-zero (amber) = neutral.
- Race Shape
- Projected race shape based on running styles of all horses (e.g. EE = two early horses, EP = one early presser).
- Pace Category
- FAST = contested early pace • LONE EARLY = one speed horse controlling pace • HONEST = moderate early pressure • SLOW = closers’ race.
- Flag (★)
- A star above the bar means this horse’s pace bias figure is ≥ 1.5 — a meaningful pace advantage or disadvantage.
Total Pace Guide
- Bar Segments
- Green = Early Pace (E1) • Amber = Mid Pace (E2) • Red = Late Pace (LP)
- Bar Height
- Total height = sum of E1 + E2 + LP average pace figures. Taller bars indicate a faster-paced horse overall.
- Grades & Rankings
- Hover to see each horse’s letter grade and ranking vs. other horses in this race (e.g. 2/9 = 2nd best of 9).
- Border
- Thicker border = this horse’s post position.
Performance vs. Peers Guide
- Bars (per post)
- Blue = avg career performance • Amber = avg last 3 races • Green = last race (improved vs. avg) • Red = last race (declined vs. avg)
- Trend Line
- Angled line above the bars: rising = improving form • falling = declining form.
- Horizontal Line
- Field average — the mean career performance of all horses in this race.
- Color Circles
- Standard post-position colors below each lane — same as the Total Pace chart.
- Border
- Thicker border = this horse’s post position.
Race Pace Simulation Guide
- Slider
- Drag left→right to advance from gate to finish. Drag all the way back to reset the race.
- Predicted Finish Order
- Factors in contested pace burn, each horse’s effort curve (peaked-early vs. peaked-late), and wide trip cost from outside posts. Updated live when Track Bias changes.
- Pace Scenario
- Lone Speed: single E horse likely rates and holds. Contested: two E horses burn each other — closers benefit. Hot Pace: speed meltdown, deep closers thrive. Soft: no early speed, moderate fractions throughout.
- Track Bias
- Slider below canvas. −2 = strong closer/wet bias; +2 = strong speed/rail bias. Recomputes the predicted finish order.
- Boxed Indicator
- Dashed orange ring = horse is surrounded (rival ahead, rival behind, wall outside). In a real race this horse must find a clear path to run.
- Running Styles
- E/EE = early speed (rushes to rail). P = presser (stalks the pace). S = stalker. SS = slow starter / closer.
| Stat | vs. Current Card | vs. All Horses |
|---|---|---|
| Averages
Career-average metrics across all AI race analysis. Performance and pace averages reflect estimated historical performance; trainer and jockey grades score in-the-money percentages. Grading scale: A = elite • B = above average • C = average • D = below average • F = poor • — = no data |
||
| Pick Pony AI Rating | D | D |
| Speed | D | D |
| Early Pace | D | D |
| Mid Pace | F | D |
| Late Pace | A | B |
| Finish Pos | D | D |
| Dirt Speed | F | C |
| Turf Speed | B | B |
| Distance Speed | D | F |
| Trainer Effectiveness | C | B |
| Jockey Effectiveness | D | D |
| 3rd Party Ratings | F | D |
| Recent
Performance analysis from the horse's recent races, weighted to reflect current form. Sprint and Route FPS (Foot Per Second) measure pace efficiency over the horse's recent sprints and routes respectively. Grading scale: A = elite • B = above average • C = average • D = below average • F = poor • — = no data |
||
| Speed | C | D |
| Early Pace | F | D |
| Mid Pace | F | C |
| Late Pace | A | B |
| Sprint FPS | F | C |
| Route FPS | B | C |
| Trainer Effectiveness | C | B |
| Jockey Effectiveness | D | D |
| 3rd Party Ratings | F | D |
| Predictions
AI-generated projections for the upcoming race, derived from prior AI analysis for speed and pace trends, surface and distance suitability, and current conditions. Grading scale: A = elite • B = above average • C = average • D = below average • F = poor • — = no data |
||
| Speed | D | D |
| Early Pace | F | D |
| Mid Pace | F | D |
| Late Pace | C | C |
A paid membership is required to view all stats. Subscribe now →
Chart Guide (2.0.35)
- Bubbles
- Color = surface: green (turf), brown (dirt), blue (synthetic)
- Top number = finishing position; bottom number in parentheses = starting post position
- Height above line = beaten lengths — closer means a smaller margin
- Border = track conditions: green (FST/GD/FM), yellow (WF/SL/YLD), red (SY/MY/FRZ/SFT/HVY)
- Connecting Line
- Solid = good conditions; dashed = bad conditions
- Line Symbol
- ▲ Triangle = sprint (7f or less); ● Circle = route (more than 7f)
- Days Between Races
- Small number above each bubble (e.g. 19d) = days since the previous race — helps spot freshness, layoffs, and tight scheduling.
- Shaded Band (Bollinger)
- Highlights volatility — a wider band means more variation in recent performance
- Performance Trend
- Straight line showing the overall performance direction — angled up = improving, angled down = declining
- Dashed Reference Line
- AI Opponent = AI analysis class-level par for the race
Notables: [Example] Key race notables appear here, such as post position bias, recent workouts, class changes, and trip notes flagged by our handicappers.
Lane Bias Guide
- Bar Direction
- Bars above the line = more favorable lane • Bars below = less favorable, relative to the average at this track.
- Color
- Green = above-average advantage • Yellow = near-average • Red = below-average • Blue = this horse’s lane.
- Bias Score
- Derived from weighted average finishing positions across historical races at this track. Shown in the tooltip on hover. To use the bias score, calculate your handicap for the horse (e.g. finish position), then add (detrimental bias) or subtract (favorable bias) the bias score.
- Races
- Number of historical races used to compute each lane’s bias score.
Race Pace Bias Guide
- Bar Height & Direction
- Positive (green) = pace favors this horse • Negative (red) = pace works against this horse • Near-zero (amber) = neutral.
- Race Shape
- Projected race shape based on running styles of all horses (e.g. EE = two early horses, EP = one early presser).
- Pace Category
- FAST = contested early pace • LONE EARLY = one speed horse controlling pace • HONEST = moderate early pressure • SLOW = closers’ race.
- Flag (★)
- A star above the bar means this horse’s pace bias figure is ≥ 1.5 — a meaningful pace advantage or disadvantage.
Total Pace Guide
- Bar Segments
- Green = Early Pace (E1) • Amber = Mid Pace (E2) • Red = Late Pace (LP)
- Bar Height
- Total height = sum of E1 + E2 + LP average pace figures. Taller bars indicate a faster-paced horse overall.
- Grades & Rankings
- Hover to see each horse’s letter grade and ranking vs. other horses in this race (e.g. 2/9 = 2nd best of 9).
- Border
- Thicker border = this horse’s post position.
Performance vs. Peers Guide
- Bars (per post)
- Blue = avg career performance • Amber = avg last 3 races • Green = last race (improved vs. avg) • Red = last race (declined vs. avg)
- Trend Line
- Angled line above the bars: rising = improving form • falling = declining form.
- Horizontal Line
- Field average — the mean career performance of all horses in this race.
- Color Circles
- Standard post-position colors below each lane — same as the Total Pace chart.
- Border
- Thicker border = this horse’s post position.
Race Pace Simulation Guide
- Slider
- Drag left→right to advance from gate to finish. Drag all the way back to reset the race.
- Predicted Finish Order
- Factors in contested pace burn, each horse’s effort curve (peaked-early vs. peaked-late), and wide trip cost from outside posts. Updated live when Track Bias changes.
- Pace Scenario
- Lone Speed: single E horse likely rates and holds. Contested: two E horses burn each other — closers benefit. Hot Pace: speed meltdown, deep closers thrive. Soft: no early speed, moderate fractions throughout.
- Track Bias
- Slider below canvas. −2 = strong closer/wet bias; +2 = strong speed/rail bias. Recomputes the predicted finish order.
- Boxed Indicator
- Dashed orange ring = horse is surrounded (rival ahead, rival behind, wall outside). In a real race this horse must find a clear path to run.
- Running Styles
- E/EE = early speed (rushes to rail). P = presser (stalks the pace). S = stalker. SS = slow starter / closer.
| Stat | vs. Current Card | vs. All Horses |
|---|---|---|
| Averages
Career-average metrics across all AI race analysis. Performance and pace averages reflect estimated historical performance; trainer and jockey grades score in-the-money percentages. Grading scale: A = elite • B = above average • C = average • D = below average • F = poor • — = no data |
||
| Pick Pony AI Rating | B | C |
| Speed | C | D |
| Early Pace | B | C |
| Mid Pace | B | B |
| Late Pace | D | D |
| Finish Pos | F | F |
| Dirt Speed | C | C |
| Turf Speed | B | B |
| Distance Speed | A | C |
| Trainer Effectiveness | F | D |
| Jockey Effectiveness | C | C |
| 3rd Party Ratings | C | C |
| Recent
Performance analysis from the horse's recent races, weighted to reflect current form. Sprint and Route FPS (Foot Per Second) measure pace efficiency over the horse's recent sprints and routes respectively. Grading scale: A = elite • B = above average • C = average • D = below average • F = poor • — = no data |
||
| Speed | D | D |
| Early Pace | D | C |
| Mid Pace | D | B |
| Late Pace | D | D |
| Sprint FPS | D | C |
| Route FPS | F | D |
| Trainer Effectiveness | F | D |
| Jockey Effectiveness | C | C |
| 3rd Party Ratings | C | C |
| Predictions
AI-generated projections for the upcoming race, derived from prior AI analysis for speed and pace trends, surface and distance suitability, and current conditions. Grading scale: A = elite • B = above average • C = average • D = below average • F = poor • — = no data |
||
| Speed | C | D |
| Early Pace | D | C |
| Mid Pace | D | C |
| Late Pace | C | C |
A paid membership is required to view all stats. Subscribe now →
TL;DR
Toggle
Get more in-depth analysis, expert picks, handicapper reports, AI picks, handicapping tools, in-article data tooltips, NO ADVERTISEMENTS, and other membership perks with a Pick Pony subscription!
The Pick Pony Mini Tip Sheet is published daily and provides consolidated analysis of all races on the card. A Pick Pony analyst prepares the report, so selections may differ from the Pick Pony Expert Picks, which are based on the consensus of all Pick Pony analysts.
Don’t forget Pick Pony’s Expert Picks, AI Picks, and Past Performance Sheets/Racing Forms!
Aqueduct hosts an 8-race Friday card featuring a mix of lower- to mid-level claiming events, New York-bred allowance optional claimers, and two key 3-year-old races on the dirt. The program includes one- and two-turn routes plus several sprints, so understanding how the main track is playing is important for interpreting race shapes and trip potential. The first race at 1 mile starts the afternoon card, and the finale is a 7-furlong claiming race that closes the day.
Weather and Track Conditions
With no specific published change to the surface, the working assumption is that the main track starts the day listed as Fast, consistent with typical late-March Aqueduct conditions when there is no significant rain or snow. In recent weeks, the Aqueduct main track has been somewhat sensitive to cold weather, with some days where speed holds a bit better, especially when the surface tightens and kickback becomes more severe. There have been days where observers noted the track playing somewhat fairer than earlier in the meet while still showing a subtle preference for horses saving ground on or near the rail.
Track Bias and Post Position Bias
Recent and longer-term patterns indicate that the Aqueduct dirt often favors inside posts, particularly posts 1 through 6, especially in small to medium-sized fields. Historically, pace-pressers and front-runners have done well, especially when the rail is good and the surface is tight. While the track can become more neutral and allow mid-pack or closing types to win, riders still generally seek inside trips, and deeper outside posts can be a mild disadvantage in full fields if the rail remains favorable. Overall, the prevailing profile suggests giving some extra credit to inside draws and horses with tactical speed, while being more cautious with deep closers from wide posts.
Race 1 – Claiming 10,000, Fillies and Mares, 1 Mile
This is a compact six-horse field where the pace projects as moderate rather than hot, making position and inside trips important. Hauntress (1) should use the rail to maintain a forward, ground-saving position, while Foxy Cara (5) and Luna Moth (4) have enough tactical speed to be in that first flight, with Troubled Luck (6) likely just behind.
Luna Moth (4) is a key contender, a consistent mid-level claimer with the tactical speed and post to get a clean pressing trip. Floge (3) is another primary player, with back class and figures to win at this level and an advantageous inside-middle draw. Foxy Cara (5) is a strong pace-adjacent contender who is usually involved early and has enough stamina to see out the mile.
Hauntress (1) is a secondary contender who can take advantage of any rail bias if she breaks well and secures a good inside stalking trip. Troubled Luck (6) should be respected as a secondary grinder type who can pick up pieces if the leaders tire late. She's Complicated (2) is more of a longshot, coming off a recent illness-related scratch and facing several more reliable mares; she is more plausible underneath than as a win candidate.
Race 2 – Starter Optional Claiming, 1 Mile
This six-horse starter optional claimer for 3-year-olds has a more competitive early pace picture. Gulfy (1) is likely to be sent from the rail, while Bold Love (3), Southeastern (4), and Hong Kong Phooey (6) can all attend or press the early fractions. Anyway (2) and Top Player (5) have more of a stalker/mid-pack profile.
Anyway (2) is a key contender with improving form and an inside-middle draw that suits a tracking trip behind the speed. Southeastern (4), from the same strong barn, is another main contender with the versatility to either set or sit just off the pace, depending on how the race unfolds. Hong Kong Phooey (6) is a primary outside contender with good speed and class, though his post might cost him some ground.
Gulfy (1) is a secondary contender and a primary pace factor; if he controls things up front or sits a pocket trip, he can stay on for a big share. Top Player (5) is a secondary grinder with a realistic chance at minor awards in this small field. Bold Love (3) shapes more as a longshot, with questions about pace pressure and stamina at the mile, and would likely need a favorable speed bias or a soft early lead to overperform.
Race 3 – Claiming 10,000, 6½ Furlongs
This seven-horse claimer has multiple pace elements. Nobodyridesforfree (1) and Scaramanga (2) from the inside, plus Skylander (3) and Timaeus (7) outside, all possess early or tactical sprint speed that should ensure honest fractions. Sin Nombre (6) and Prince Of Truth (4) can sit in behind, with Mister J T (5) more likely toward the rear early.
Sin Nombre (6) is a key contender with tactical speed and a strong finishing kick suited to the elongated sprint trip. Timaeus (7) is another primary contender, backed by a high-percentage barn and capable of stalking in the clear from his outside draw. Skylander (3) would be a legitimate contender on ability if fully sound, though his prior vet-injury notation earlier in the month adds a monitoring note for race day.
Nobodyridesforfree (1) is a secondary contender who can benefit from any rail or pace bias if he breaks sharply and holds the inside. Prince Of Truth (4) is a consistent mid-pack type suited to picking up minor awards if the top pair do not fire. Scaramanga (2) and Mister J T (5) look like longer-priced runners with more exposed form and will need either a perfect trip or multiple rivals to underperform to get heavily involved.
Race 4 – NY-Bred Allowance Optional Claiming, 6 Furlongs
This seven-horse New York-bred allowance optional claimer should feature an honest to fast pace. Factually Correct (1) and Three B's (2) both have speed and draw the rail and immediate outside, while Beary Funny (4) and What's Up Bro (7) can also go forward. Master Freud (3) likely sits off with an apprentice weight allowance, while Elysian Meadows (5) and Merica's Back (6) typically run from mid-pack.
Three B's (2) is a key contender with a strong barn and rider, projecting a perfect pace-pressing trip tracking Factually Correct (1). Beary Funny (4) is another primary contender with strong allowance-level figures and an aggressive rider able to secure a first-flight position. Elysian Meadows (5) brings class and late strength from a top barn, though he may rely more on pace softening up the front group.
Factually Correct (1) is a secondary but dangerous contender who can take advantage of the rail if he breaks well and either makes the lead or sits the pocket. Merica's Back (6) is a secondary grinder who could move into the frame late if the leaders duel too hard early. Master Freud (3), with a prior illness scratch, and What's Up Bro (7), from a wide draw likely to lose ground, both rate more as longshots needing improvement or favorable race dynamics.
Race 5 – Maiden Claiming 20,000, 7 Furlongs
Nine 3-year-old maidens stretch out to 7 furlongs, a distance that often exposes both stamina and trip issues. The pace should be solid, with Chips And Fish (4), Reign It In (5), Big Brooklyn (6), Bellamy (7), and Cruising Cat (8) likely to be involved or tracking close. Mach Schnell (1), Trapping Hands (2), and Swedish Candy (3) may sit mid-pack, while Solomini's World (9) stalks from the outside.
Bellamy (7) is a key contender with tactical speed and upside, well drawn to track outside the main pace group and avoid inside traffic. Big Brooklyn (6) is another primary contender from the middle of the gate with enough early foot to secure a good spot without being used too hard. Solomini's World (9), from the far outside, has enough potential and positional speed to be considered a main player if he can avoid losing too much ground on the turn.
Reign It In (5) is a secondary contender with decent speed and a mid-gate draw that should allow a first-flight or stalking trip. Chips And Fish (4) is another secondary option who can sit a pocket trip if he breaks well. Mach Schnell (1), Trapping Hands (2), Swedish Candy (3), and Cruising Cat (8) shape more as longshots with more to prove, each needing notable improvement or a favorable set of circumstances to threaten for the win.
Race 6 – NY-Bred Maiden Special Weight, Fillies, 6½ Furlongs
This maiden special weight for New York-bred 3-year-old fillies has a mix of initially unexposed and lightly raced types. Pace should be genuine, with Venetta (3), Barbour County (4), Big Jackie (5), Rock Steady Babe (6), and Punchoutandgohome (7) all having profiles that can produce early or tactical speed. Kaz Farm Girl (1), Beau's Bella (2), and Majorsdreamcometru (8) are more uncertain, though the inside draw for Kaz Farm Girl (1) is notable if she breaks sharply.
Venetta (3) is a key contender with a strong trainer and rider combination and a favorable inside-middle post, suited to breaking running and tracking or setting the pace. Barbour County (4) is another main contender with tactical versatility and solid connections, capable of adapting to how hot the early fractions become. Punchoutandgohome (7) is also a primary player, with a top rider and an outside draw that can allow a stalking trip just off the leaders.
Rock Steady Babe (6) is a secondary contender whose outside-middle draw gives tactical options if the pace is stronger than expected. Big Jackie (5) has some appeal as a secondary improving type who can be involved early from the mid-gate. Kaz Farm Girl (1), with prior illness-related scratches, plus Beau's Bella (2) and Majorsdreamcometru (8), shape more as longshots or question marks pending evidence of a step forward.
Race 7 – Allowance Optional Claiming, 1⅛ Miles
This feature-level route draws seven older runners with established class. Makes Sense (2) and Wynstock (6) have shown front-running or pressing tendencies, while Resilience (1) and Society Man (5) can sit close if the early tempo is moderate. Whittington Park (3), Le Gris (4), and Dreamlike (7) are more stalker or mid-pack types.
Wynstock (6) is a key contender from a top national barn, with the tactical speed and outside-middle draw to secure a prominent position into the first turn. Resilience (1) from the rail is another main contender, with proven class and a ground-saving draw well suited to this 1⅛-mile configuration. Society Man (5) is a strong contender who fits this track and distance well and often delivers a sustained middle move.
Dreamlike (7) is a secondary contender, capable on class and finishing strength but potentially compromised by an outside draw and the possibility of a moderate pace. Makes Sense (2) is an interesting secondary player if he is allowed to control or share an easy early lead. Whittington Park (3) and Le Gris (4) look more like longshots needing both a perfect trip and some regression or misfires from the top tier to win.
Race 8 – Claiming 12,500 N2L, 7 Furlongs
The finale is a 10-horse non-winners-of-two claimer at 7 furlongs, with plenty of early and tactical speed. Instant Success (1), Mercilesanihilator (2), Superpower (3), Nantz (4), Magni (6), and Forgone (7) can all be involved early or in the first flight. Majestic Arc (5), Strand Road (8), Damage (9), and Fiscal Drag (10) tend more toward mid-pack or off-the-pace styles.
Mercilesanihilator (2) is a key contender with a strong local barn, excellent inside-middle draw, and enough tactical speed to track or press from just behind the leaders. Superpower (3) is another primary contender, dropping into a softer spot with the right stalking style for this distance. Strand Road (8) is also a main player on overall form when right, though his previous steward-related scratch makes current readiness an important race-day check.
Instant Success (1) is a secondary contender from the rail, especially if the track continues to be friendly to inside speed and he can secure a good early position. Damage (9) is a secondary off-the-pace threat from the outside, potentially benefiting from any pace collapse. Nantz (4), Majestic Arc (5), Magni (6), Forgone (7), and Fiscal Drag (10) have some positive elements but generally appear a notch below on paper, fitting more as longer-priced or underneath candidates barring substantial improvement or ideal race setups.

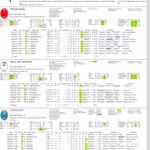
Notables: [Example] Key race notables appear here, such as post position bias, recent workouts, class changes, and trip notes flagged by our handicappers.